
Add Text Overlay Images: 5 Smart No-Code Steps
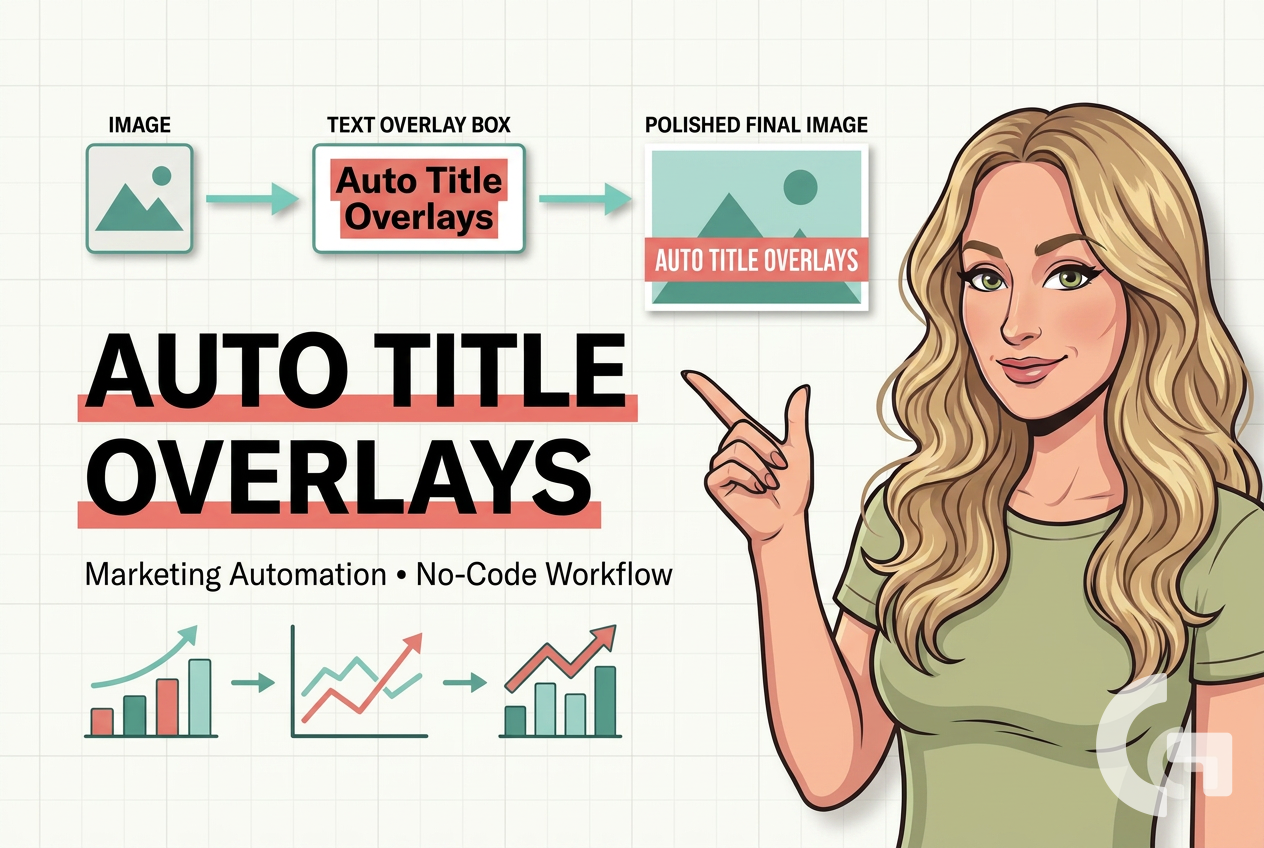
If you already automate SEO article creation, the next obvious step is making the images look polished too. A plain generated hero image is fine, but a branded image with a consistent title overlay looks much better on a blog.
In this tutorial, I’ll show you a simple no-code workflow for doing exactly that with Make and Cloudinary. The idea is very practical: upload an image, transform it by adding text on top, and prepare it for publishing to WordPress.
This setup is part of a bigger SEO content automation flow. If you are building a reporting or SEO workflow around content performance, you may also like this guide on a Looker Studio organic traffic SEO dashboard.
Table of Contents
- Step 1: Understand the goal of this automation
- Step 2: Use Cloudinary for image transformation
- Step 3: Create your Cloudinary connection in Make
- Step 4: Upload the generated image to Cloudinary
- Step 5: Design the text overlay in Cloudinary Studio
- Step 6: Copy the transformation instructions
- Step 7: Build the transformation step in Make
- Step 8: Use AI to help with the transformation code
- Step 9: Download or pass along the final image with title
- Step 10: Prepare for WordPress publishing
- What makes this workflow useful for marketers
- Practical tips before you build your own version
- Summary
Step 1: Understand the goal of this automation
The starting point here is an existing Make scenario for SEO article production. In that broader flow, the article has already been prepared: keywords were selected, a draft was written, internal links were added, meta tags were created, and an image was generated.
The missing piece was visual consistency.
Instead of uploading a hero image as-is, the goal is to automatically place the article title on top of each image in the same style every time. That means:
- The image stays relevant to the article.
- The text overlay is applied in a repeatable way.
- You avoid editing every hero image manually.
- Your WordPress blog looks more consistent.
This is a small improvement, but it makes a difference. If you publish content regularly, those small design details quickly become very repetitive when done by hand.
Step 2: Use Cloudinary for image transformation
The service used in this workflow is Cloudinary. It is especially useful here because it can transform images through URLs and transformation instructions. That is the magic part.
Instead of opening each image in a design tool, adding text manually, exporting it, and uploading it again, you can let Cloudinary handle the transformation for you.
In this case, Cloudinary is used to:
- Upload the generated image
- Add a text layer over the image
- Control text alignment, color, and placement
- Create a final image ready for publishing
Cloudinary can also do much more. You can crop images, change aspect ratio, apply effects, add logos, change backgrounds, and stack multiple overlays. For a content automation setup, that opens a lot of useful options.
For this particular workflow, the free plan was enough. That is good news if you are just testing or building your first version.
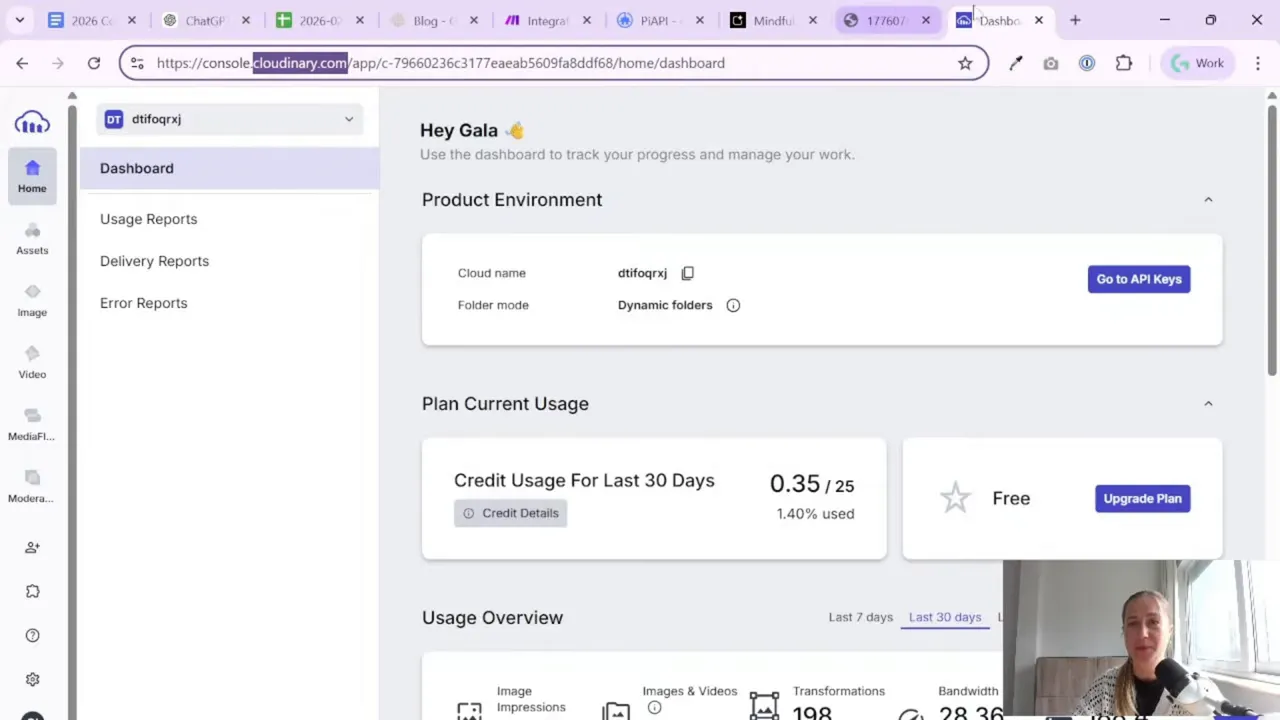
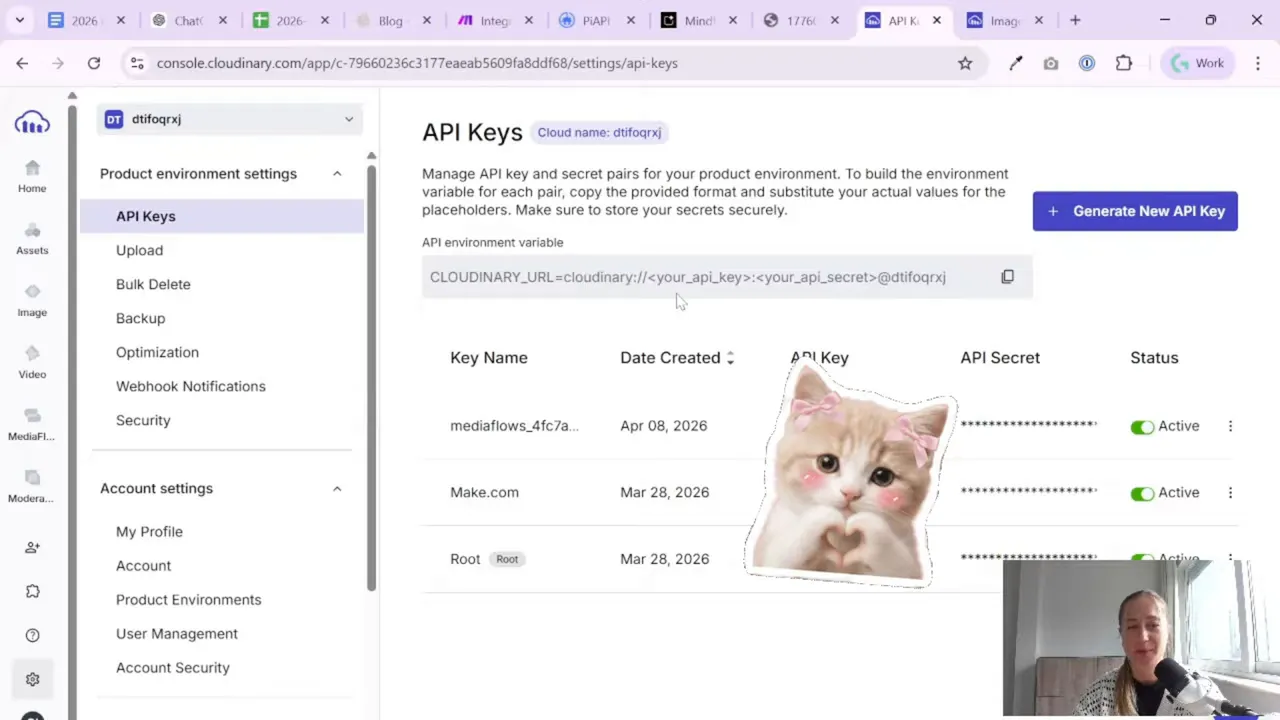
Step 3: Create your Cloudinary connection in Make
To connect Make and Cloudinary, you need three things from your Cloudinary account:
- API key
- API secret
- Cloud name
Inside Cloudinary, these are available in your account settings. A new API key can be generated and then used to connect the Cloudinary module inside Make.
Once connected, Make can send images to Cloudinary and ask Cloudinary to transform them.
This step is basic, but important. If the connection is wrong, nothing else will work. So it is worth taking one extra minute to confirm:
- Your API credentials are copied correctly
- You are using the correct cloud name
- The Make connection saves successfully
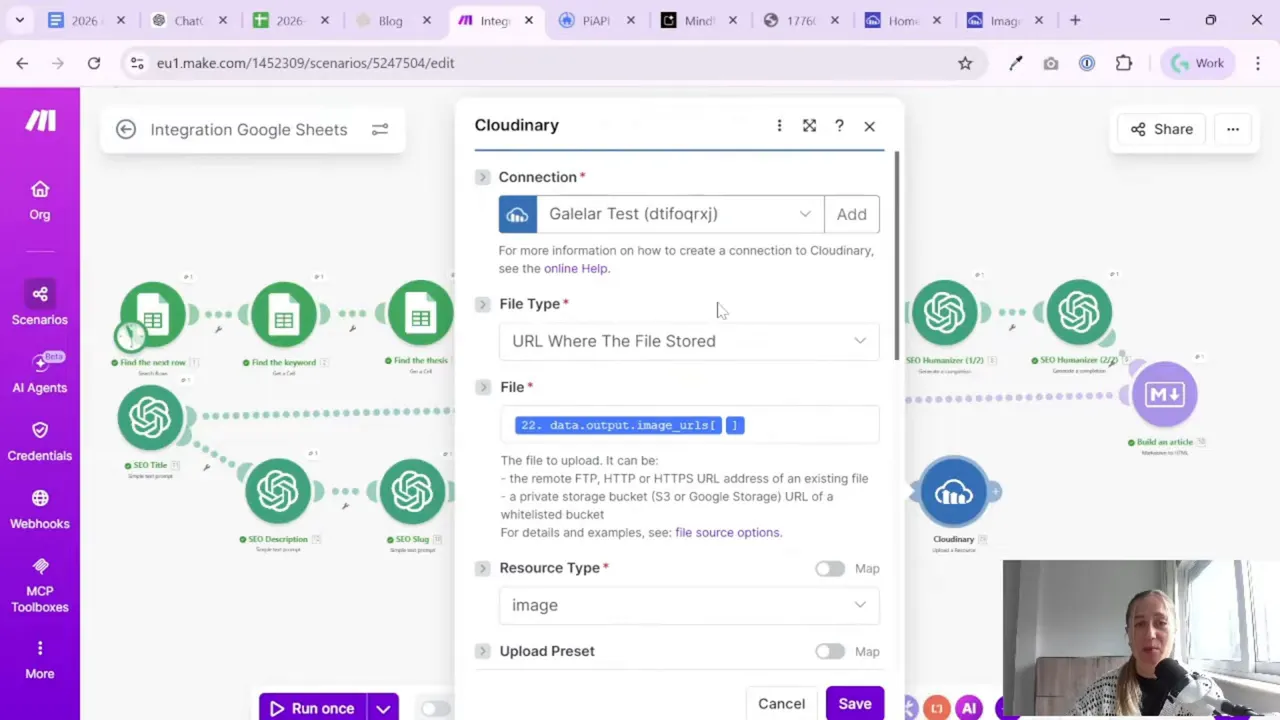
Step 4: Upload the generated image to Cloudinary
After the connection is ready, the first Make module to use is the Cloudinary upload module. The image can be uploaded either as raw data or from a URL.
In this setup, the image already exists as a URL coming from the previous step in the automation. That makes things easier.
When configuring the upload module, a few details matter:
- Source: use the image URL from your earlier automation step
- Public ID: give the image a sensible name
- Folder: save test images in a dedicated folder
- Unique file name: keep filenames unique to avoid overwriting issues
- Type: upload
One practical tip from this setup: use a test folder first. It keeps your experiments tidy and makes troubleshooting less annoying.
Once the module runs, the image appears in Cloudinary. At that point, the file is available for transformation.
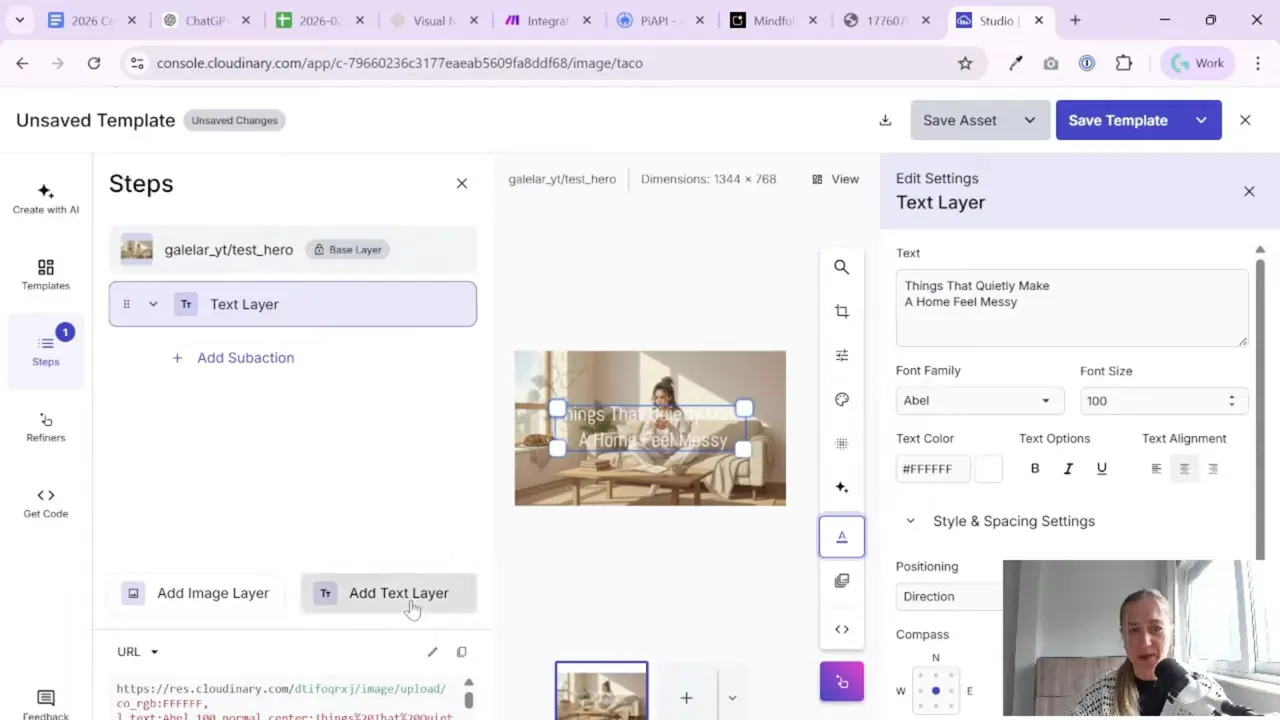
Step 5: Design the text overlay in Cloudinary Studio
This is the part that makes the whole system feel fun.
Inside Cloudinary Studio, you can open the uploaded image and experiment with transformations visually. That includes image edits, effects, and overlays.
For blog hero images, the key feature is the text layer.
You can paste in an article title and then adjust how it looks:
- Text color
- Font family
- Font size
- Alignment
- Line breaks
- Background behind the text
- Position on the image
In this example, the title is centered, white, and styled to appear over the hero image in a clean, readable way.
You can also add a background layer behind the text if the image itself is too busy. A soft gray or semi-opaque background helps the title stay readable without redesigning the whole visual.
A Tool I Use for Building This Kind of Automation
For automation, one of my favorite tools is Make.com.
I use it to connect different tools and automate repetitive workflows — for example moving data between APIs, Google Sheets, and reporting systems.
Cloudinary Studio is useful because it lets you test the look before you automate it. This saves a lot of trial and error later inside Make.

A practical note on consistency
If you publish blog posts regularly, consistency matters more than perfection. You do not need to create a different design for every single image.
Usually, one simple format is enough:
- Same title placement
- Same text color
- Same font
- Same spacing
- Same style for all hero images
That gives your blog a recognizable visual pattern and keeps the automation manageable.
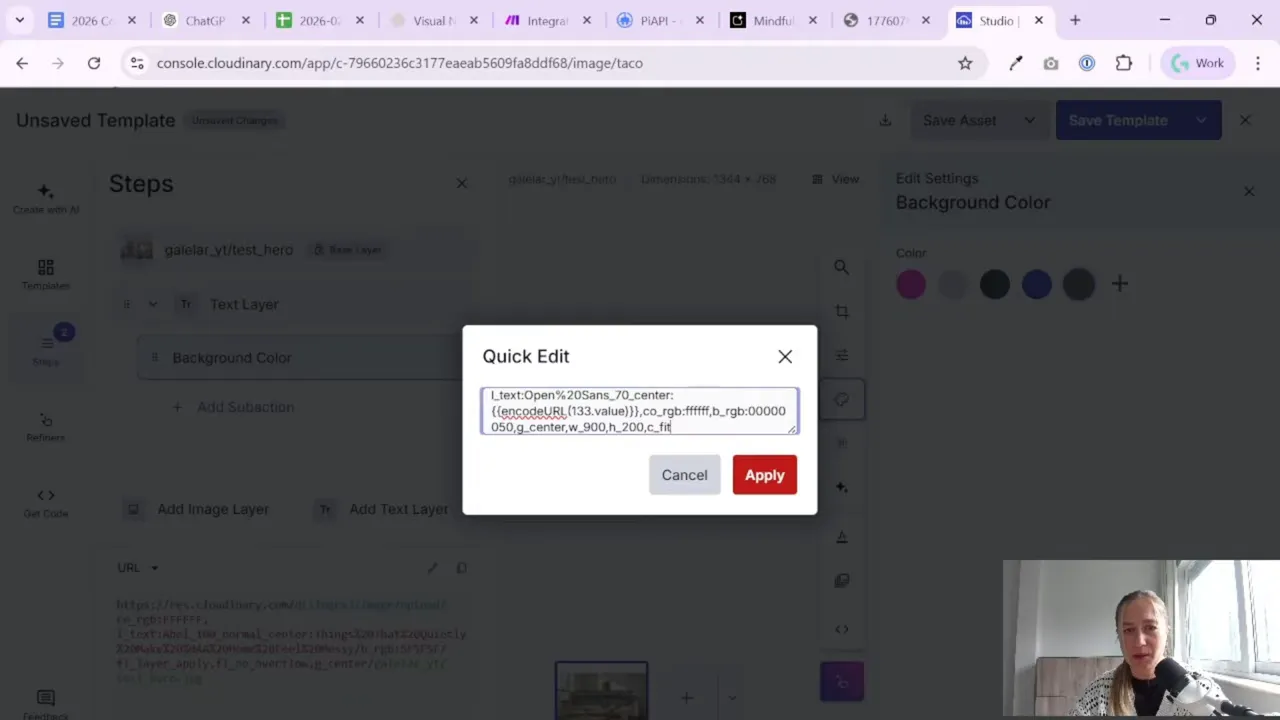
Step 6: Copy the transformation instructions
Once the overlay looks right in Cloudinary Studio, Cloudinary generates transformation instructions that describe exactly what was done to the image.
This part is important because those instructions are what Make will reuse programmatically.
Instead of manually rebuilding the formatting inside Make, you can copy the relevant transformation code from Cloudinary and use it as the basis of your automated step.
That code includes things like:
- The text layer definition
- The color of the text
- The position of the overlay
- The background settings
- The overall transformation sequence
There was also some experimentation involved here. A practical approach was:
- Test visually in Cloudinary Studio
- Copy the transformation section
- Move it into Make
- Replace the static test title with the dynamic article title
- Run tests and check the result
This is a very normal workflow with automation tools. First make it work manually, then make it dynamic.
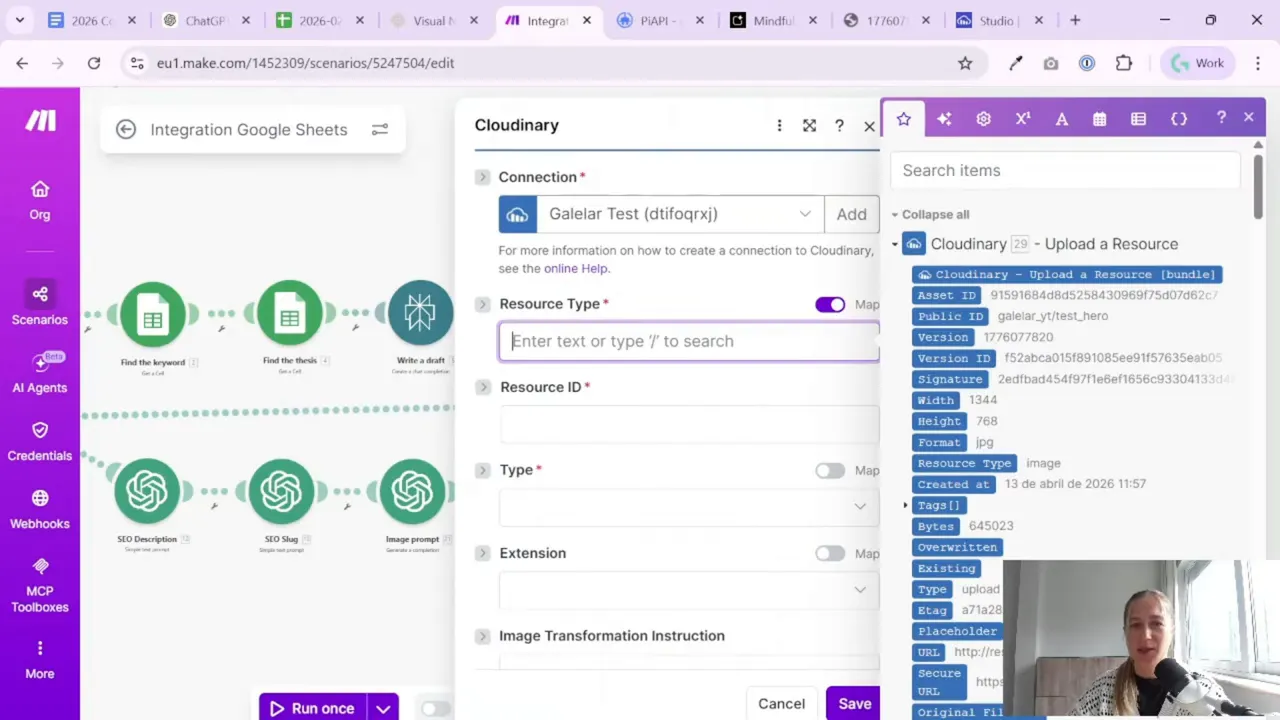
Step 7: Build the transformation step in Make
After uploading the image, the next module in Make is another Cloudinary action for transforming the uploaded resource.
The key inputs here are:
- Resource type: image
- Public ID: the uploaded image ID returned from the previous module
- Type: upload
- Image transformation instructions: the transformation code from Cloudinary Studio
Then comes the important dynamic part: instead of using a fixed test value for the title, the transformation string is updated to insert the article title from your automation scenario.
So if your article title is generated earlier in the workflow, that title can now become the text overlay on the hero image.
This is the point where the automation becomes genuinely useful. It is no longer “add this exact sample title.” It becomes “add the current article title to the current article image.”
Why testing matters here
Cloudinary transformations can be a little picky. If spacing is wrong or the formatting string is not structured correctly, the image may not render as expected.
A very sensible method used here was:
- Read Cloudinary’s documentation
- Test inside the visual editor first
- Run the transformation step separately in Make
- Review the output image
- Adjust until the result looks right
That is a good reminder for no-code work in general. Even if the setup is visual, a bit of documentation reading still saves time.
Step 8: Use AI to help with the transformation code
One helpful detail in this setup is that the transformation code was refined with ChatGPT. That makes a lot of sense.
When you already know the result you want, AI can be useful for cleaning up parameter syntax, helping format the transformation string, or adapting a Cloudinary instruction into something easier to paste into Make.
That does not replace testing, of course. You still need to run the result and see whether the image looks correct. But it can speed up the ugly part of working with long parameter strings.
If you do something similar, the best approach is simple:
- Build the visual version first
- Copy the transformation structure
- Ask AI to help format or adapt it
- Test it in Make
Small reminder: AI is great for helping with syntax. It is not a substitute for checking the final output with your own eyes.
Step 9: Download or pass along the final image with title
After the transformation works, the final image is ready. At this point, there is no need to keep downloading the original image without the title.
The workflow can be simplified so that the transformed version becomes the one used in the next step.
That means the sequence becomes:
- Generate image
- Upload image to Cloudinary
- Add title overlay through transformation
- Download the transformed image or pass its URL forward
This is cleaner than handling two versions of the file.
Once you update the download step to use the Cloudinary image with title, the image is basically ready for publishing.
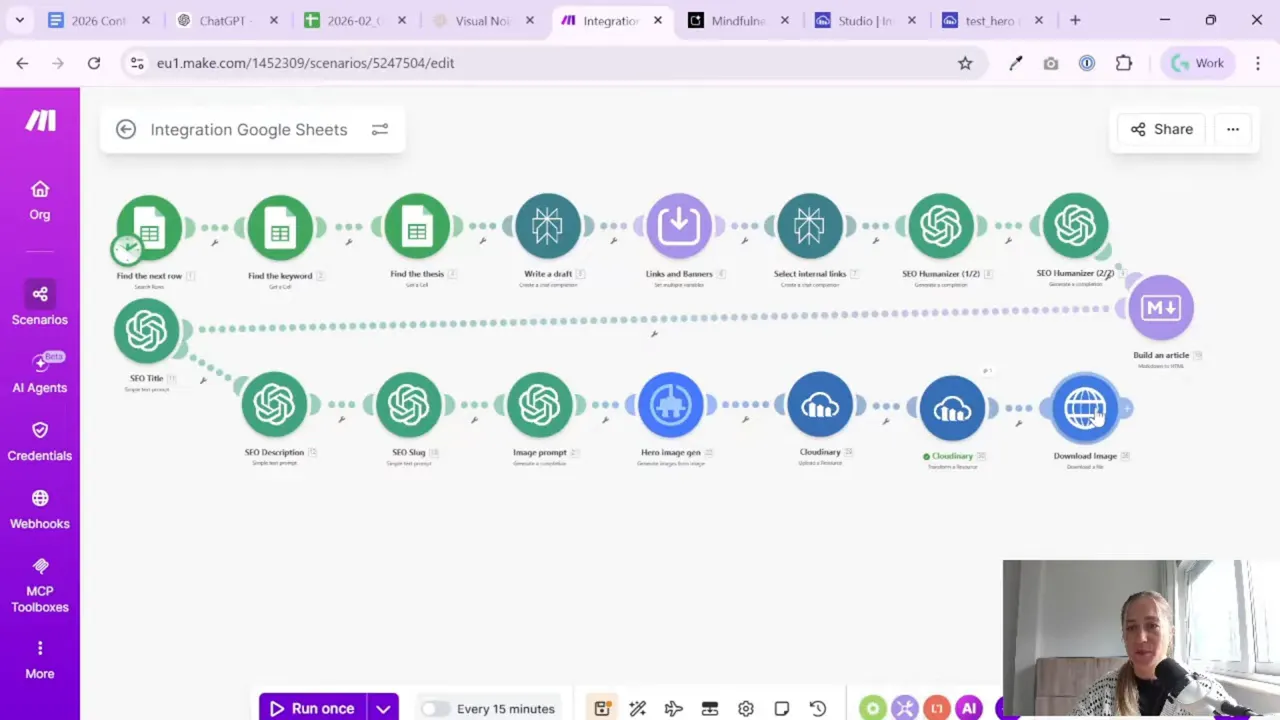
Step 10: Prepare for WordPress publishing
The next logical step in the automation is WordPress integration. Once the transformed hero image exists, it can be uploaded to the WordPress site and attached to the article.
That part belongs to the next stage of the larger scenario, but the important point here is that this image pipeline is already prepared for it.
You now have:
- An article title
- A generated hero image
- A transformed branded image with title overlay
- A file or URL ready to send into WordPress
If your content process also includes reporting and SEO checks after publishing, you might find the resources on the Gaille Reports blog useful for building the analytics side around your publishing workflow.
What makes this workflow useful for marketers
I like this setup because it solves a very real content production problem without turning into a giant technical project.
For marketers, freelancers, and small business owners, the value is clear:
- You save time on repetitive image editing
- Your blog visuals become more consistent
- You can connect image styling directly to article creation
- You reduce the number of manual publishing steps
And maybe most importantly: it is flexible.
Once Cloudinary is in the workflow, you are not limited to adding titles. You can later test:
- Brand logos
- Color effects
- Different text positions
- Automatic crops for social formats
You do not have to do all of that on day one. But it is nice to know the option is there.
Practical tips before you build your own version
If you want to recreate this process, here are the most useful practical lessons from the setup:
- Start with a test folder in Cloudinary. It keeps experiments separate from production files.
- Design the overlay visually first. Do not guess the transformation code from scratch if you can preview it in Studio.
- Use dynamic titles only after the test version works. Static first, dynamic second.
- Read the documentation when something looks strange. It is not glamorous, but it helps.
- Test the transformation module on its own. This makes debugging much easier.
- Keep the design simple. Fancy effects are tempting. Clear readable titles are usually better.
If you work a lot with structured workflows and logic in spreadsheets before bringing things into Make, this guide on Google Sheets logic functions may also be useful. It is especially handy when your automation depends on conditions and text-building steps.
Summary
Adding a title overlay to every SEO hero image is a small automation, but it improves the final content a lot. With Make and Cloudinary, you can upload an image, transform it with consistent text styling, and pass the finished version into your publishing flow.
The nice part is that this does not require heavy coding. It is mostly a matter of connecting the tools, testing the transformation once, and then replacing the sample title with dynamic article data.
If you already automate article drafting, meta tags, or internal links, this is a very natural next step. It makes your content pipeline look more complete and a lot more polished.
And honestly, once you see text being added to images automatically through a URL-based transformation, it does feel a little bit like magic.
Want to go further with your content and reporting workflow?
- Clean dashboards in Looker Studio
- Set theme and layout in Looker Studio
- Google Sheets logic functions overview
