
Upload Image to WordPress: 7 Smart Make Steps
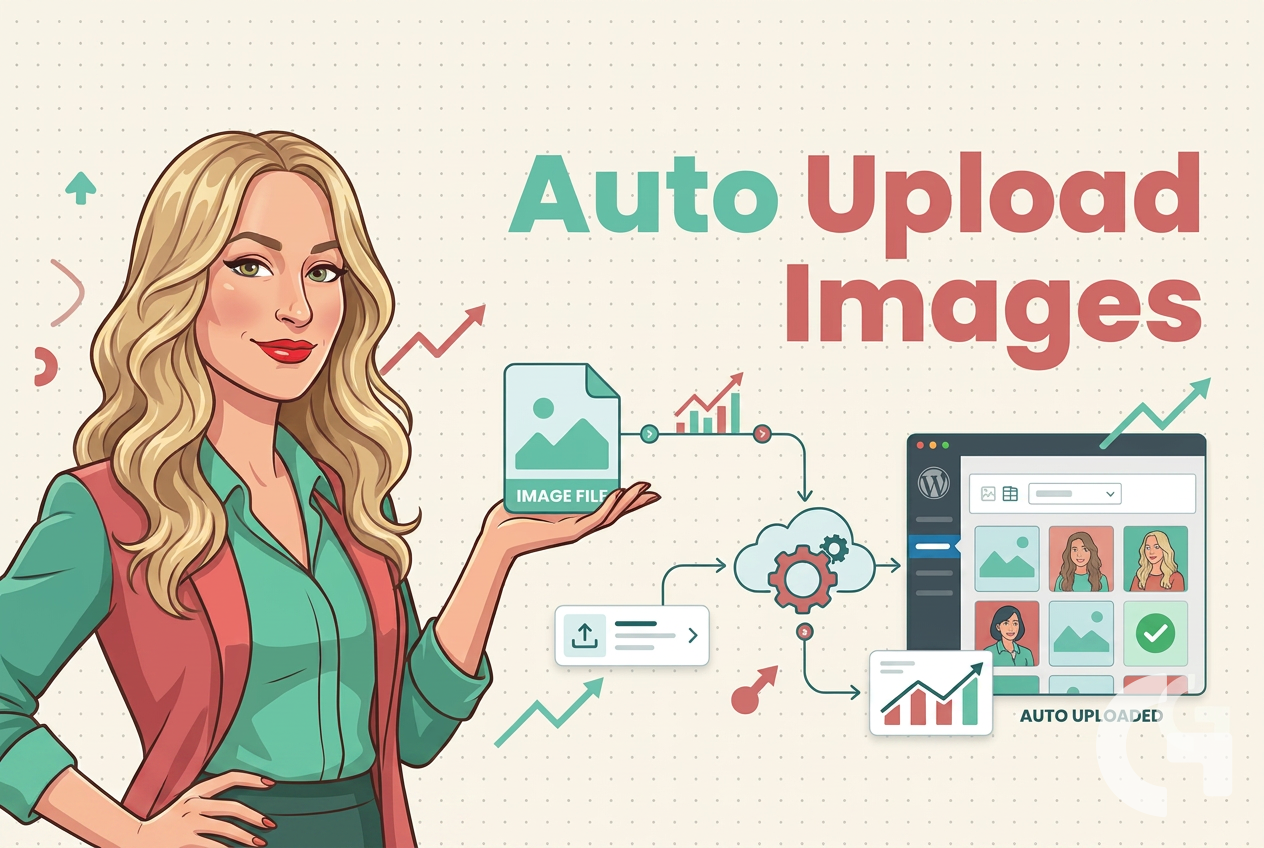
If you are building an automated content workflow, there is one small task that still loves to waste time: uploading the featured image to WordPress. Writing can be automated. Image generation can be automated. But then someone still has to open WordPress, go to Media Library, upload the file, and fill in a few details. Annoying.
In this guide, I’ll show you how to connect Make to WordPress so your hero image is uploaded automatically as part of your article pipeline. This is a practical setup for marketers, freelancers, and business owners who want less manual work and a smoother publishing process.
The example here is part of a bigger AI-assisted content automation flow: keyword selection, article drafting, internal links, SEO fields, image creation, and then WordPress upload. We will focus on the image upload step, but I’ll also show where it fits into the whole system.
Table of Contents
- Step 1: Understand where this step fits in your content automation flow
- Step 2: Add the WordPress module in Make
- Step 3: Connect Make to your WordPress site
- Step 4: Install the Make plugin in WordPress and copy the API key
- Step 5: Map the image file correctly
- Step 6: Fill in the WordPress media fields in a useful way
- Step 7: Run the scenario and test the full pipeline
- Step 8: Confirm the image appears in the WordPress Media Library
- Step 9: Keep the bigger automation in mind
- Step 10: Use a consistent image generation approach
- Step 11: Expect small errors during setup and fix them fast
- Step 12: Why this matters for marketers and small teams
- Summary
Step 1: Understand where this step fits in your content automation flow
Before connecting anything, it helps to see the role of this module in the bigger process.
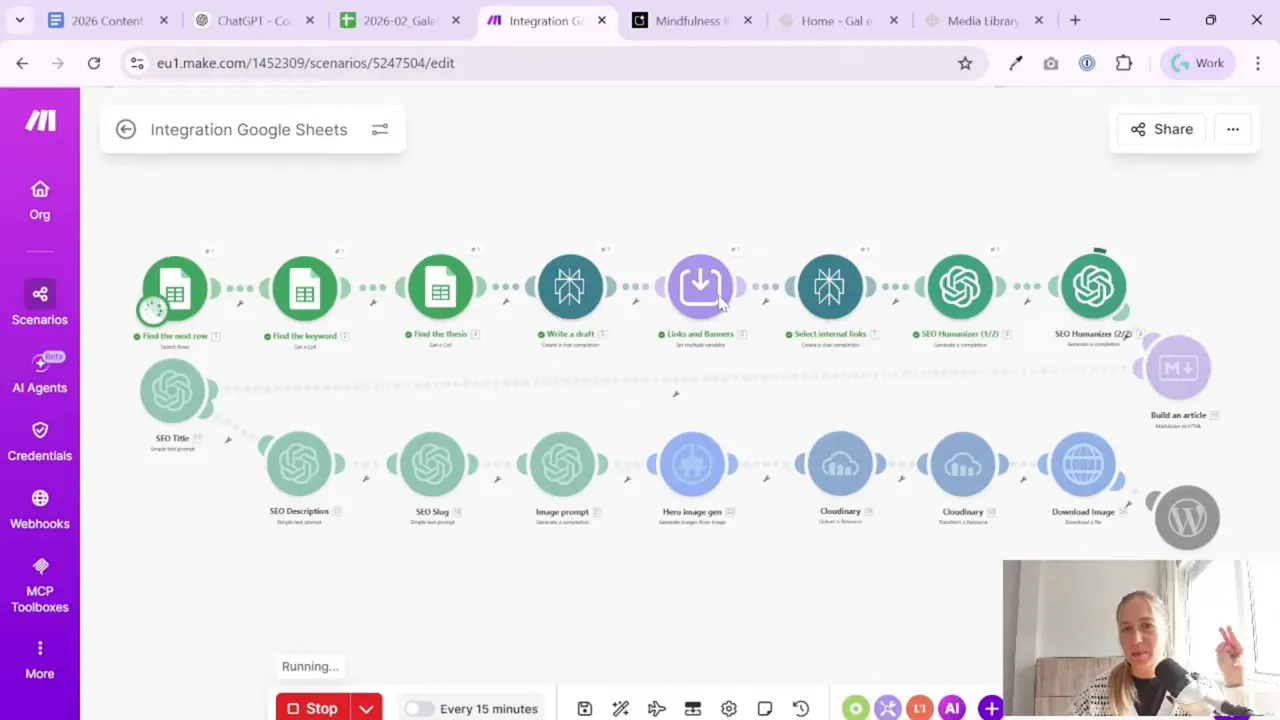
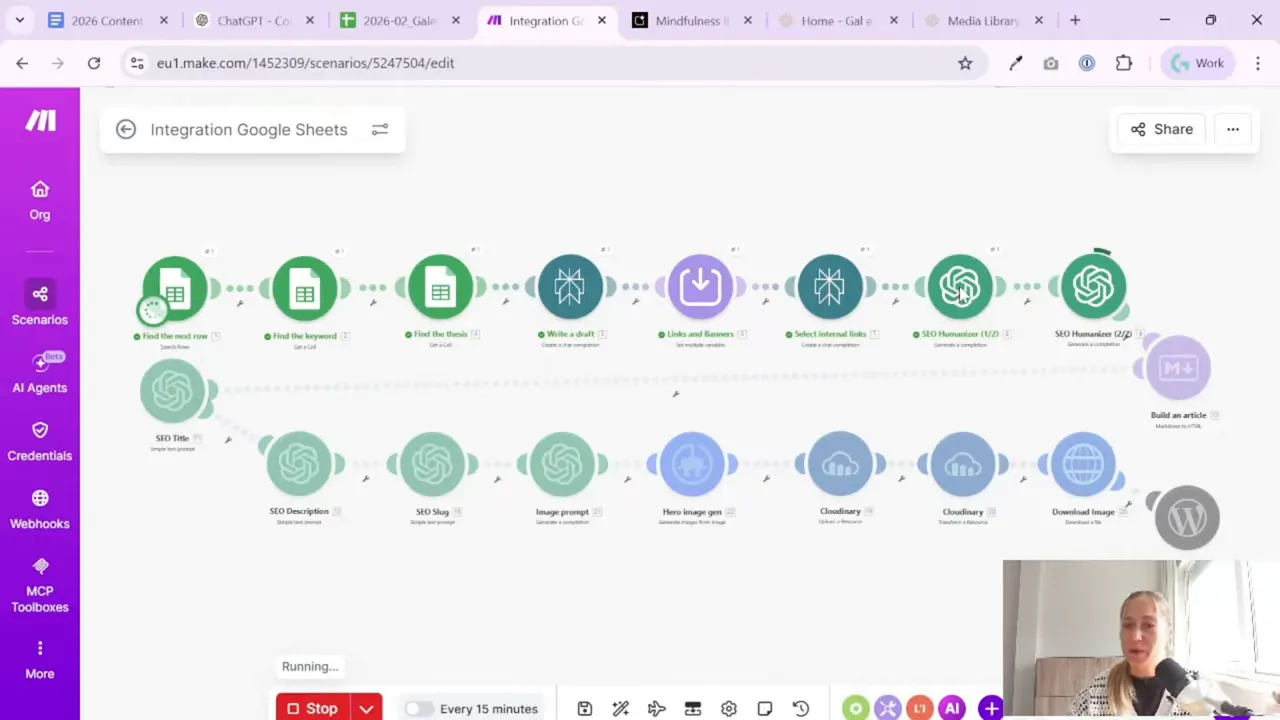
The workflow here is a content marketing automation scenario built in Make. It starts with a Google Sheets table that stores keywords and article ideas. From there, the scenario creates article drafts, adds internal links, prepares SEO elements, generates a hero image, downloads that image file, and finally sends it to WordPress.
So this WordPress media upload is not a standalone trick. It is one piece of a larger publishing machine.
The full flow looks roughly like this:
- Find the next keyword row in Google Sheets
- Use the keyword and thesis to draft the article
- Select matching internal links and banners
- Write the article in parts
- Combine the article sections into one final version
- Create the SEO title, description, and slug
- Generate the hero image
- Download the image file
- Upload the image to WordPress Media Library
This matters because the image upload module depends on data created earlier in the scenario. For example:
- The image file comes from the image download step
- The alt text can use the article title
- The file name can use the article slug
- The title field can use the SEO title
If you are interested in building reporting and SEO systems around your content later, this kind of automation pairs nicely with a proper SEO dashboard in Looker Studio.
Step 2: Add the WordPress module in Make
Once your image has already been generated and downloaded inside Make, the next step is to send it to WordPress.
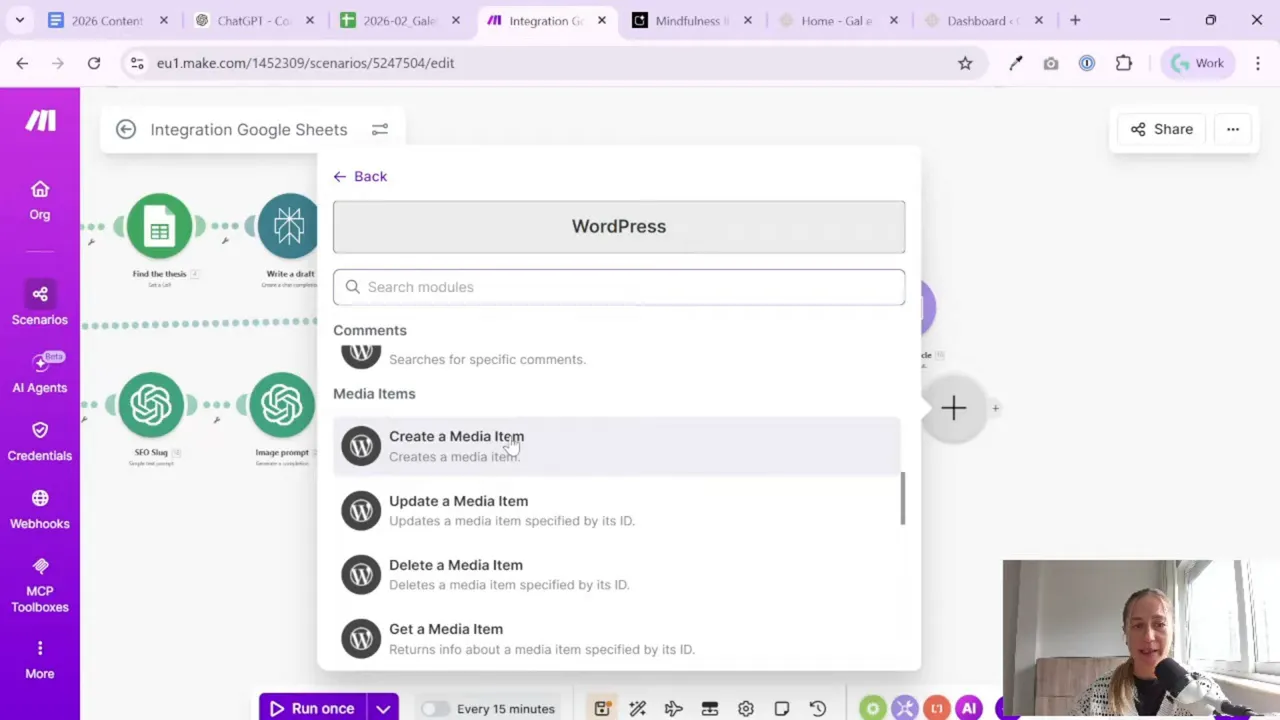
In Make, add a new WordPress module and choose the action to create a media item. This is the module that uploads a file directly into the WordPress Media Library.
That means you do not need to log in to WordPress every time just to upload the image manually. The image appears in your media library automatically when the scenario runs.
If you like naming modules clearly, give it something simple like:
- Upload hero image
Small thing, but useful. When your scenario gets longer, good names save time.
Step 3: Connect Make to your WordPress site
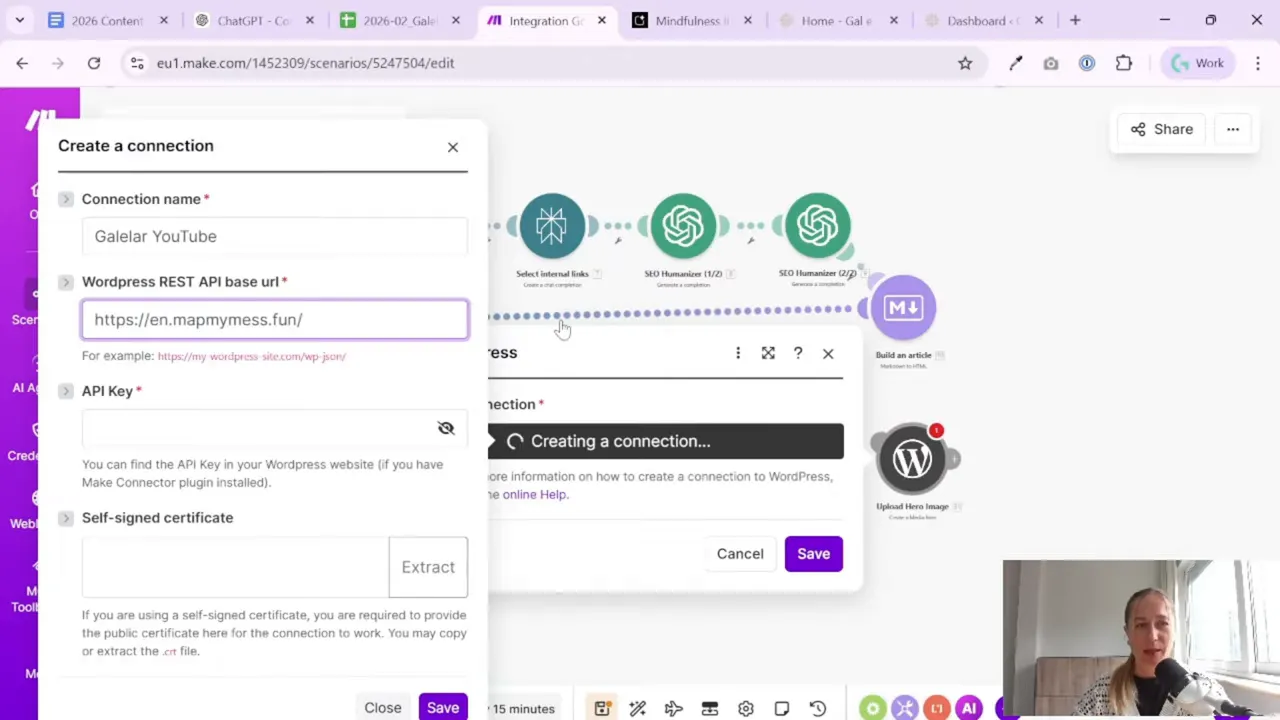
If this is your first time using the WordPress module, you need to create a connection.
Make will ask for a few things:
- Your WordPress site URL
- An API key
- Optionally, a sign certificate, though this setup does not require it
For the site URL, use your WordPress site address with the standard REST endpoint. On a normal WordPress setup, adding /wp-json works.
So if your site is:
you would use:
https://example.com/wp-json
This should work fine on a standard WordPress installation.
If your site has a very custom setup, test it. But for a regular WordPress site, this is usually enough.
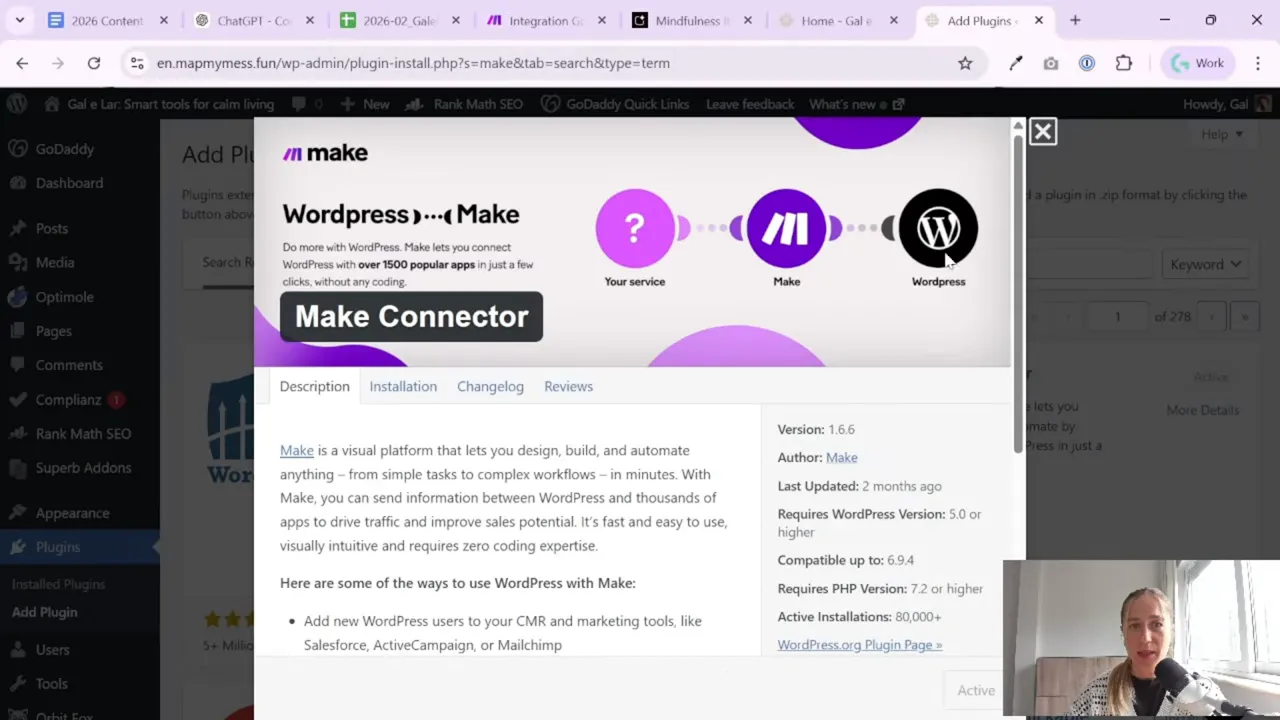
Step 4: Install the Make plugin in WordPress and copy the API key
The API key comes from a WordPress plugin.
Inside your WordPress admin area:
- Go to Plugins
- Click Add Plugin
- Search for Make
- Install and activate it
After activation, you will see the Make plugin settings in WordPress. That is where the API key is available. Reveal the key and copy it into Make when creating the connection.
This is the main connection step. Once the API key is pasted correctly and saved, Make can talk to your WordPress website.
If saving fails the first time, do not panic. Sometimes it is just a copy issue. Re-copy the key carefully and save again.
A Tool I Use for This Automation Setup
For automation, one of my favorite tools is Make.com.
I use it to connect different tools and automate repetitive workflows — for example moving data between APIs, Google Sheets, and reporting systems.
If you work with WordPress often, the official WordPress plugin directory is also useful for checking plugin details and compatibility.
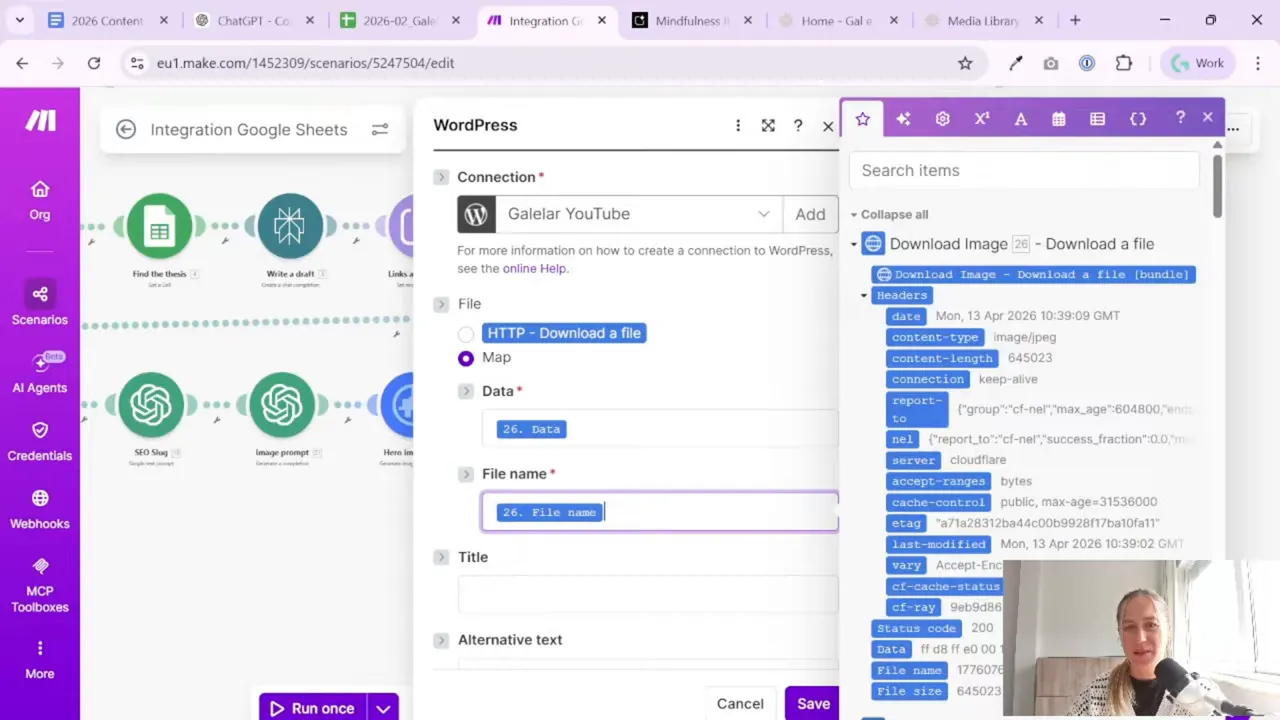
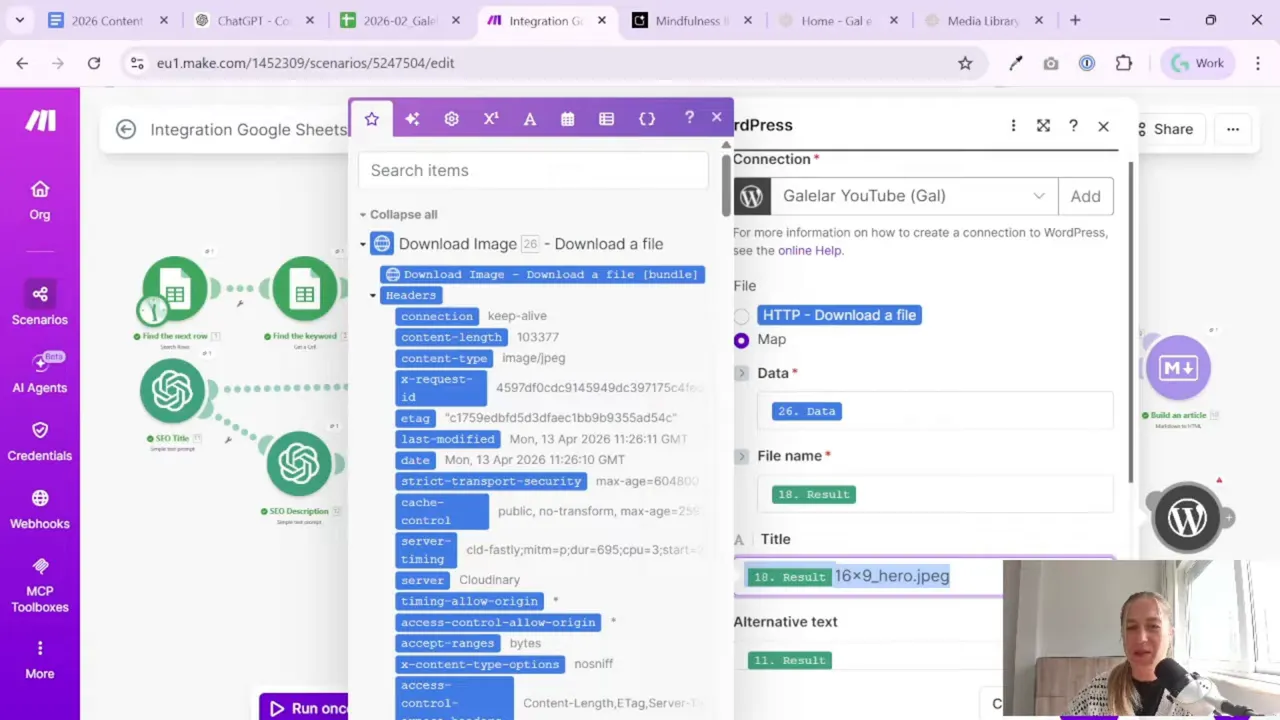
Step 5: Map the image file correctly
This is the most important part of the upload step.
The WordPress media module needs the actual file data, not just the image name and not just a URL.
In this workflow, the image was already generated earlier and then downloaded in a previous Make module. That download step returns the file data. In the WordPress media upload module, map that downloaded file into the File field.
In simple words:
- The image generator creates the hero image
- The download module fetches the file itself
- The WordPress module uploads that file to your website
If the wrong field is mapped here, the upload will fail or create a broken result. So this is one place worth checking twice.
The setup described here uses the file data from the download image step directly. That is what gets pushed into WordPress Media Library.
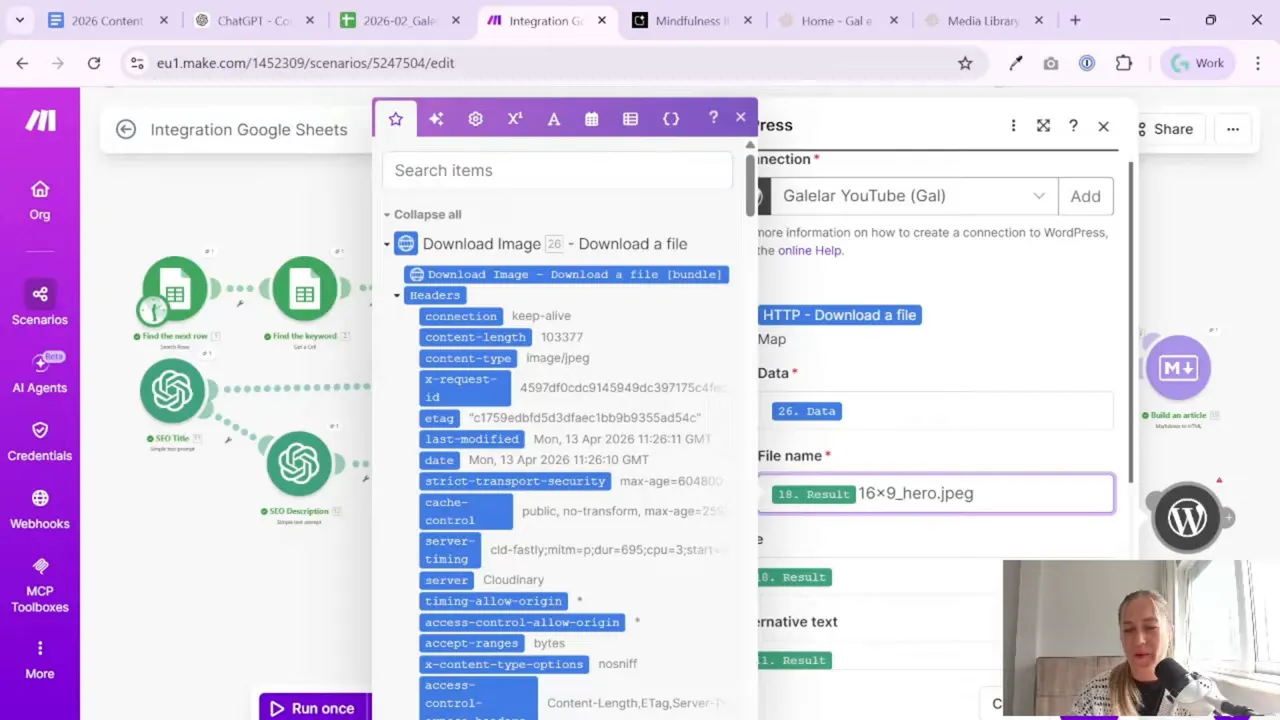
Step 6: Fill in the WordPress media fields in a useful way
Once the file is mapped, you can set the extra fields for the media item.
This part is easy to skip, but it is worth doing properly because it helps with content organization and accessibility.
Here is the practical setup used in this workflow:
- Alternative text: use the title of the article
- File name: use the slug
- Title: use the SEO title
This gives you cleaner media uploads and makes the files easier to manage later.
Why this structure makes sense:
- The alt text describes the image in a way tied to the article topic
- The file name stays clean and URL-friendly because it uses the slug
- The title becomes more readable inside WordPress because it uses the SEO title
There was one small mapping mistake during setup: the title and file name fields were initially mixed up. After correction, the better logic was:
- Title = SEO title
- File name = slug
That is a good reminder: when setting up automation, tiny mapping issues are normal. Test, fix, run again.
What about the other fields?
You may also see optional fields like:
- Description
- Caption
- Post ID
In this setup, those were not used. For a simple image upload to the media library, they are not required.
If your goal is just to get the hero image into WordPress cleanly and automatically, keeping the setup minimal is often best.
Step 7: Run the scenario and test the full pipeline
Now it is time to test.
Because this media upload depends on earlier steps, you usually need to run the whole scenario rather than just this one module in isolation. That can feel a bit annoying, especially if your account has usage limits, tokens, or operation caps. Still, it is part of the process. Better to test the full flow and know the data passes correctly from one step to the next.
When the scenario runs, it should move through the full chain:
- Select the row from Google Sheets
- Prepare article inputs
- Generate the article sections
- Combine the content
- Create SEO fields and slug
- Generate the image prompt
- Create the hero image
- Download the image
- Upload it to WordPress
That full test confirms not just the WordPress connection, but the whole content assembly line.
Step 8: Confirm the image appears in the WordPress Media Library
After the scenario finishes, go to your WordPress site and open the Media Library.
You should see the newly uploaded image there.
That is the moment when the automation really feels real. No manual upload. No opening image folders on your laptop. No dragging files into WordPress. It just shows up.
For anyone publishing content regularly, even one removed manual step matters. And once you stack several of those together, the time savings become very noticeable.

Step 9: Keep the bigger automation in mind
The image upload is useful on its own. But it becomes much more valuable when it is part of a repeatable workflow.
In this setup, the article generation process is not just “AI writes text.” It is more structured than that.
The pipeline includes:
- A source table with keywords and theses
- Draft generation in parts
- Internal link selection
- Article assembly
- SEO title, description, and slug generation
- Hero image generation
- WordPress media upload
One interesting detail is that the article is written in parts rather than in one big block. In this case, that worked better. First part, second part, then combine everything. After that, internal links are added at the end.
That is a practical reminder for marketers using AI tools: the best setup is not always the most “clever” one. Sometimes a simple split into smaller content pieces gives better results than asking for everything in one prompt.
If you want more ideas around dashboards, reporting, and practical data workflows for marketers, the Gaille Reports blog has more tutorials in the same hands-on style.
Step 10: Use a consistent image generation approach
Although the main topic here is the WordPress connection, the image generation step before it also matters.
The workflow uses AI image generation to create the hero image, and there was mention of doing many tests to get the desired result. In particular, the goal was to keep the same character style across different poses and images.
That is a common issue in AI-generated visuals. If you plan to publish many articles and want a consistent brand look, image prompting needs some testing.
The practical lesson here is simple:
- Do not assume your first image prompt will be good enough
- Test your prompt logic before automating at scale
- Once it works, keep the structure consistent
Otherwise, you automate chaos. And yes, chaos can also be automated very efficiently.
Step 11: Expect small errors during setup and fix them fast
One thing I like about this kind of workflow is that it shows the real setup process, not some perfect “one click and done” fantasy.
There were small issues along the way:
- A field was mapped incorrectly
- The API key needed to be copied again
- The scenario had to be run one more time after the fix
This is normal.
When you automate marketing tasks, most problems are not dramatic. Usually they are simple mapping mistakes, missing fields, or connection details that need to be checked once more.
That is why I recommend this mindset:
- Build one step at a time
- Test each important module
- Fix the small issues immediately
- Only then scale the workflow
It is much easier to debug one media upload than a giant scenario with ten broken steps.
Step 12: Why this matters for marketers and small teams
This setup is not just about saving a minute here and there. It changes how content work feels.
When the hero image uploads automatically:
- You reduce repetitive admin work
- You make publishing more consistent
- You remove one more manual bottleneck
- You free time for editing, strategy, and analysis
And importantly, this kind of automation is accessible. You do not need to write code. You do need to be careful with field mapping and testing, but that is very manageable for non-technical marketers.
If you need help connecting marketing tools, analytics systems, or content workflows, there is also a simple way to get in touch here.
Summary
Automatically uploading a hero image to WordPress with Make is a small step that makes a big difference in a content automation workflow.
The process is straightforward:
- Add the WordPress media module in Make
- Connect your site using the WordPress URL and API key
- Install the Make plugin in WordPress
- Map the downloaded image file
- Set useful fields like alt text, file name, and title
- Run the scenario and confirm the image appears in Media Library
That is it. Once it works, your publishing flow becomes cleaner and much more satisfying.
And honestly, there is something very nice about seeing a new image appear in WordPress without touching the admin panel at all.
If you are building an AI-assisted article pipeline, this is one of those steps worth automating early. It is practical, visible, and saves real time.
Want to go further with your marketing automation setup?
