
How to Connect Google Sheets to Make.com in 3 Simple Steps (Part 3/13)

If you already have a list of SEO keywords in Google Sheets, the next smart step is to connect that sheet to your automation tool. This is where the process starts to feel real. Instead of manually checking which keyword to write next, you can let Make.com pick the next available row for you.
In this guide, I’ll walk through a simple setup: connect Google Sheets to Make.com, find the next keyword row, and pull the keyword plus its article thesis into your scenario. It is a small workflow, but it is the foundation for a much bigger content marketing system.
If your goal is to automate blog drafts, content pipelines, or WordPress publishing later, this is the clean place to begin.
Table of Contents
- Step 1: Understand what this automation is supposed to do
- Step 2: Prepare your Google Sheet before you connect anything
- Step 3: Create a new Make.com account and start from scratch
- Step 4: Add the first module to search for the next valid row
- Step 5: Rename the module so your scenario stays readable
- Step 6: Test the first module before building anything else
- Step 7: Add a second module to get the keyword from the selected row
- Step 8: Clone the module to get the thesis from the same row
- Step 9: Run the whole mini-scenario and validate the output
- Step 10: Think of this as the foundation, not the final automation
- Step 11: Keep your scenario simple and modular
- Step 12: A few practical tips before you expand the workflow
- Conclusion
Step 1: Understand what this automation is supposed to do
The idea is simple.
You have a Google Sheet with planned SEO articles. Each row contains information for one future article, such as:
- A keyword
- A thesis or short idea for the article
- Some status columns you may fill in later
Make.com will connect to that sheet and do three things:
- Find the next row that should be processed
- Read the keyword from that row
- Read the thesis from that same row
That’s it. No magic yet. But this is exactly how good automation usually starts: one tiny reliable step at a time.
If you are planning a broader SEO workflow, it also helps to keep your research process organized. For reporting and search analysis, this kind of setup fits nicely alongside a structured SEO dashboard, like the one described in this Looker Studio organic traffic and SEO dashboard guide.
Step 2: Prepare your Google Sheet before you connect anything
Before opening Make.com, make sure your Google Sheet is tidy.
In this setup, the sheet contains SEO keywords and related notes for future articles. The workflow depends on a few simple rules:
- Column A contains the keyword
- Column E contains the thesis or article direction
- Another column is used as a signal to show whether the row has already been processed
In the example workflow, the important logic is:
- The keyword must not be empty
- A later cell, used as a trigger/status marker, must still be empty
This matters because Make needs a way to know which row is “next.” If your sheet has no structure, your automation will get confused very quickly. And yes, spreadsheets can absolutely become dramatic if you let them.
If you want to improve the logic in your sheet itself, especially with conditions like “if this cell is empty” or “if this status is completed,” this overview of Google Sheets logic functions such as IF, IFS, AND, and OR is very useful.
Step 3: Create a new Make.com account and start from scratch
Make.com is a no-code automation tool that works well for marketing workflows. It has a visual builder, and for this kind of task, it is easy to get started without technical experience.
After signing up, go to the Scenarios section and create a new scenario from scratch.
You may see templates, but for this process it makes sense to build everything manually. That way, you understand exactly what each module does and you can adjust it later without guessing.
On the free plan, you can already do quite a lot. The example setup shown here is small enough that the free version should be enough for testing or for a very simple content workflow.

Step 4: Add the first module to search for the next valid row
The first module is the most important one. It tells Make which row to work with.
Choose the Google Sheets connector, then select the action to search rows.
When connecting Google Sheets for the first time, Make will ask you to create a connection. I recommend naming the connection clearly, especially if you work on multiple projects. Something simple like “SEO Content Sheet” is better than ending up with five mystery connections later.
Then:
- Sign in with your Google account
- Grant access to Google Sheets
- Select the spreadsheet
- Select the correct sheet tab
- Confirm that the table contains headers
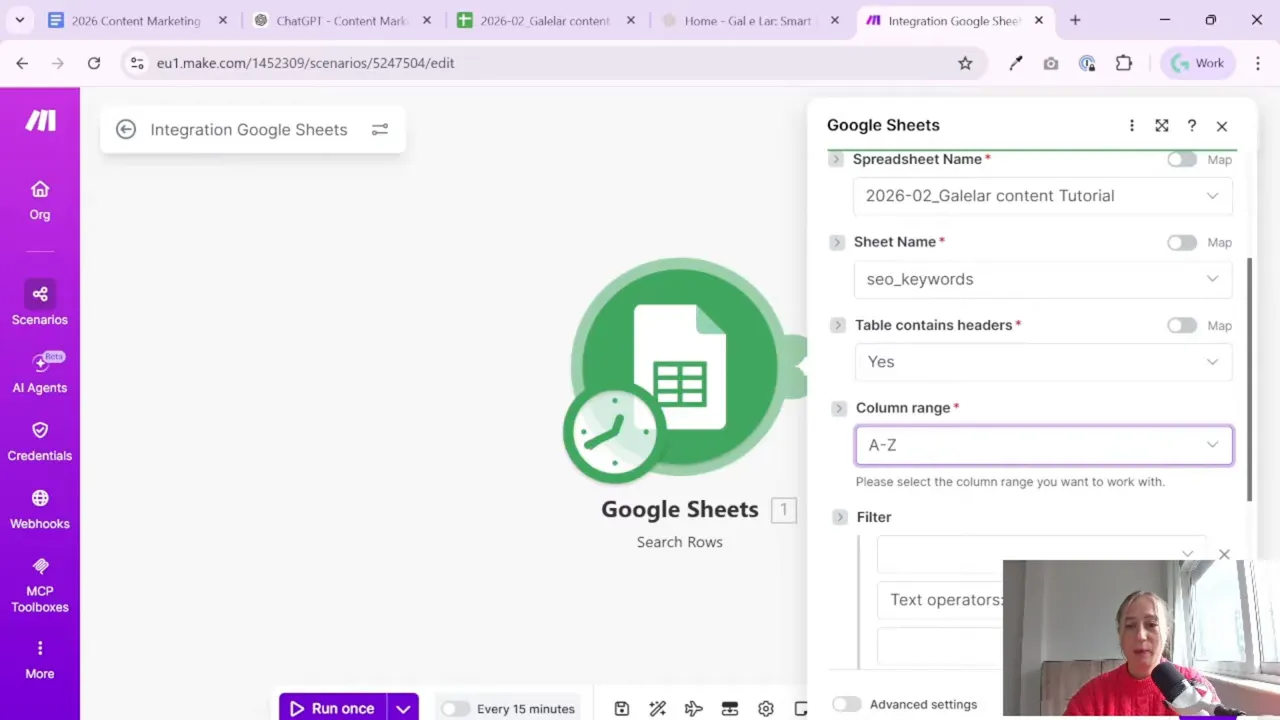
Once the file is connected, set the filters.
The workflow shown here uses two conditions:
- Keyword column is not empty — meaning there is actually an article idea in the row
- Status/date column is empty — meaning this row has not been processed yet
This gives Make a very practical rule: find the first row that has a keyword ready to go but has not yet been marked as used.
A Tool I Use for Building Automations Like This
For automation, one of my favorite tools is Make.com.
I use it to connect different tools and automate repetitive workflows — for example moving data between APIs, Google Sheets, and reporting systems.
Also set the limit to 1. You only want one row at a time.
That keeps the scenario clean and predictable.
Why this filter logic works well
This is one of those small details that makes automation reliable.
If you only searched for rows where the keyword exists, Make could keep pulling rows you already used. By checking both conditions, you create a simple queue inside your spreadsheet.
It is not fancy. It is just effective.
Step 5: Rename the module so your scenario stays readable
After saving the first module, rename it.
This may sound minor, but it helps a lot once your scenarios become longer. Instead of keeping the generic Google Sheets action name, change it to something clear like:
- Find the next row
Good naming makes automation easier to maintain. When you come back in two weeks, you will thank your past self.
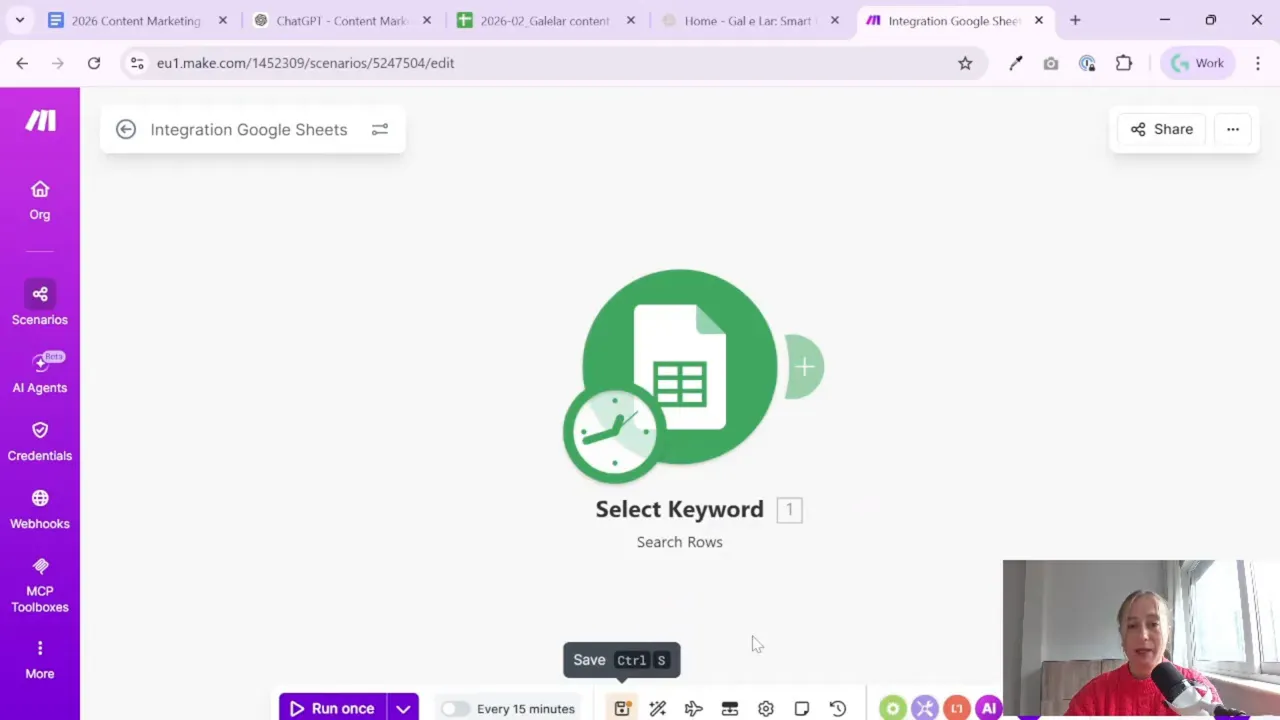
Step 6: Test the first module before building anything else
Now run the module once.
This step is important because it confirms that your filter is working before you start adding more actions. When the module runs successfully, Make will show output including the row number it found.
In the example setup, the first valid row returned was row 2. After putting a value into that row to simulate that it had been processed, the next run returned row 3 instead.
That is exactly the behavior you want.
This is a good habit when building automations:
- Build one small piece
- Test it
- Only then move to the next piece
Make.com works best when you think in tiny actions. Not one giant workflow. A chain of small, clear steps.
Step 7: Add a second module to get the keyword from the selected row
Once Make knows the row number, the next step is to read the actual keyword from that row.
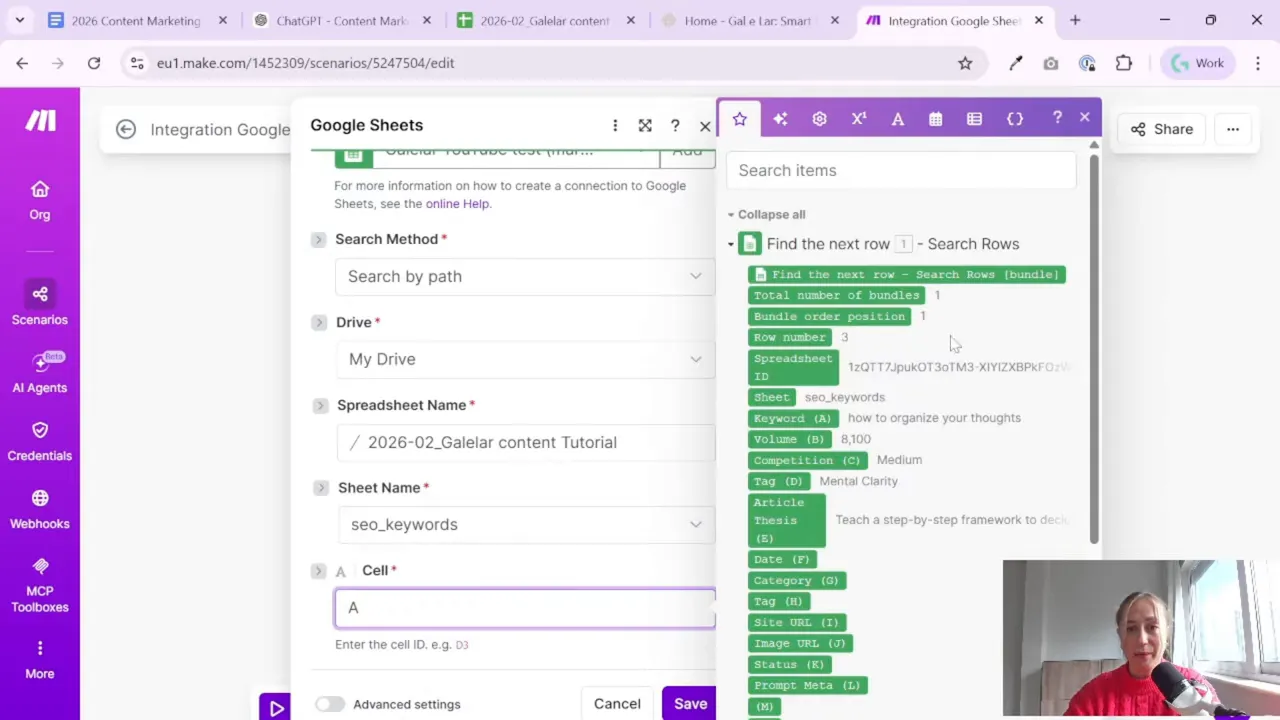
Add another Google Sheets module and choose Get a cell.
Now you need to tell Make which cell to read.
Since the keyword is in column A, the reference should be:
- Column A
- Plus the row number returned by the previous module
So instead of hardcoding something like A2 or A3, you build a dynamic reference:
- A + row number from module 1
That means if the first module finds row 7, this module reads A7. If it finds row 12, it reads A12.
Rename this module to something clear, for example:
- Find the keyword
This is where the scenario starts to become useful. You are no longer just identifying a row. You are pulling actual content planning data into the workflow.
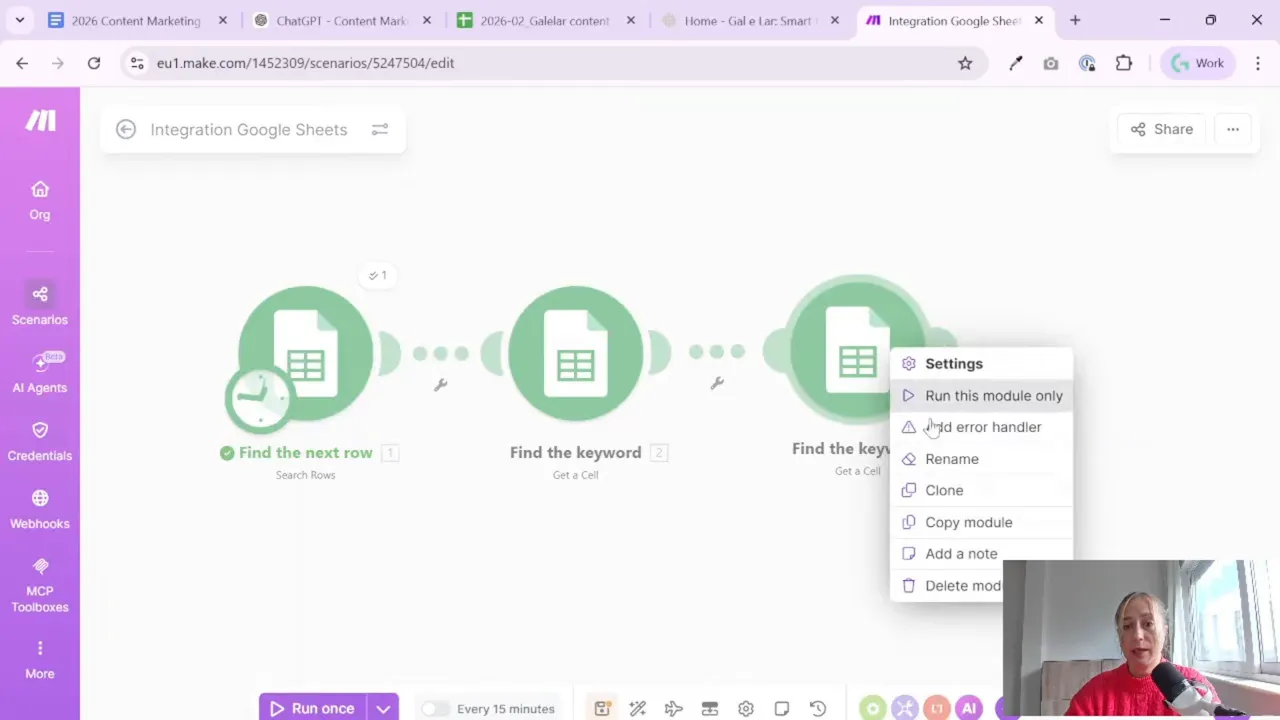
Step 8: Clone the module to get the thesis from the same row
Now repeat the same logic for the article thesis.
The easiest way is to clone the previous module instead of creating a new one from scratch. This saves time and reduces errors.
After cloning:
- Rename the module to Find the thesis
- Keep the same spreadsheet and sheet settings
- Change the column reference from A to E
Because the row number still comes from the first module, this new module reads:
- E + row number from module 1
So if the selected row is row 3, the module reads E3.
This is a simple pattern you can reuse over and over. Once you have one row number, you can pull any column you need from that same row.
Why cloning is helpful here
When two modules are almost identical, cloning keeps things neat. You already know the spreadsheet, tab, and connection are correct. You just change the one piece that matters.
Less clicking. Less mess. Better mood.
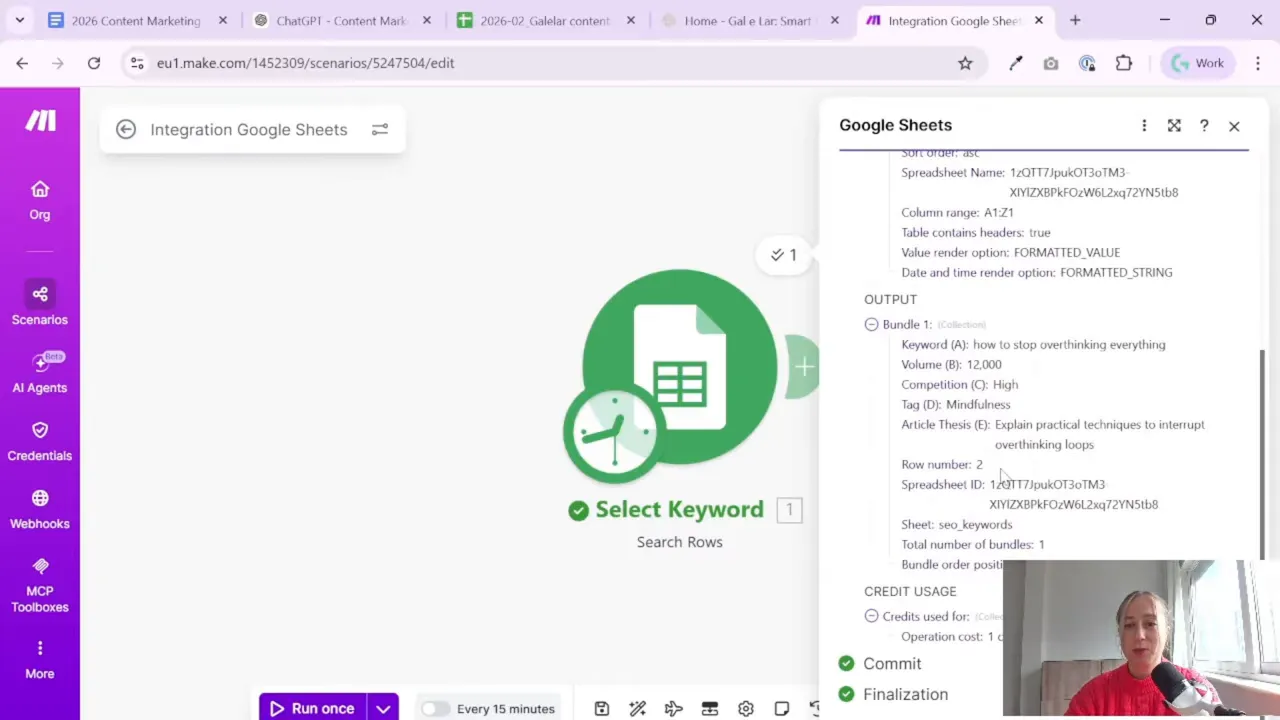
Step 9: Run the whole mini-scenario and validate the output
At this point, your scenario has three modules:
- Find the next row
- Find the keyword
- Find the thesis
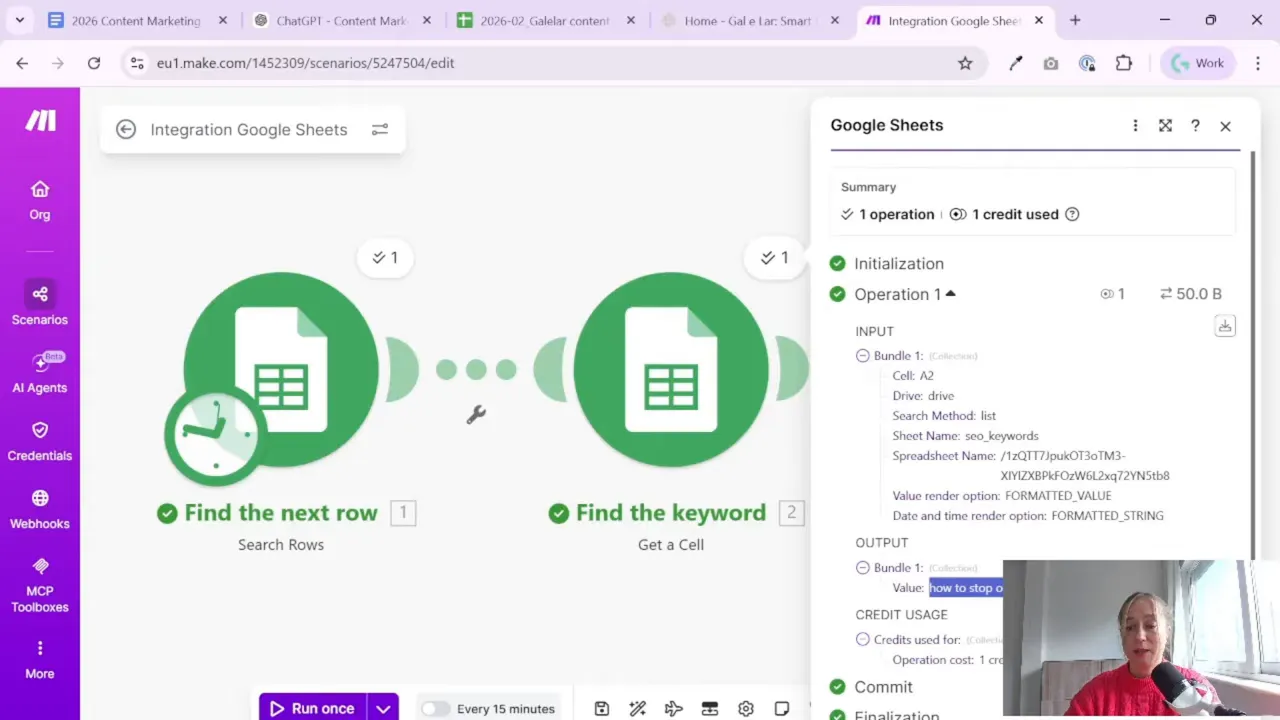
Now run the scenario once and check the outputs carefully.
In the example, the returned keyword was:
- How to stop overthinking everything
That confirmed the setup was working correctly.
Make lets you inspect both input and output for each module, which is very helpful during setup. If something is wrong, you can usually spot it quickly:
- Wrong row number
- Wrong column letter
- Wrong tab selected
- Filter conditions not matching what you intended
This kind of testing is worth doing slowly. A few extra minutes here can save a lot of confusion later when you connect AI writing or WordPress publishing.
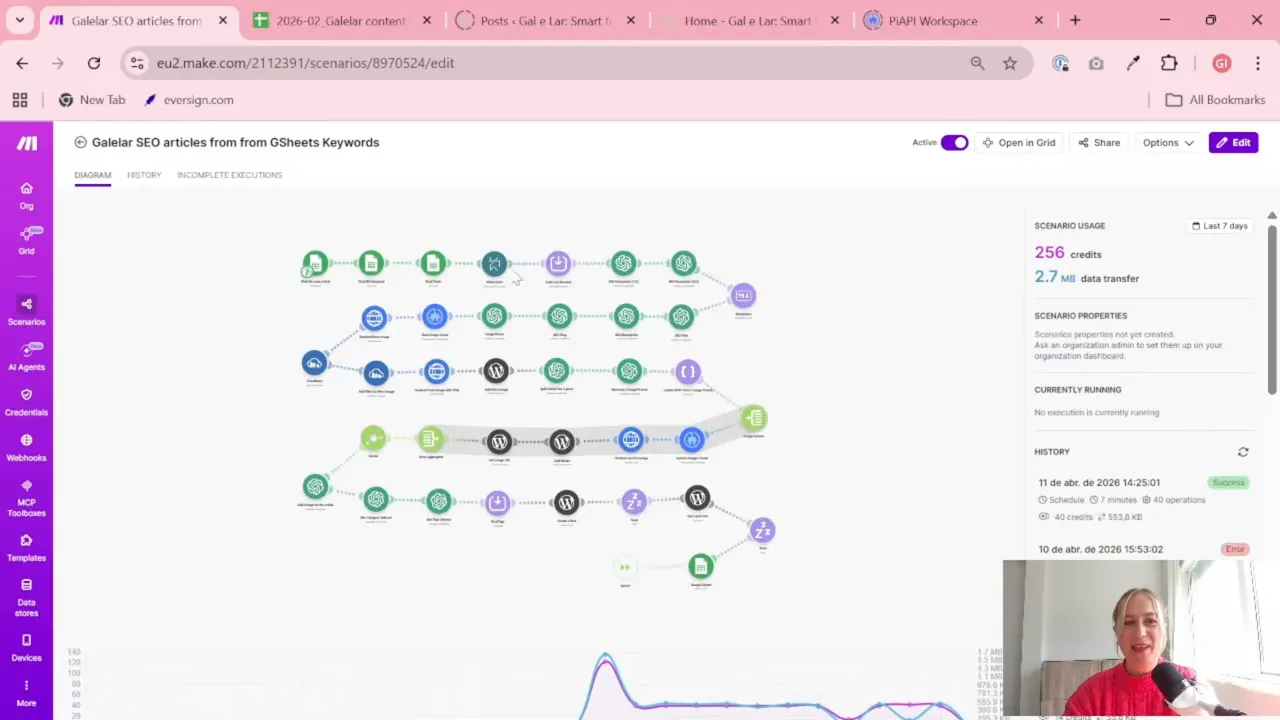
Step 10: Think of this as the foundation, not the final automation
This workflow does not publish anything yet. It does not write the full article yet either. And that is perfectly fine.
Its job is to create a reliable bridge between your planning sheet and your automation tool.
Once that bridge works, you can build the next steps on top of it, such as:
- Sending the keyword and thesis to an AI tool for drafting
- Creating a content brief automatically
- Saving generated text back into Google Sheets
- Publishing a draft to WordPress
But first, Make needs to know what to work on. That is what this setup solves.
If you regularly work with Sheets as the control center for marketing tasks, you may also like browsing more workflow ideas on the Gaille Reports blog, where this kind of practical reporting and automation thinking appears often.
Step 11: Keep your scenario simple and modular
One of the most useful ideas in this setup is the way the workflow is broken into tiny pieces.
Instead of trying to do everything in one huge step, each module has one clear purpose:
- Find the row
- Read one cell
- Read another cell
This is how Make.com is easiest to work with.
For non-technical marketers, this is good news. You do not need to think like a developer. You just need to describe the process clearly, one action at a time.
A useful way to think about it is this:
- If you would explain the task to an assistant in three small instructions, those three instructions will probably become three modules.
That mindset helps a lot when building automations for content, reporting, lead handling, or campaign management.
Step 12: A few practical tips before you expand the workflow
Before moving on to AI drafting or publishing, it is worth cleaning up a few details.
Use clear column roles in your sheet
Make sure each column has one job. For example:
- Keyword
- Thesis
- Status
- Draft URL
- Published date
This makes later automation much easier.
Rename modules as you build
Do not leave default names everywhere. A readable scenario is easier to debug, update, and hand over to someone else.
Test after every small change
If something breaks, you will know exactly where it happened.
Keep one row = one article idea
This sounds obvious, but it is the kind of thing that saves hours later.
Use official documentation when needed
If you get stuck on module options or permissions, the Make Help Center and the Google Sheets support documentation are helpful references.
Conclusion
Connecting Google Sheets to Make.com is a small step, but it is one of the most important parts of a content automation workflow. Once Make can find the next valid row and pull the right cells, you have a clean starting point for everything that follows.
The nice part is that this setup is simple. No code. No complicated logic. Just a structured sheet, a few filters, and three focused modules.
If you want to automate SEO content creation, start here. Build the bridge first. Then let the rest of the workflow grow on top of it.
Want to go further with Google Sheets and automation?
