
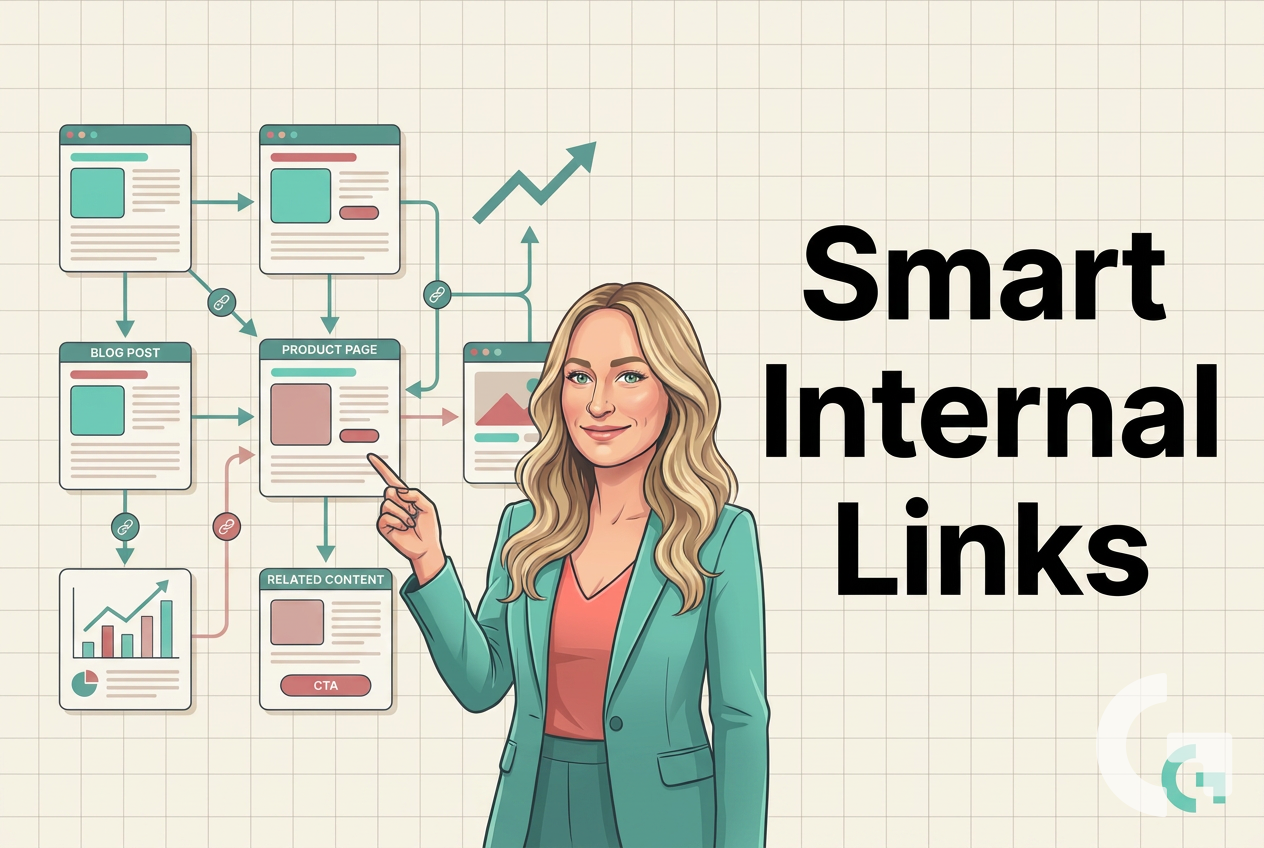
How to Build Internal Links Automatically with Make.com (Part 5/13)
If you are automating SEO article creation, writing the article itself is only part of the job. You also need the extra pieces that make the post more useful and more strategic: internal links, social links, and reusable content blocks you want to insert again and again.
In this tutorial, I’ll show a simple way to build that part inside Make. The idea is straightforward: create a small library of reusable elements, then let AI pick the ones that best match each article. This keeps your workflow cleaner, saves time, and helps your articles feel more complete.
If you want a visual walkthrough, here is the tutorial:
This setup is especially useful for marketers, freelancers, and business owners who want content automation without turning the process into a giant technical project.
Table of Contents
- Step 1: Understand what this part of the automation should do
- Step 2: Create a reusable variable library in Make
- Step 3: Add social media links as your first variable
- Step 4: Build a structured list of internal links for your website
- Step 5: Use AI to format your internal link library
- Step 6: Decide how many internal links you want per article
- Step 7: Add a module that selects the best matching internal links
- Step 8: Pass the right data into the AI prompt
- Step 9: Test the full scenario from Google Sheets to article output
- Step 10: Check the output format before you move on
- Step 11: Expand the same idea beyond internal links
- Step 12: Keep the setup simple and maintainable
- Summary
Step 1: Understand what this part of the automation should do
Before building anything in Make, it helps to be clear about the goal.
In this workflow, the article is already being generated from a keyword and a thesis stored in Google Sheets. The next job is to enrich that article with extra elements that make it stronger and more useful.
That includes things like:
- Social media links
- Internal links to related articles
- Banners or service blocks
- Links to key pages on your website
- Affiliate links, if relevant to your content model
The smart part is this: you do not need to manually decide all of those every time. You can store them as variables and then let the scenario reuse them automatically.
This is a very practical content marketing idea. Instead of rebuilding the same supporting content for every article, you create a small content library once and use it whenever needed.
Step 2: Create a reusable variable library in Make
The first useful block in this setup is the multiple variables module in Make.
This module works like a mini library inside your scenario. You define named items and assign values to them. Later, other modules can pull from that library.
In this case, the variable set is used for links and banners.
A good way to think about it is this:
- Name = what the element is called
- Value = the content you want to reuse
If you publish articles regularly, this is one of those small setup choices that saves a lot of repetitive work later.
You can create one variable set and keep adding reusable pieces over time. For example, maybe today you only need social media links and internal links. Later, you may add:
- A newsletter signup section
- A product mention
- A consultation banner
- A “contact us” block
Very simple. Very useful.
Step 3: Add social media links as your first variable
The easiest thing to store first is your social media profile list.
In the workflow shown here, one variable is called social media links. Inside it, there is a ready-to-use group of links for platforms like:
- Telegram
- YouTube
- TikTok
If you run a brand, personal website, or niche blog, adding these links as one reusable block makes a lot of sense. You define them once and insert them whenever you need them.
This is especially handy if the formatting matters. For example, if you want links to appear in a specific style or order, storing that ready-made version in a variable avoids formatting the same block over and over.
At this point, the variable module has started to become more than a technical step. It is now a content asset library.
Step 4: Build a structured list of internal links for your website
The second variable is where the SEO value becomes more interesting.
Instead of storing only social links, you can also store internal article links from your own website. These are the links you want AI to choose from when it decides which related posts should be recommended inside a new article.
Internal links matter because they help:
- Connect related content
- Keep readers on your site longer
- Support site structure
- Give search engines more context about your content
Google’s guidance on links is a useful reminder that clear, meaningful internal linking helps both users and search engines understand your website better.
In this workflow, the internal links are prepared as a list. Each item includes useful structure, such as:
- Category
- Article title
- URL
This structure gives the AI enough context to choose links that actually fit the new article.
A Tool I Use for Building This Kind of Automation
For automation, one of my favorite tools is Make.com.
I use it to connect different tools and automate repetitive workflows — for example moving data between APIs, Google Sheets, and reporting systems.
If your site has only a few articles, you can include all of them. If your site is larger, it is often smarter to include only your best or most strategic pages.
For example, you might choose:
- Your strongest evergreen articles
- Pages that already perform well
- Product or service pages
- Important conversion pages such as a contact page
That last point matters. Internal links do not have to point only to blog posts. They can also support business goals.
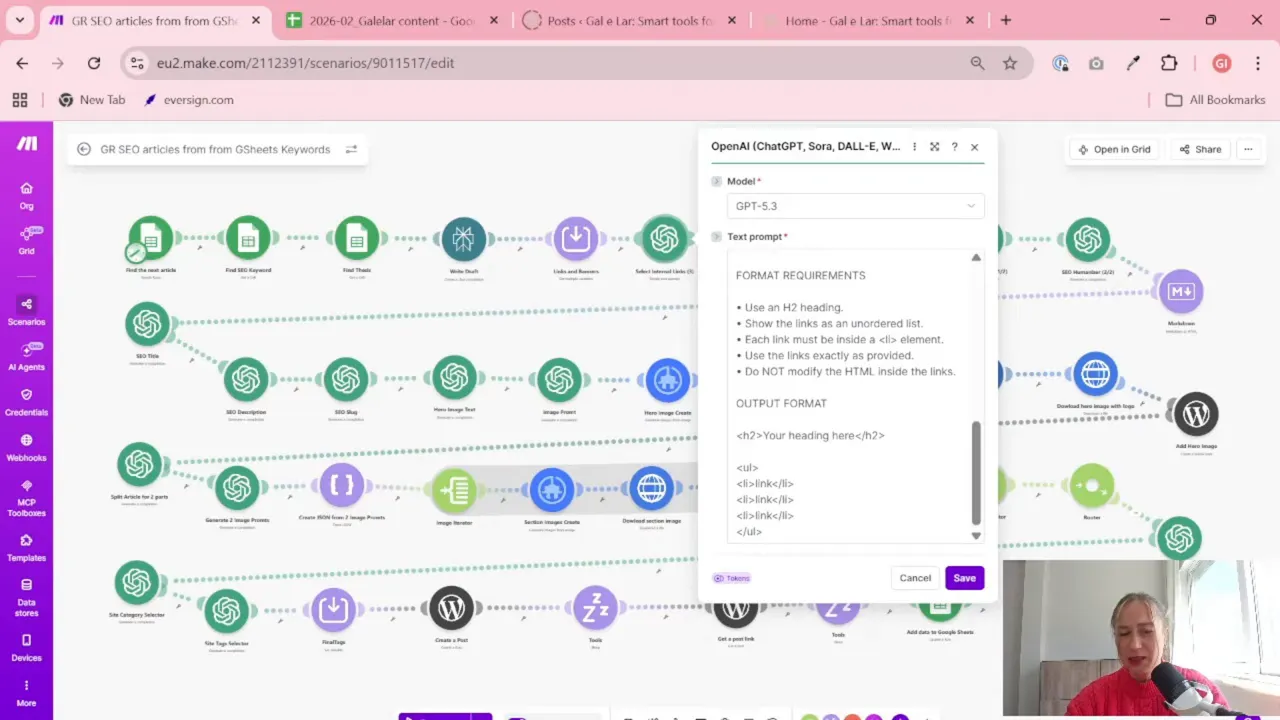
Step 5: Use AI to format your internal link library
One practical part of this setup is using AI to help prepare the internal link list in the right format for Make.
Instead of manually arranging dozens of article titles and categories, you can ask an AI tool to turn your article list into a consistent structure. In this case, the goal is to create one clean list with:
- The category from the website
- The full article title
- The article link
Then you paste that result into the variable value inside Make.
This is not the glamorous part of automation, but honestly, it is one of the most helpful. Good automation often comes from boring-but-clean setup.
If your list is messy, your outputs will be messy too. If your source list is tidy, the rest of the workflow becomes much easier.
And if you publish more articles later, you can simply update this variable library instead of rebuilding your whole scenario.
Step 6: Decide how many internal links you want per article
Once you have a big list of available links, the next question is simple: how many should go into each article?
In this workflow, the target is three internal links per article.
That is a sensible choice. It is enough to create a useful “read more” section without turning the article into a giant link dump.
You can, of course, choose a different number. But three is a nice middle ground for many blog posts.
At this stage, the workflow has:
- The article content generated earlier in the scenario
- A stored library of available internal links
- A rule that only a few relevant links should be selected
Now the AI can do the matching.
Step 7: Add a module that selects the best matching internal links
The next module uses AI to review the generated article and choose the internal links that fit best.
The logic is very simple:
- Take the article content created earlier in the scenario
- Take the full list of available internal links from the variable block
- Ask AI to select the three most relevant options
That is it.
The prompt is doing the heavy lifting here. It tells the model that there is an article and a list of internal links, and that it should pick only the links that match the topic.
This is a good use case for AI because the task is narrow and clear. You are not asking it to invent strategy from scratch. You are asking it to choose from a fixed list.
That usually leads to more predictable results.
In the example workflow, Perplexity is used because that connection is already available in the scenario. Later, this part can be swapped to ChatGPT if needed.
If you work with AI tools in automations, this is a good reminder that the exact model matters less than the prompt structure and the quality of the source data.
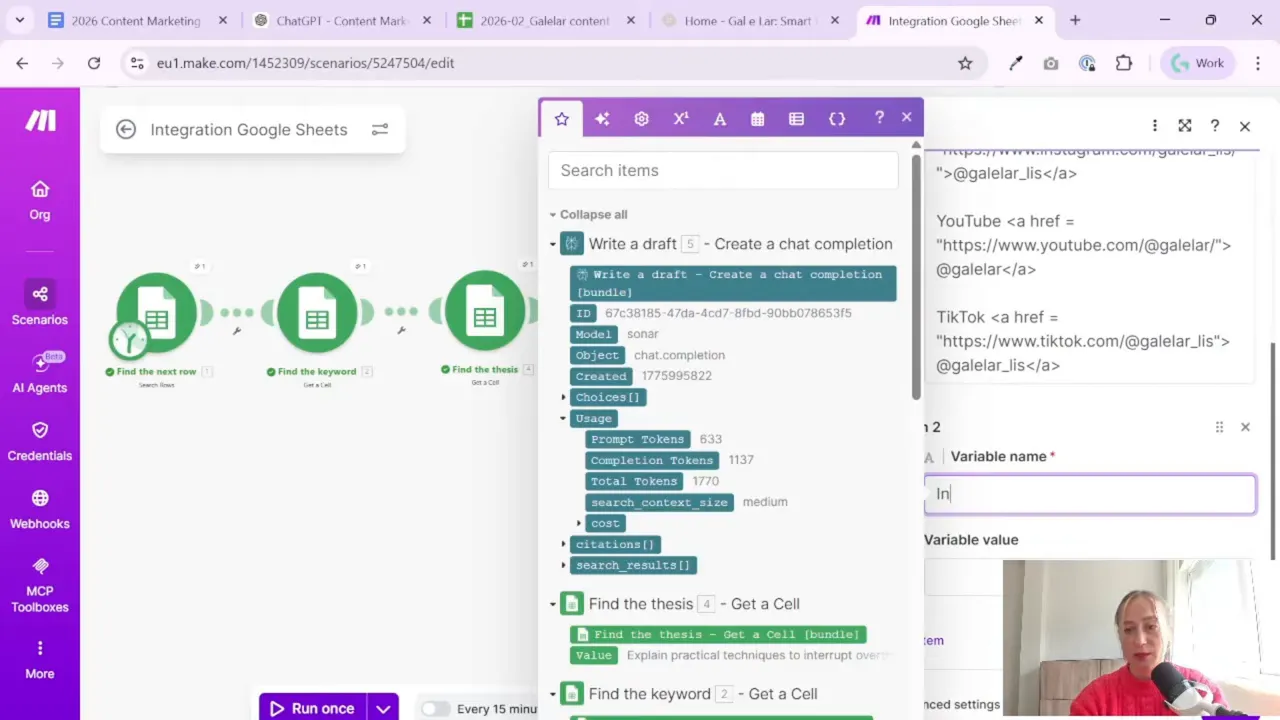
Step 8: Pass the right data into the AI prompt
When setting up the module, two inputs are important.
First input: the article content. This comes from the previous article generation step.
Second input: the available internal links. This comes from the variable block you created earlier.
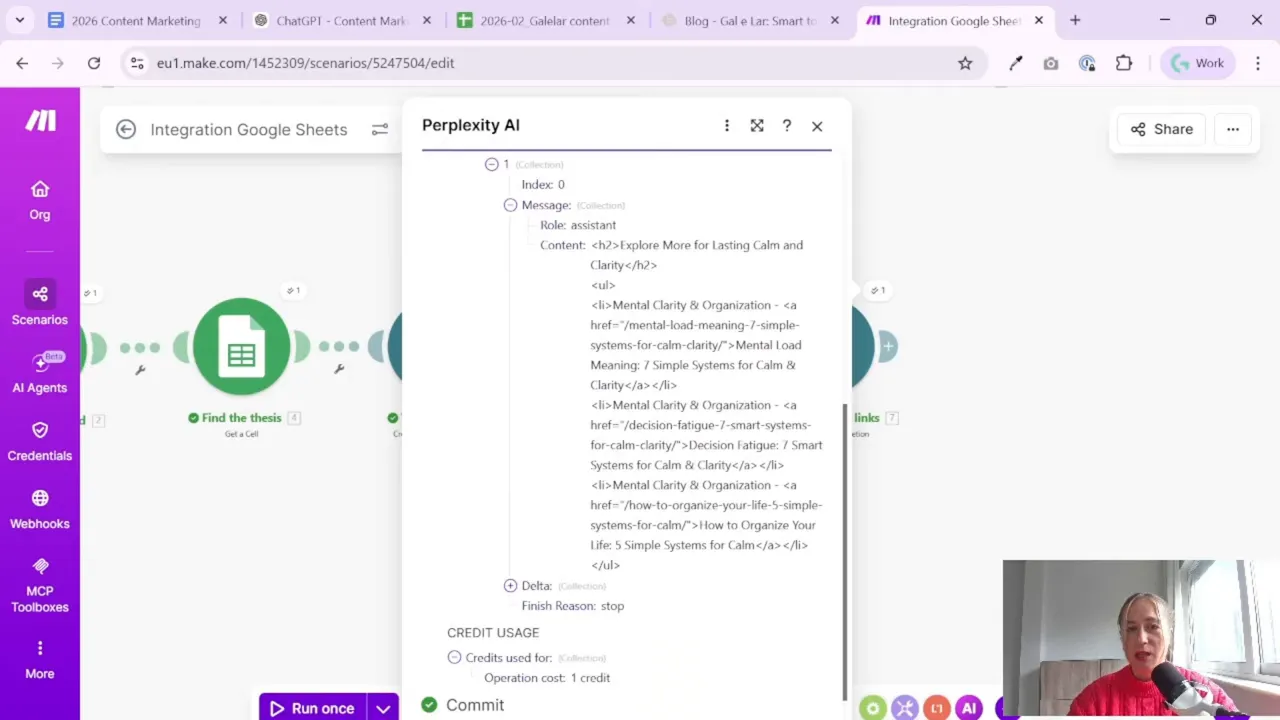
The AI model compares the two and returns a shortlist.
In this setup, the selected links are returned in HTML format, which is helpful if the final article output is also being assembled in HTML.
That means the “read more” section is not just a text suggestion. It is already closer to publish-ready content.
If you are building blog automation for WordPress or another CMS, this kind of output can save another formatting step later.
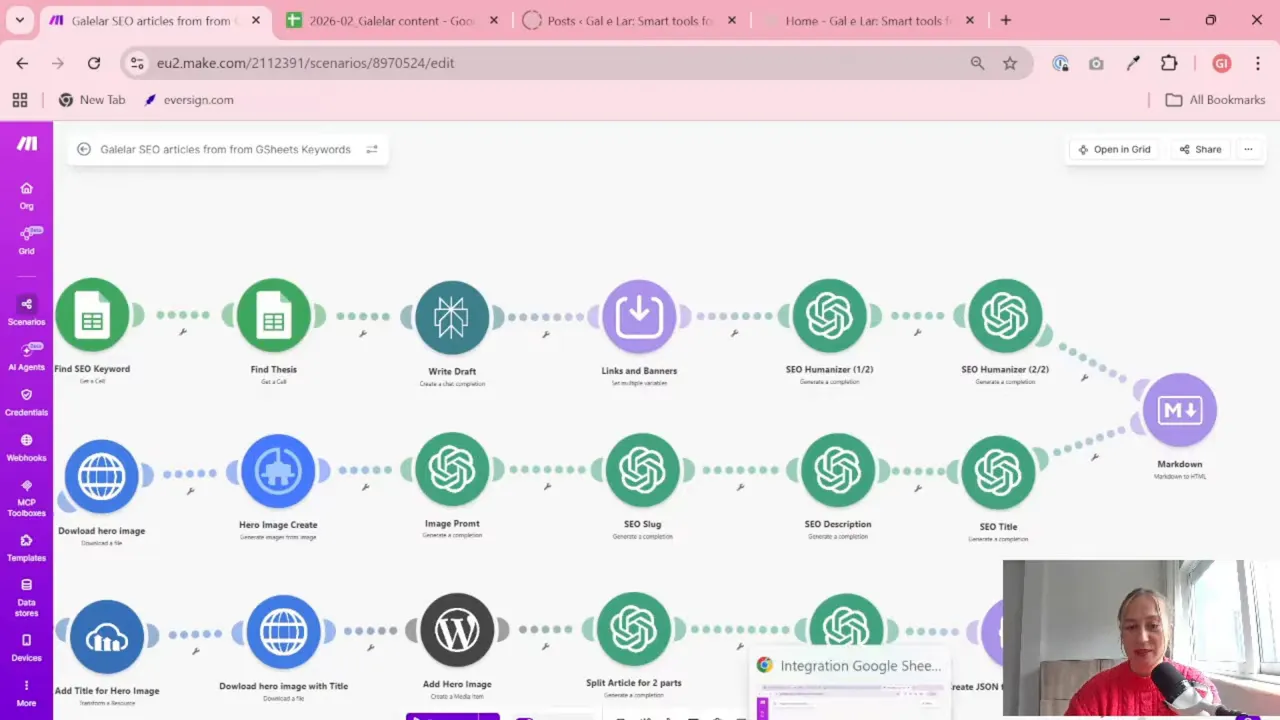
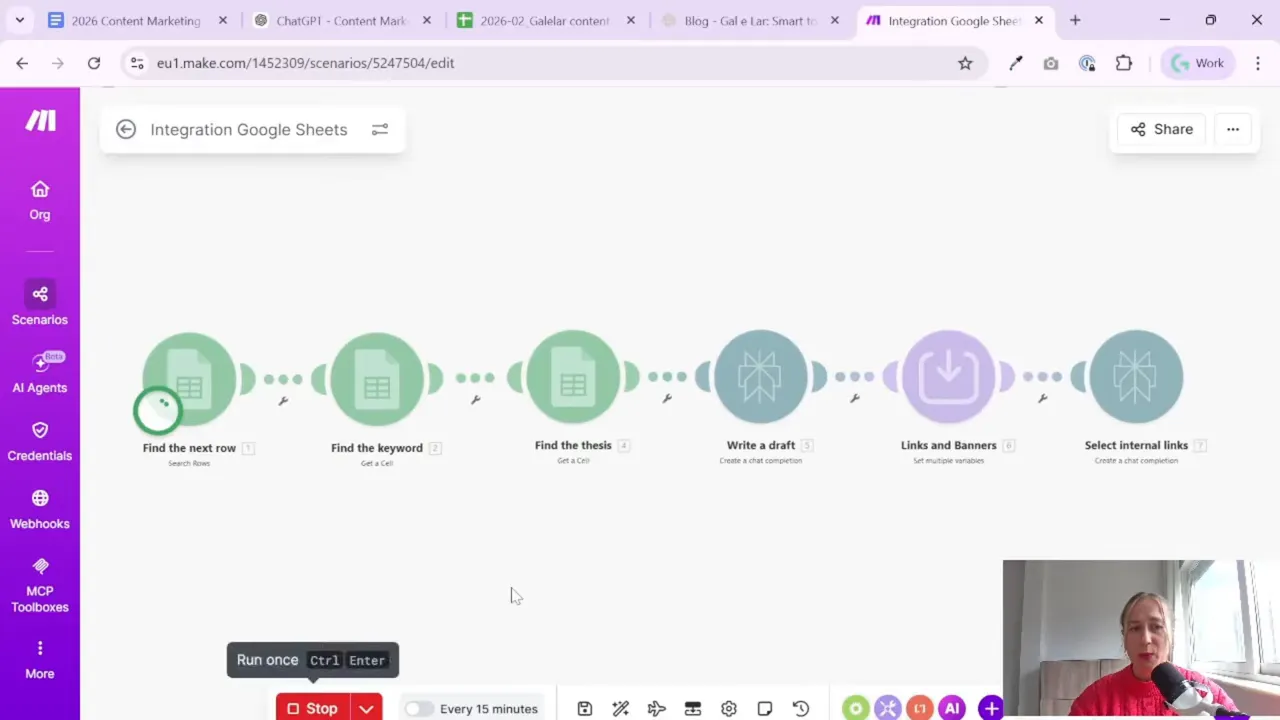
Step 9: Test the full scenario from Google Sheets to article output
After setting up the links and selection logic, the next step is to run the whole scenario once and see what happens.
In this workflow, the scenario already includes earlier steps such as:
- Selecting a row from Google Sheets
- Taking a keyword
- Taking a thesis
- Generating an article draft with AI
- Passing that article into the internal link selector
Testing matters because this is usually the moment when small issues show up. Sometimes it is a model setting. Sometimes it is formatting. Sometimes one field is mapped incorrectly.
That happened here too. There was a module issue during the run, and the workflow needed a quick check. This is normal. Automation almost never works perfectly the first time, and that is fine.
The important part is to test with real data, inspect the returned output, and adjust as needed.
If you are new to Make, this is a good habit to build:
- Run once
- Inspect every module output
- Fix one issue at a time
- Run again
No drama. Just debugging in small steps.
Step 10: Check the output format before you move on
Once the scenario runs successfully, review the result carefully.
In this case, the returned output includes a nicely formatted section with three related articles under a “read more” style block.
That is exactly the kind of enhancement that makes AI-generated content feel more complete and more useful.
When reviewing your own output, check these things:
- Are the selected links actually relevant to the article topic?
- Is the formatting clean enough to use in your final article template?
- Are the article titles correct and complete?
- Does the section feel natural rather than forced?
If yes, you now have a working content enrichment step inside your article automation.
That is a big improvement over plain article generation.
Step 11: Expand the same idea beyond internal links
One of the nicest things about this setup is that it is not limited to internal links.
The same variable-library approach can be used for many reusable content elements.
For example, you could store:
- Service banners
- Social proof blocks
- Affiliate recommendations
- Newsletter call-to-action sections
- Links to key pages like “contact us” or course pages
The pattern stays the same:
- Create a structured library of reusable content pieces
- Store them in Make variables
- Let AI choose what fits the article
- Insert the result into the final post
This is where automation starts to feel genuinely useful. You are not just generating words. You are building a repeatable publishing system.
If you are interested in more practical tutorials like this, the Gaille Reports blog is a good place to explore more content around automation, reporting, and marketing workflows.
Step 12: Keep the setup simple and maintainable
It is easy to overcomplicate content automation. My advice is: do less, but do it cleanly.
A simple version of this workflow is already valuable:
- One spreadsheet with keywords and article ideas
- One AI step to generate the article
- One variable block with reusable links and assets
- One AI step to choose the best internal links
That is enough to create better article drafts than a plain one-shot generation process.
If you later want to grow the system, you can. But you do not need a giant setup on day one.
And if you need help designing reporting or marketing automation systems around your data stack, you can always reach out here.
Summary
If you are building automated SEO articles in Make, adding a reusable library of links and banners is a very smart next step. It helps standardize your content, supports internal linking, and makes your articles feel more intentional.
The process is simple:
- Create a variable block for reusable elements
- Add social links and internal links
- Use AI to select the most relevant links for each article
- Test the output and keep the formatting tidy
This kind of setup is practical, not flashy. But honestly, that is why it works.
You build the library once, and then your scenario does the repetitive work for you. A good automation should feel a little boring after setup. That usually means it is doing its job.
Keep building your automation workflow with these guides
