
Add AI Images to WordPress: 14 Smart Automation Steps
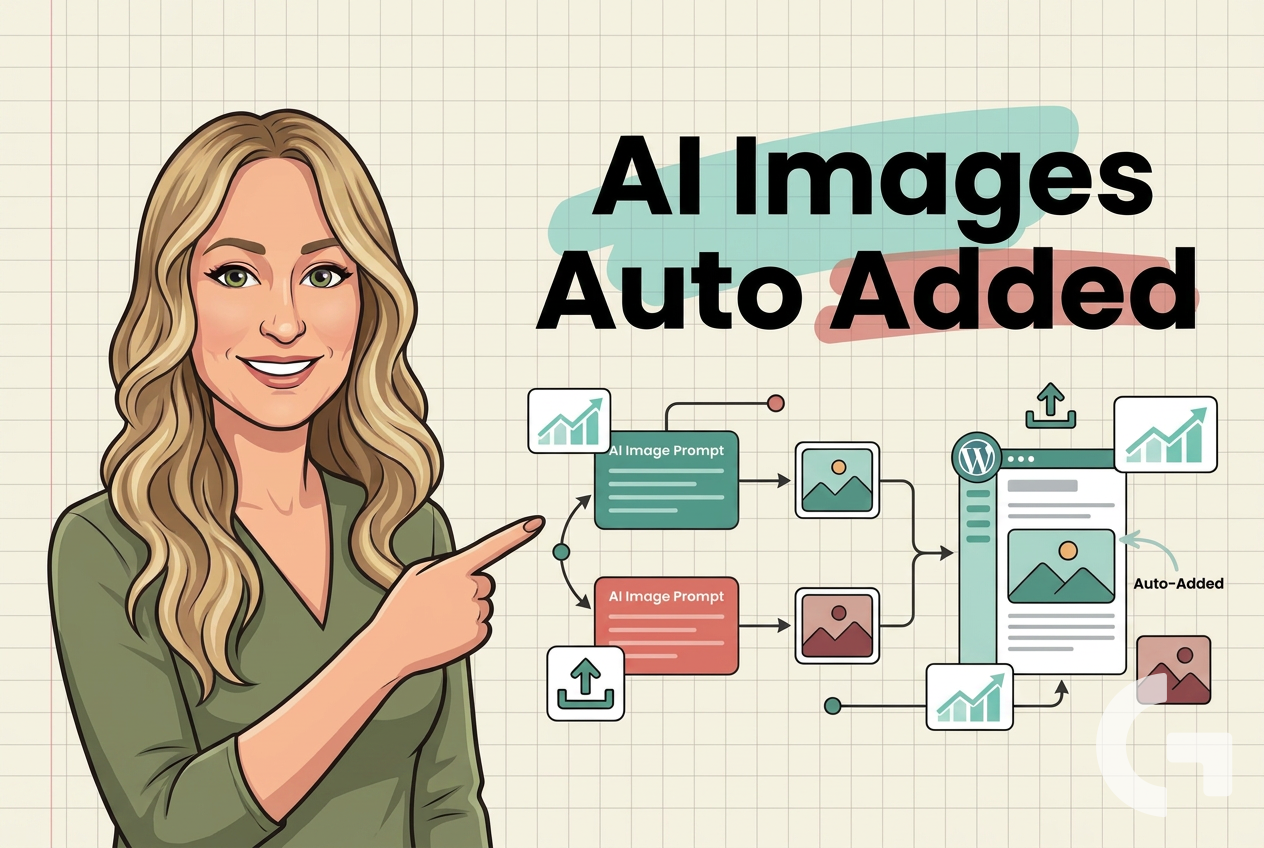
If you are building an automated content workflow, generating the article itself is only part of the job. You also need images, proper uploads to WordPress, and a clean way to place those images inside the post without doing everything by hand.
In this tutorial, I’ll walk through a simple way to do that in Make. The goal is to take two image prompts, generate both images, upload them to WordPress, collect their URLs, and then insert them into the article automatically.
This is especially useful if you already have a scenario that writes blog posts and creates a main image, and now you want to finish the workflow properly. The key pieces here are the iterator and the array aggregator. Once you understand those two, the rest becomes much easier.
Table of Contents
- Step 1: Start from a scenario that already creates the article
- Step 2: Use an iterator to process image prompts one by one
- Step 3: Clone the image-generation block you already used for the hero image
- Step 4: Generate each image with your chosen image model
- Step 5: Download the generated image file
- Step 6: Upload each image to WordPress and give files unique names
- Step 7: Use an array aggregator to collect the uploaded media IDs
- Step 8: Add a router if your scenario behaves oddly
- Step 9: Fetch the media item details to get the actual image URLs
- Step 10: Use a text model to insert the images into the article
- Step 11: Test the scenario by running it once and checking repetition counts
- Step 12: Check the image URLs and confirm the files appear in WordPress
- Step 13: Keep an eye on image-generation costs
- Step 14: Treat this as one part of a bigger publishing workflow
- Why this setup works well for non-technical marketers
- Summary
Step 1: Start from a scenario that already creates the article
This setup assumes you already have the earlier parts of your automation working. In this case, the scenario already does a few important things:
- Creates the article text
- Generates meta tags
- Creates the main or hero image
- Builds a JSON structure with prompts for two extra images
So the job now is not to create the whole content pipeline from scratch. It is to add the next layer: body images.
That distinction matters because many people get stuck trying to automate everything at once. It is usually easier to build the process piece by piece. First get the article. Then get the hero image. Then add the supporting images. Then move on to categories, tags, and final publishing.
If you work with content performance and reporting, this staged approach is also much easier to maintain later. That is very much the same mindset I use in broader marketing automation and reporting work, whether it is content operations or analysis for blogs and content websites.
Step 2: Use an iterator to process image prompts one by one
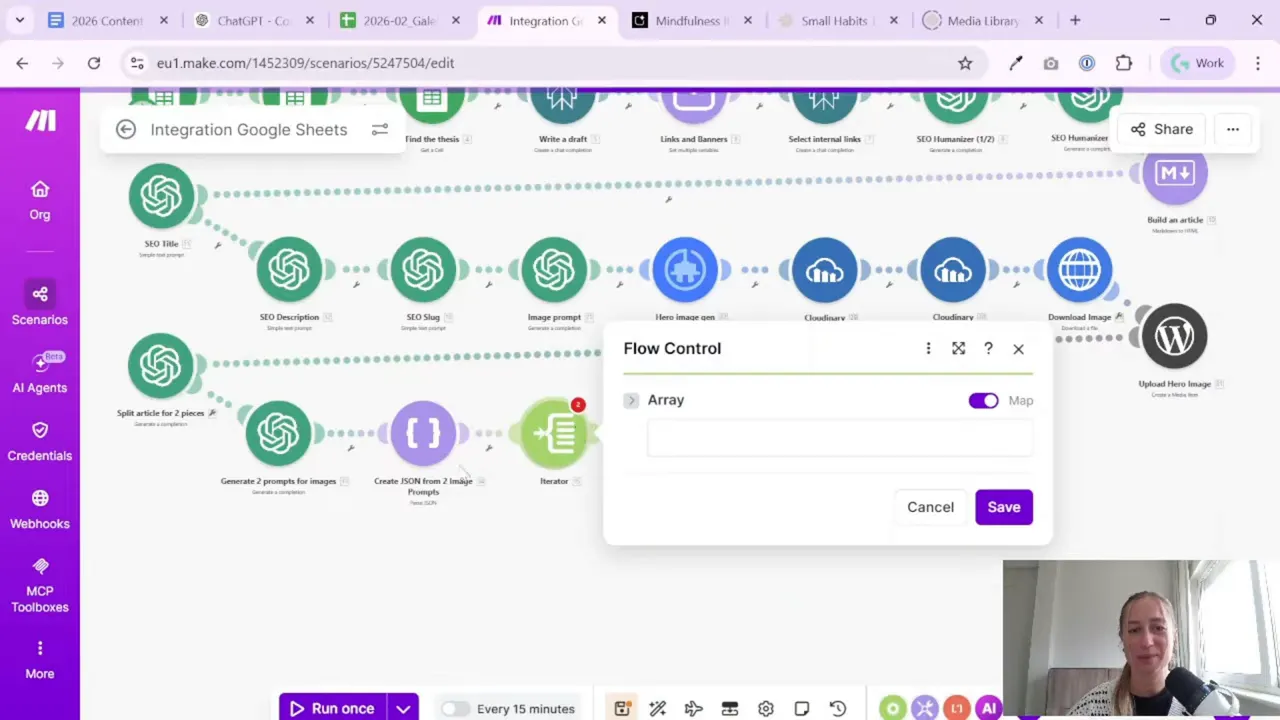
The first important module here is the iterator.
The purpose of the iterator is simple: if your previous step created a JSON object with multiple image prompts, the iterator takes those prompts one at a time and sends them through the same sequence of actions.
In this example, there are two prompts:
- Image 1 prompt
- Image 2 prompt
Without an iterator, Make would not naturally know that you want to repeat the same image-generation block twice. With an iterator, it does exactly that.
So the logic becomes:
- Take prompt 1
- Generate image 1
- Upload image 1 to WordPress
- Take prompt 2
- Generate image 2
- Upload image 2 to WordPress
That is the main idea. Very simple once you see it. But this is one of those Make concepts that can feel confusing the first time around.
A practical tip here: rename the iterator module clearly. Something like Image iterator makes the scenario much easier to read later. Tiny naming decisions save a lot of time when your automation grows.
Step 3: Clone the image-generation block you already used for the hero image
There is no need to reinvent the wheel here.
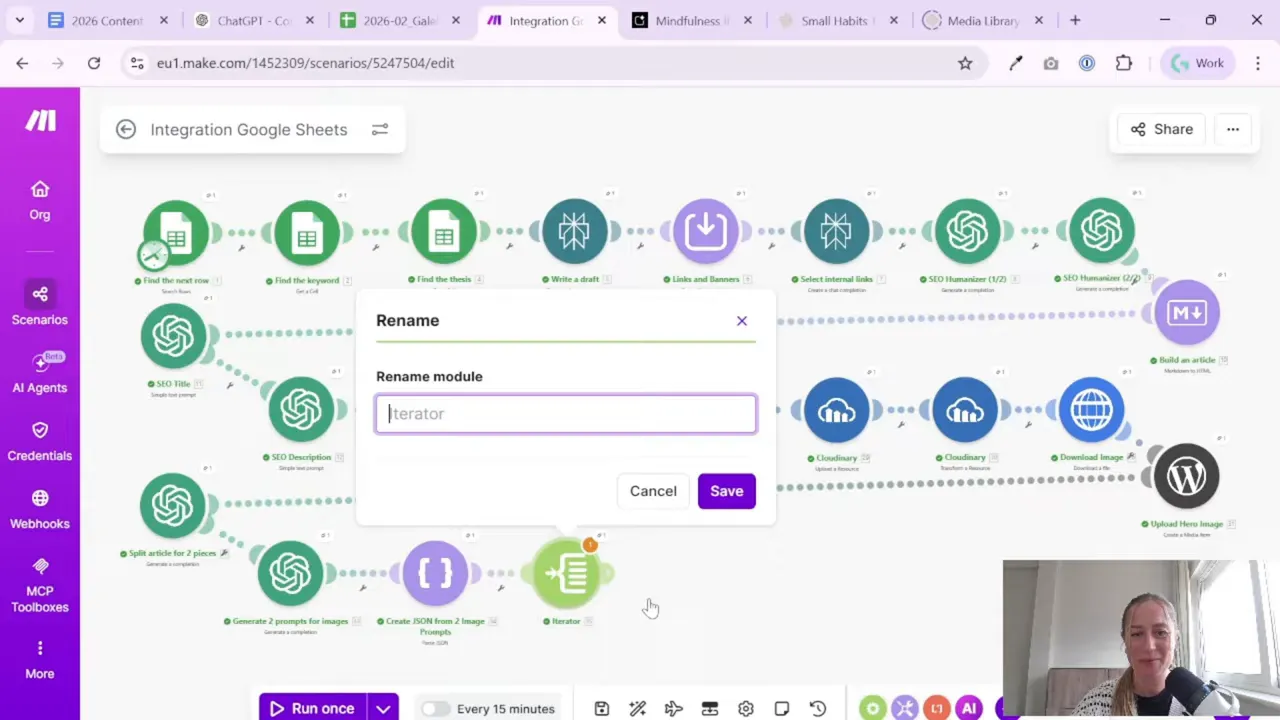
If you already have a working block that generates the hero image, you can duplicate that section and reuse it for the article body images. That is exactly the easiest way to build this.
After cloning the section, rename it to something clear, for example:
- Body image generation
Then update the prompt mapping so it uses the value coming from the image iterator instead of the hero image prompt.
This means the same image-generation logic is reused, but now the input changes each time the iterator runs.
That is one of the nicest things about Make: once one block works, you can often copy it and swap just one or two fields.
Step 4: Generate each image with your chosen image model
For the image generation step, the setup uses Nano Banana. There is also mention of Nano Banana Pro, but the simpler version is enough for this part of the process.
The configuration is straightforward:
- Generate one image per prompt
- Use a suitable aspect ratio for article images
- Output the file as JPEG
There is also one useful simplification here: no extra image-processing step is needed after generation. Since the output is already acceptable, there is no need to run another action like Cloudinary processing in this part of the scenario.
That keeps the workflow cleaner and cheaper.
In other words, if the generated image is already good enough for a body visual inside a blog post, do not complicate the pipeline just because you can. Automation has a funny way of becoming a hobby project if you let it.
A Tool I Use for Building This Kind of Automation
For automation, one of my favorite tools is Make.com.
I use it to connect different tools and automate repetitive workflows — for example moving data between APIs, Google Sheets, and reporting systems.
Step 5: Download the generated image file
Once the image is created, you need to download it from the output URL.
This step is important because WordPress media upload usually needs the file itself, not just the remote link created by the image tool.
So after image generation, add a download step that pulls the output image URL from the previous module.
The flow looks like this:
- Prompt goes in
- Image gets generated
- Output image URL is returned
- Download that image file
At this point, you are preparing the file for WordPress media upload.
Step 6: Upload each image to WordPress and give files unique names
After downloading the image, the next step is to upload it to your WordPress website.
If you already have WordPress connected in Make, you can simply clone the upload module you used before and place it after the download step.
One very practical detail here is file naming.
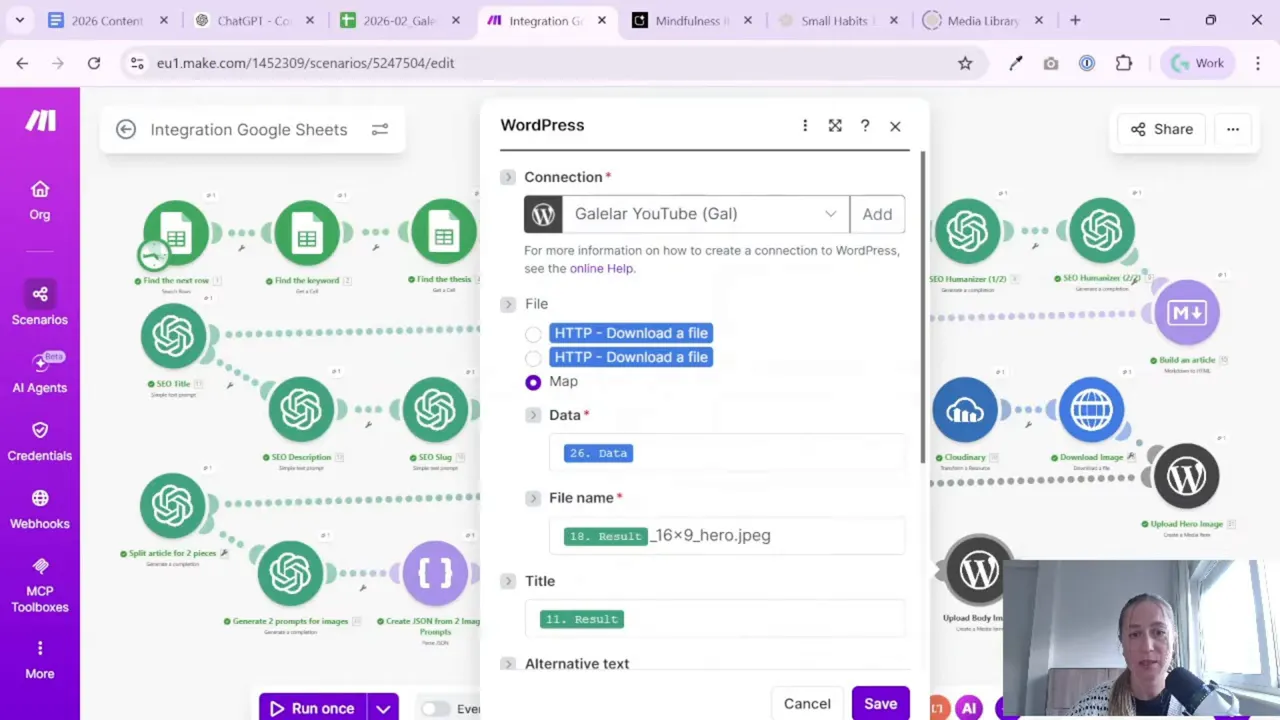
Because you are uploading more than one image for the same article, the filenames should be different. A clean approach is to combine:
- The article slug
- A descriptive label
- The iterator ID
For example, if the iterator produces ID 1 and ID 2, the filenames become unique automatically. That helps avoid overwriting and also keeps your media library more organized.
Even if you think you will “clean it up later,” trust me, later usually never comes. Good naming from the beginning is worth it.
Step 7: Use an array aggregator to collect the uploaded media IDs
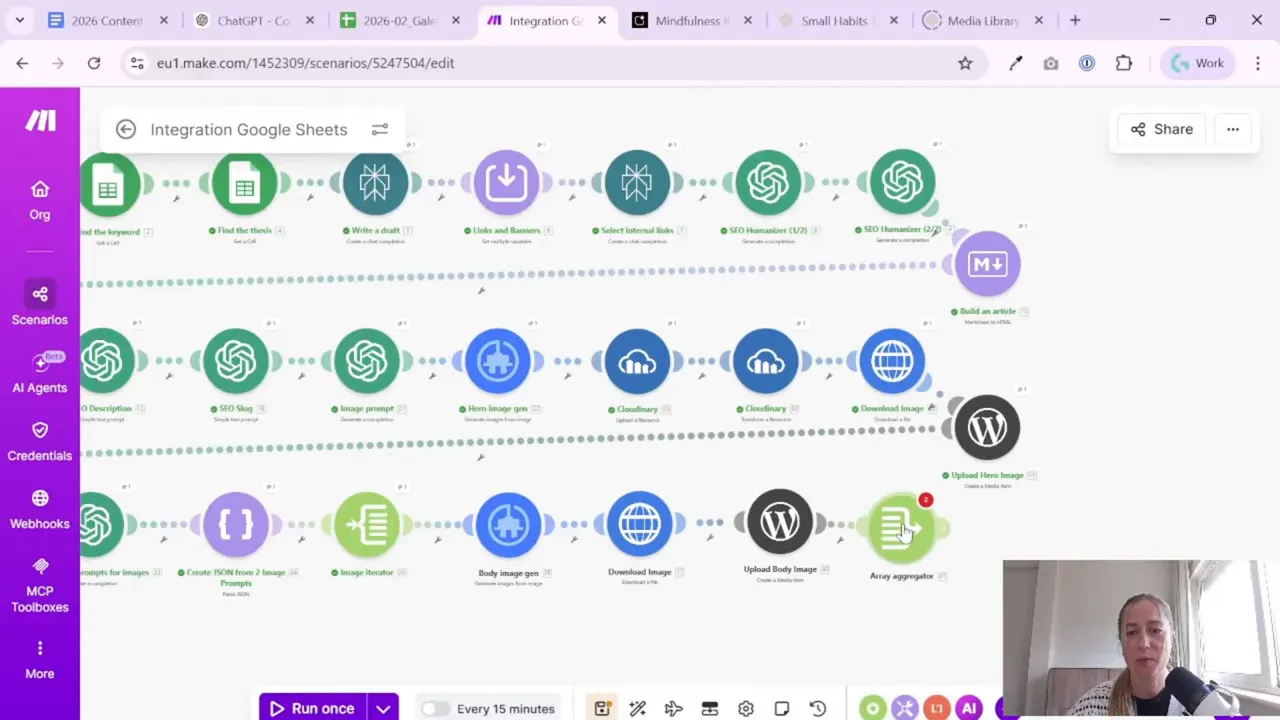
Now we get to the second key concept: the array aggregator.
The iterator runs the same block multiple times. That is great. But after those repeated runs finish, you need a way to collect the results into one place. That is what the array aggregator does.
In this case, the result you want to collect is the media item ID returned by WordPress for each uploaded image.
Why collect the IDs?
Because later you will use those IDs to fetch the image URLs and then insert those URLs into the final article content.
When configuring the array aggregator in Make, pay attention to the source range. You choose:
- From which module the repeated section starts
- Until which module the repeated section ends
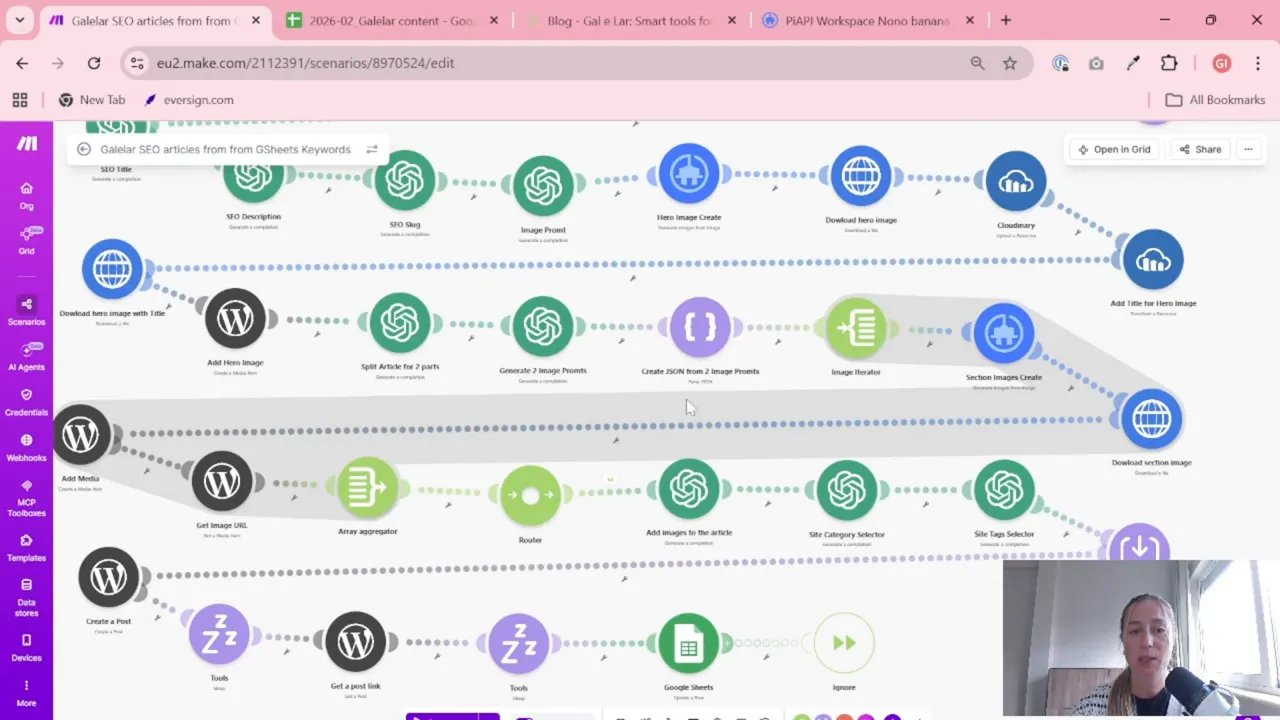
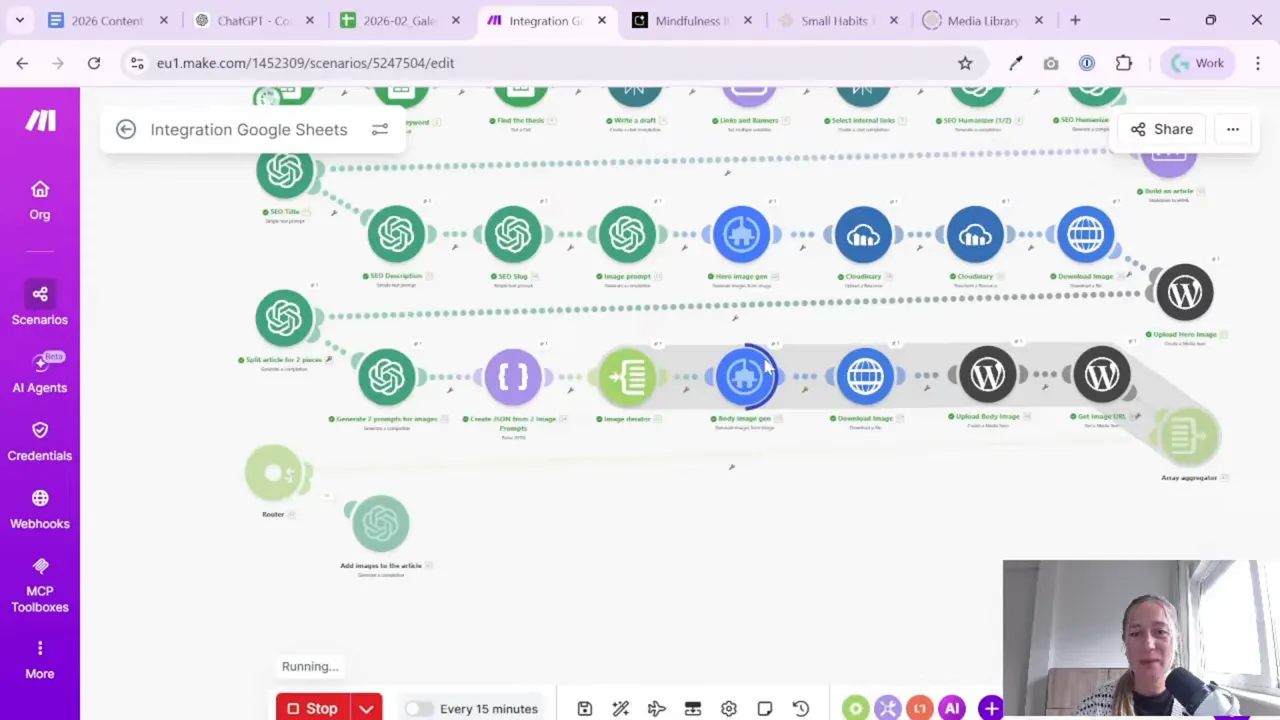
In Make, the repeated section is usually shown with a gray background. That visual cue is helpful because it shows exactly which part of the scenario is being repeated by the iterator.
Inside the array aggregator, the aggregated field should be the media item ID.
So now your scenario does not just upload images separately. It also stores the results in a structured list you can use in the next step.
Step 8: Add a router if your scenario behaves oddly
This is a small but useful practical note.
In this setup, a router was added after the aggregation step because there had been some issues or buggy behavior in the scenario, and adding the router helped it work properly.
I like this kind of detail because it reflects real life. Not every automation issue is philosophical. Sometimes you add one module, save, rerun, and suddenly Make stops being dramatic.
So if your flow feels unstable after aggregation, adding a router can be worth trying.
It is not presented as a universal rule here, but as a practical fix that worked in this scenario.
Step 9: Fetch the media item details to get the actual image URLs
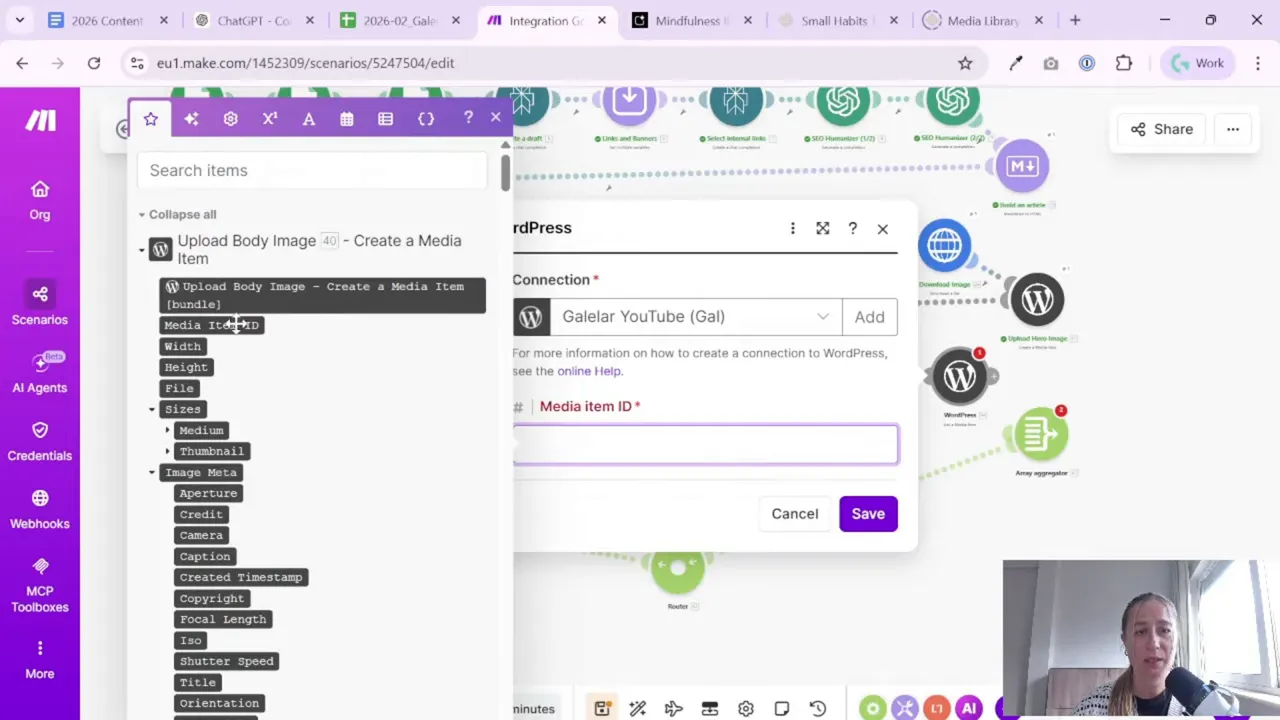
After aggregation, you have media item IDs. But for inserting images into the article, what you really need is the source URL of each image.
So the next WordPress step is Get media item.
For each media item ID collected in the array, retrieve the corresponding media object from WordPress, then pull the source URL.
This gives you the direct image links stored on your own site, which is exactly what you want in the article body.
At this stage, your automation now has:
- The article content
- The uploaded images in WordPress
- The source URLs for those uploaded images
That is enough to ask an AI text model to place the images into the content.
Step 10: Use a text model to insert the images into the article
The next module uses ChatGPT to update the article.
The instruction is very specific: do not rewrite the article, do not change the text, just add the images into it.
That is an important prompt-writing principle. If you want a model to make a narrow edit, tell it clearly to stay within those limits.
The inputs for this module are:
- The article content, coming from the markdown output created earlier
- The array of image source URLs collected from WordPress
The prompt file used in the scenario includes these instructions and can be reused, but it is important to adapt prompts to your own business and content style. A prompt that works for one niche may need small changes for another.
Here the goal is not fancy AI writing. The goal is controlled editing.
You already have the article. You already have the images. This step simply combines them.
Step 11: Test the scenario by running it once and checking repetition counts
Once everything is mapped, save the scenario and run it once.
When testing in Make, one of the easiest ways to understand what happened is to look at the little run counters on each module.
If a module ran once, you will see one execution. If the iterator repeated a block twice, the modules inside that repeated block should show two executions.
That gives you a fast visual check that the iterator is doing what you intended.
In this scenario, because there are two body image prompts, the image-generation and upload modules should run twice.
That is exactly the behavior you want:
- Run 1 handles image 1
- Run 2 handles image 2
Then the aggregator collects both results into one array for the next step.
Step 12: Check the image URLs and confirm the files appear in WordPress
Before you call the whole thing done, do two quick checks.
Check 1: Validate the source URLs
Look at the array output and confirm that the source URLs are valid and open correctly.
This tells you that:
- The files uploaded successfully
- The correct URLs were retrieved from WordPress
- The next AI step has proper links to work with
Check 2: Open the WordPress media library
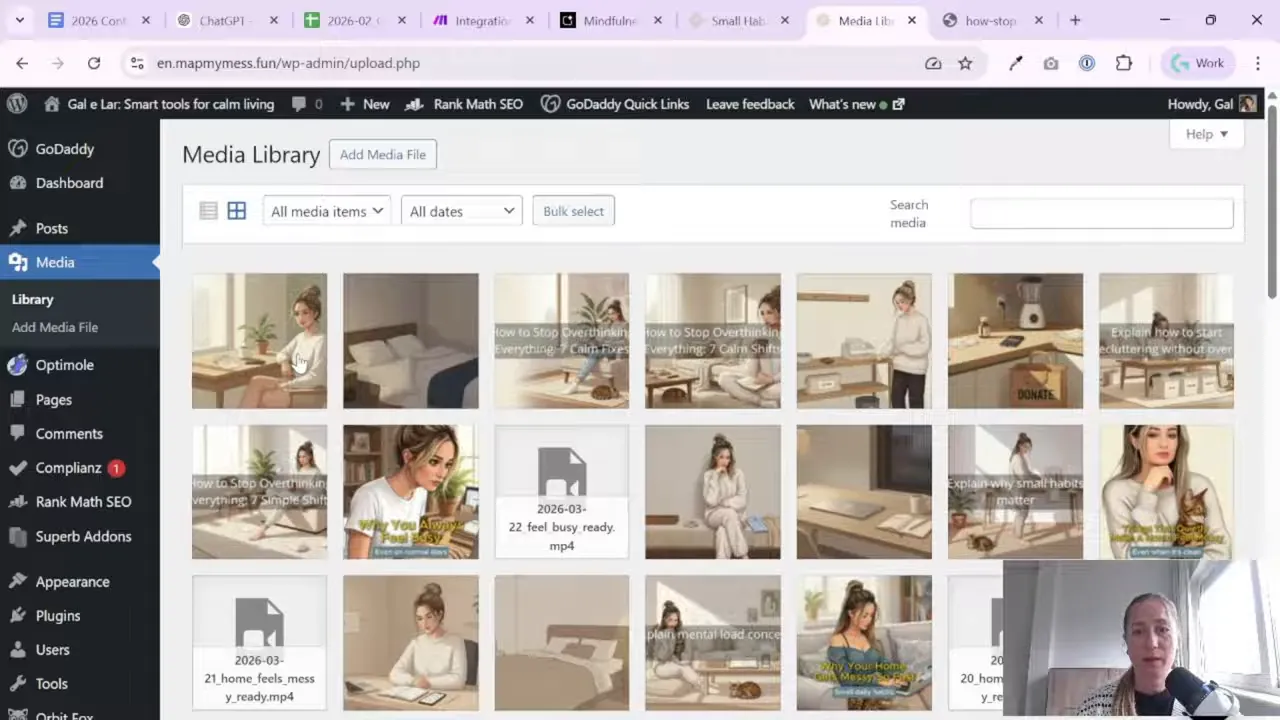
Then go to your site’s media library and make sure both images are there.
If they appear correctly in the media library, the upload portion of the automation is working.
These quick manual checks are worth the minute they take. Automation saves time, yes, but only after you trust it.
Step 13: Keep an eye on image-generation costs
There is also a useful cost note in this setup.
The example uses Nano Banana Pro for one image at 10 cents and Nano Banana for the two additional body images at 3 cents each. That brings the total image generation cost for the article to 16 cents.
That kind of rough cost tracking is smart, especially if you plan to publish at scale.
You do not need a giant spreadsheet from day one, but you should know your approximate cost per article. Once you start generating content in larger volumes, even small per-article costs add up.
If you are building a content production machine for a business, this matters just as much as whether the modules technically work.
Step 14: Treat this as one part of a bigger publishing workflow
By the end of this setup, you are very close to a fully automated publishing process.
The scenario now covers a lot:
- Article creation
- Meta tag generation
- Main image creation
- Additional body image creation
- Upload to WordPress
- Collection of image URLs
- Automatic insertion of those images into the article
The next logical pieces are things like categories and tags. Those are separate topics and worth handling cleanly rather than cramming everything into one giant flow.
If you are interested in this broader kind of automation work, you may also like the resources on the Gaille Reports blog and the overview of digital marketing and reporting automation services.
Why this setup works well for non-technical marketers
I like this workflow because it solves a very practical problem without requiring code.
You do not need to build a custom script to loop through prompts, upload assets, and rewrite post content. Make handles the flow logic, WordPress stores the files, and the text model handles the final insertion step.
The most important ideas are not complicated:
- Iterator = repeat this block for each image prompt
- Array aggregator = collect the results from those repeated runs
- Get media item = convert WordPress IDs into usable image URLs
- ChatGPT step = place the images into the article without rewriting everything
Once you understand that chain, the whole scenario makes sense.
Summary
If you want to automatically add multiple AI-generated images to a WordPress article, the cleanest approach in Make is to combine an iterator with an array aggregator.
The iterator processes each image prompt one by one. The repeated block generates, downloads, and uploads each image to WordPress. The array aggregator collects the returned media IDs. Then WordPress provides the final source URLs, and a text model inserts those images into the article.
It is a tidy workflow. It is practical. And most importantly, it removes one more batch of manual work from content publishing.
If your current process still involves downloading images manually, uploading them one by one, and editing posts afterward, this setup is a very nice upgrade.
Want to go further with your marketing automation setup?
