
Google Sheets to BigQuery Made Easy – No Coding Required

Are you looking to seamlessly integrate your Google Sheets data into BigQuery without writing a single line of code? You’re in the right place! In this article, I’ll walk you through the simple process of how to create a BigQuery table from Google Sheets, enabling you to perform advanced data analysis and reporting with ease.
If you want a more visual walkthrough, feel free to check out my video tutorial below where I demonstrate the entire process step-by-step.
Step 1: Prepare Your BigQuery Project and Dataset
Before importing your Google Sheets data, ensure you have a BigQuery project set up. If you don’t have one yet, create a new project in the Google Cloud Console. Next, create or select an existing dataset where your new table will live.
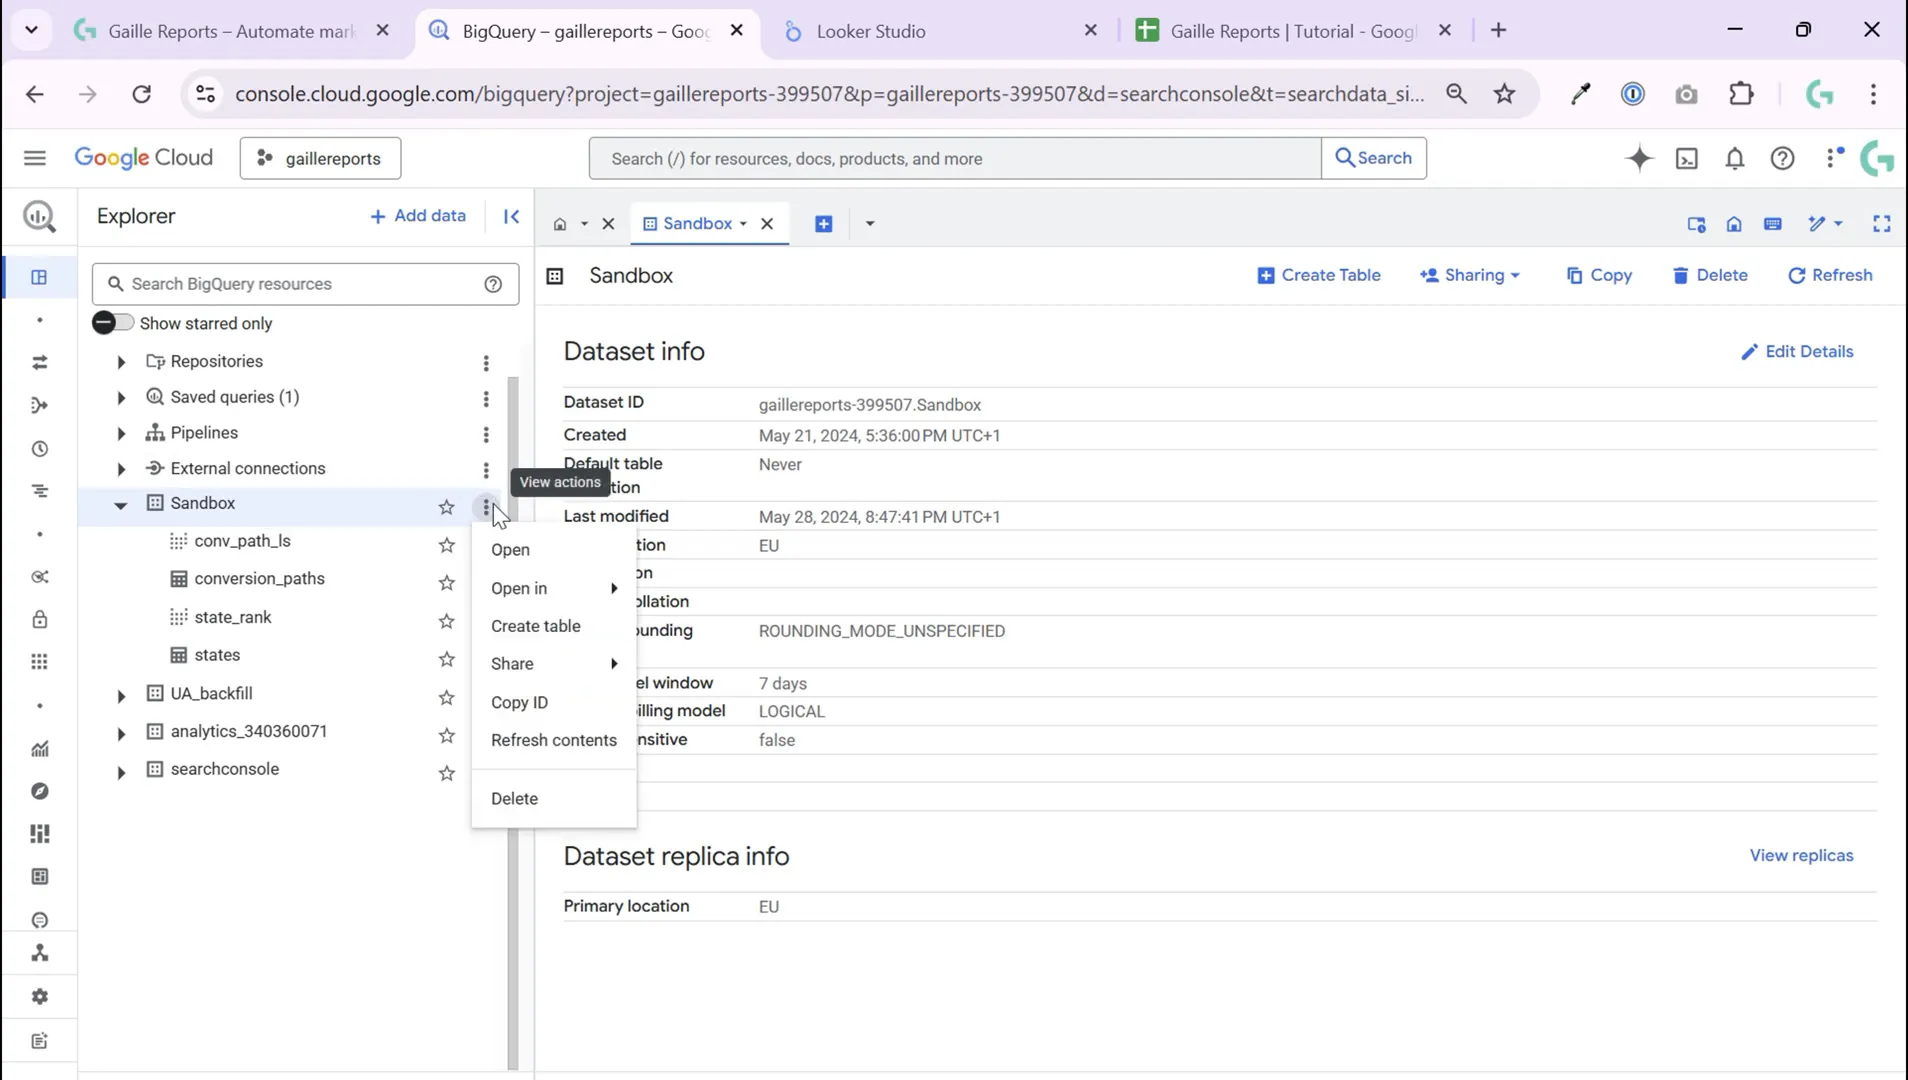
In my example, I already had a pet project running in BigQuery and a dataset ready to use. Once you’re inside your dataset, click the three dots next to it and select Create Table.
Step 2: Select Google Sheets as Your Data Source
In the Create Table interface, you’ll be asked to choose the source of your data. Select Drive as the source, then choose Google Sheets as the file format.
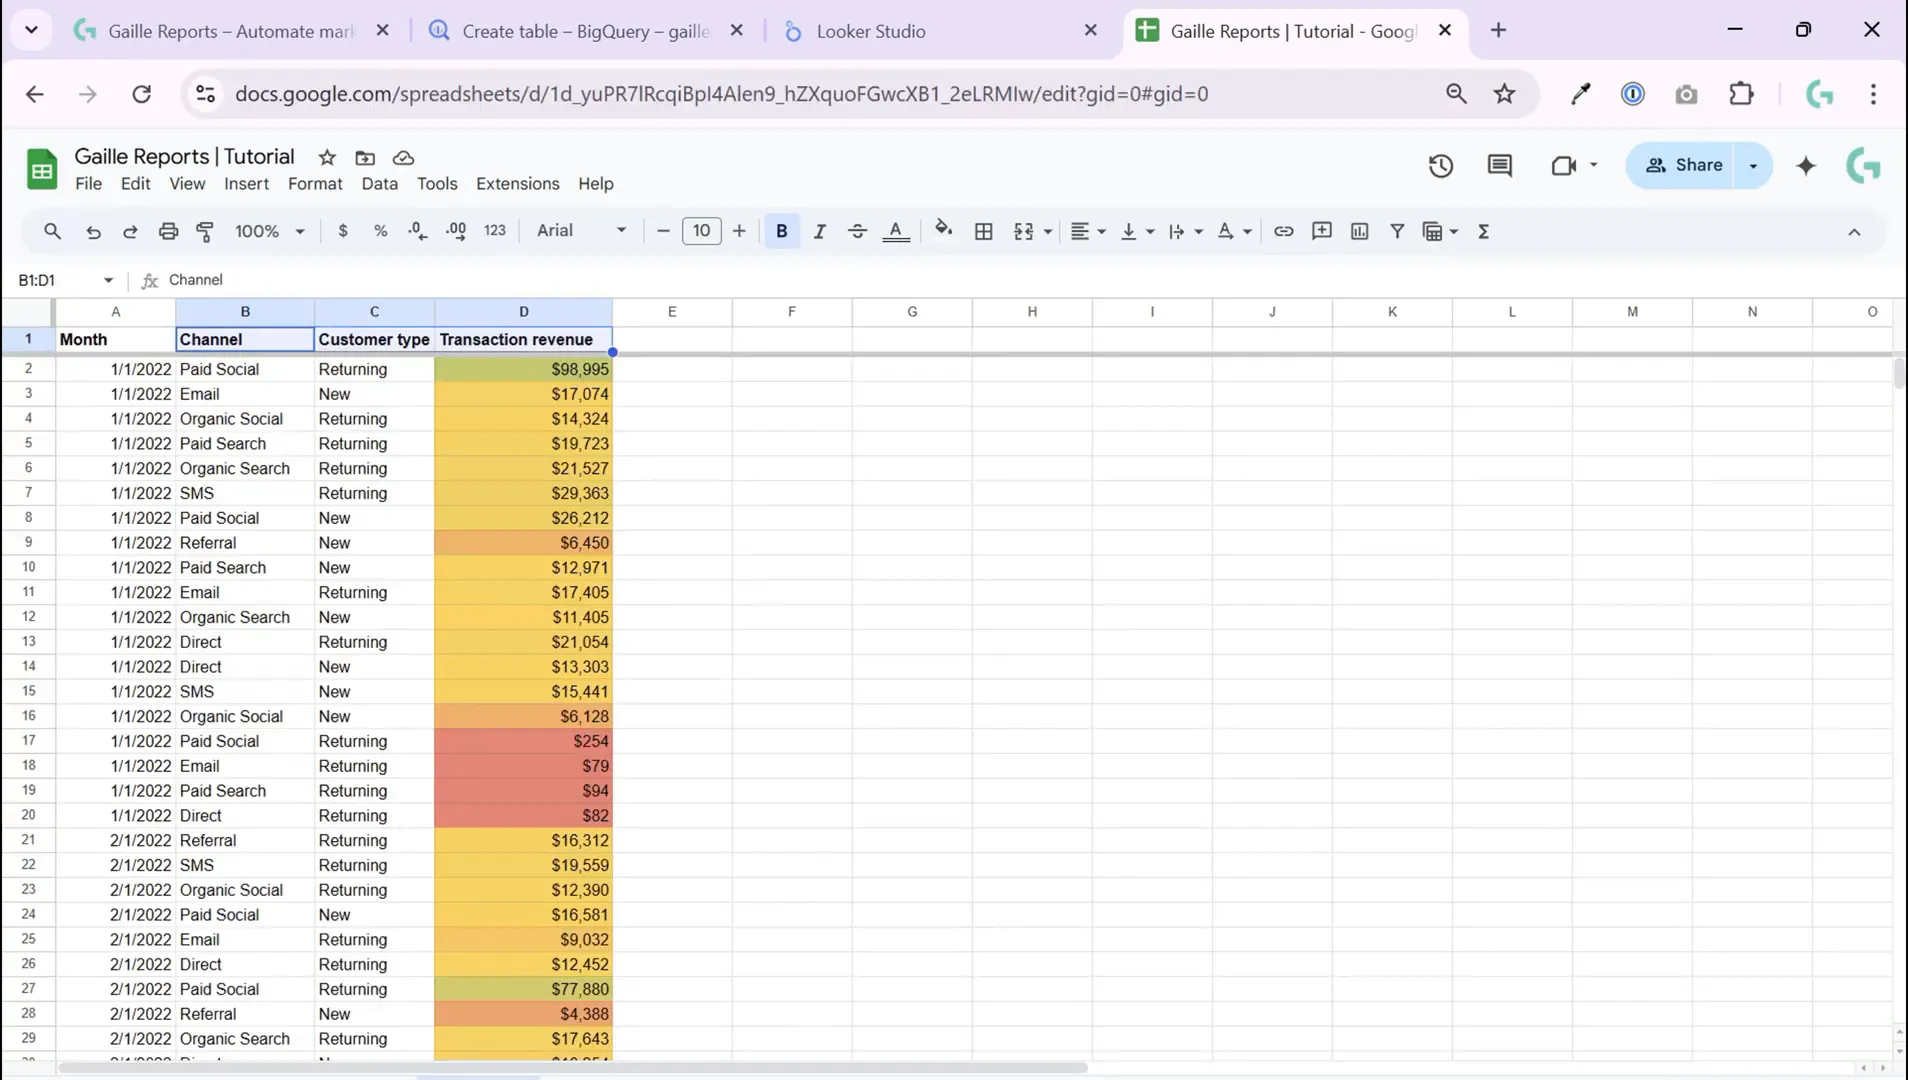
Next, you need to provide the URL of your Google Sheets document. Simply open your Google Sheet in a new tab, copy the URL from your browser’s address bar, and paste it into the Drive URL field in BigQuery.

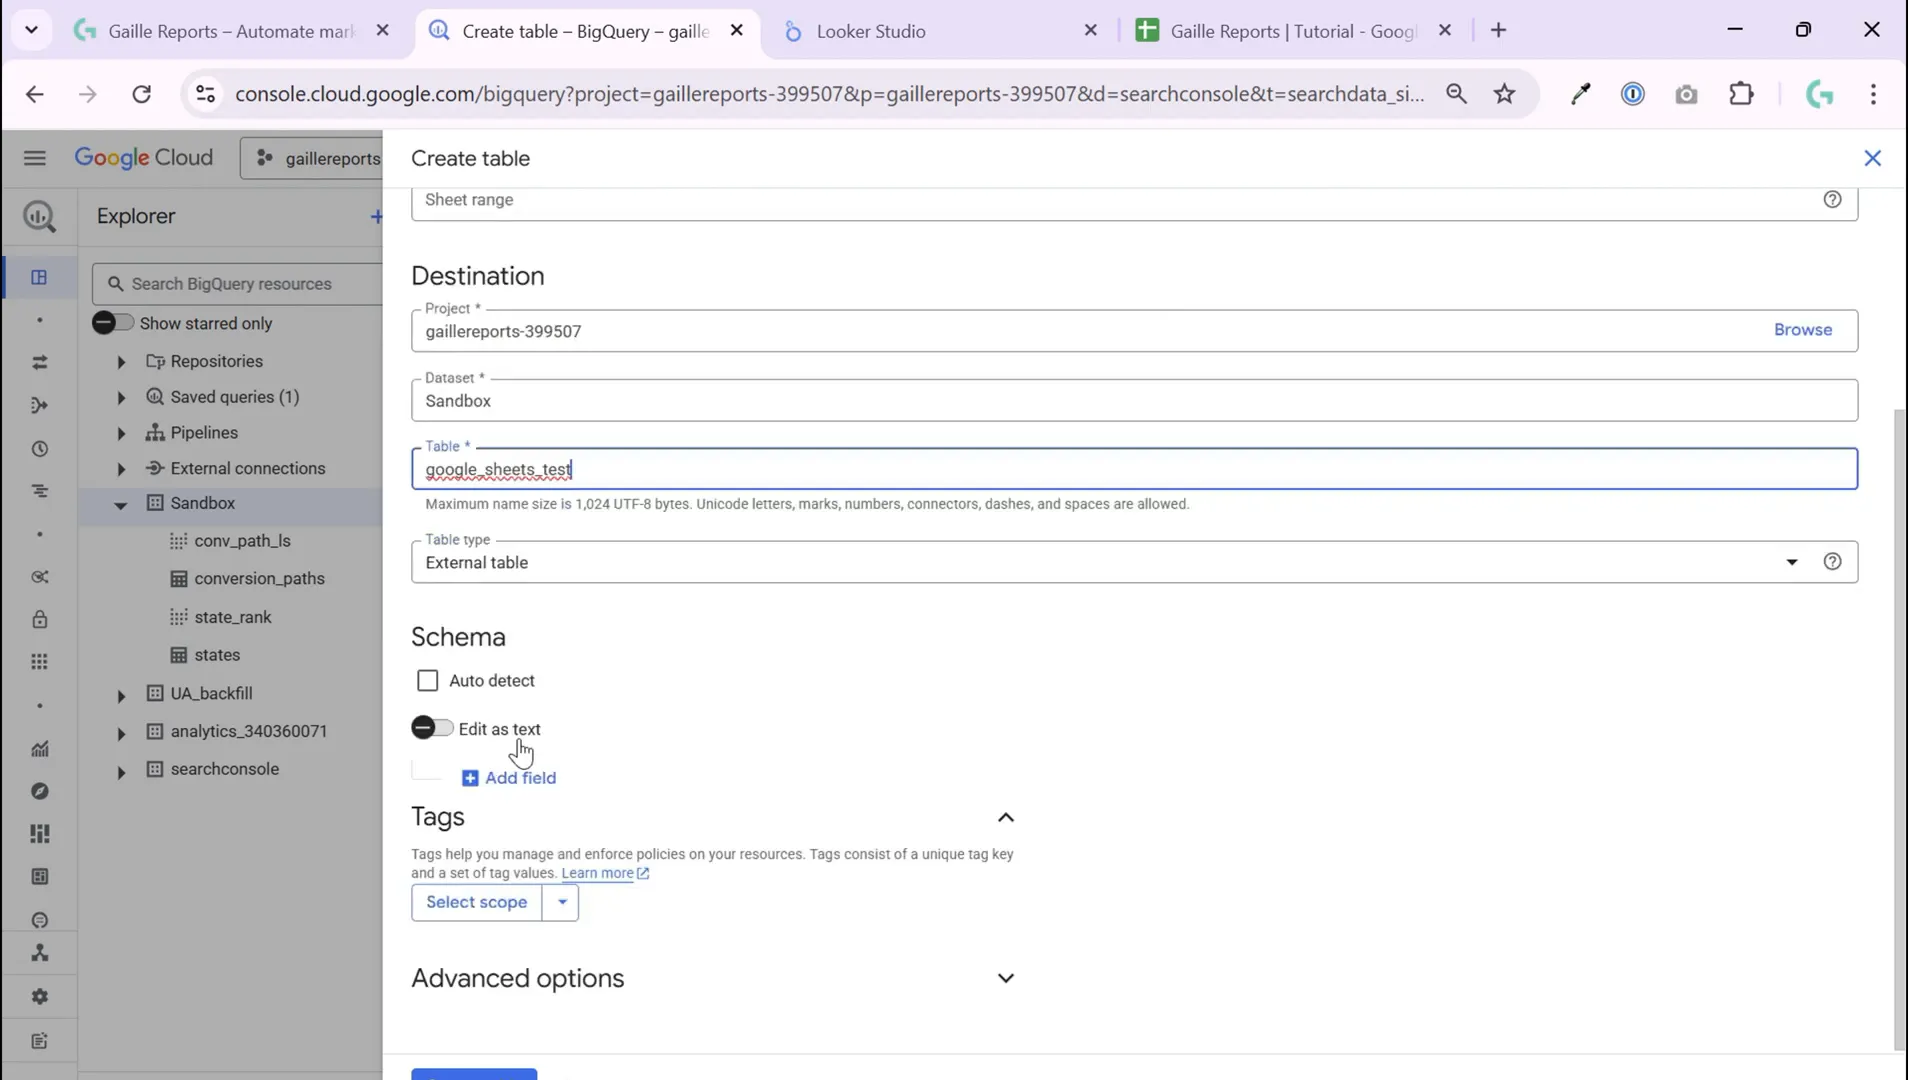
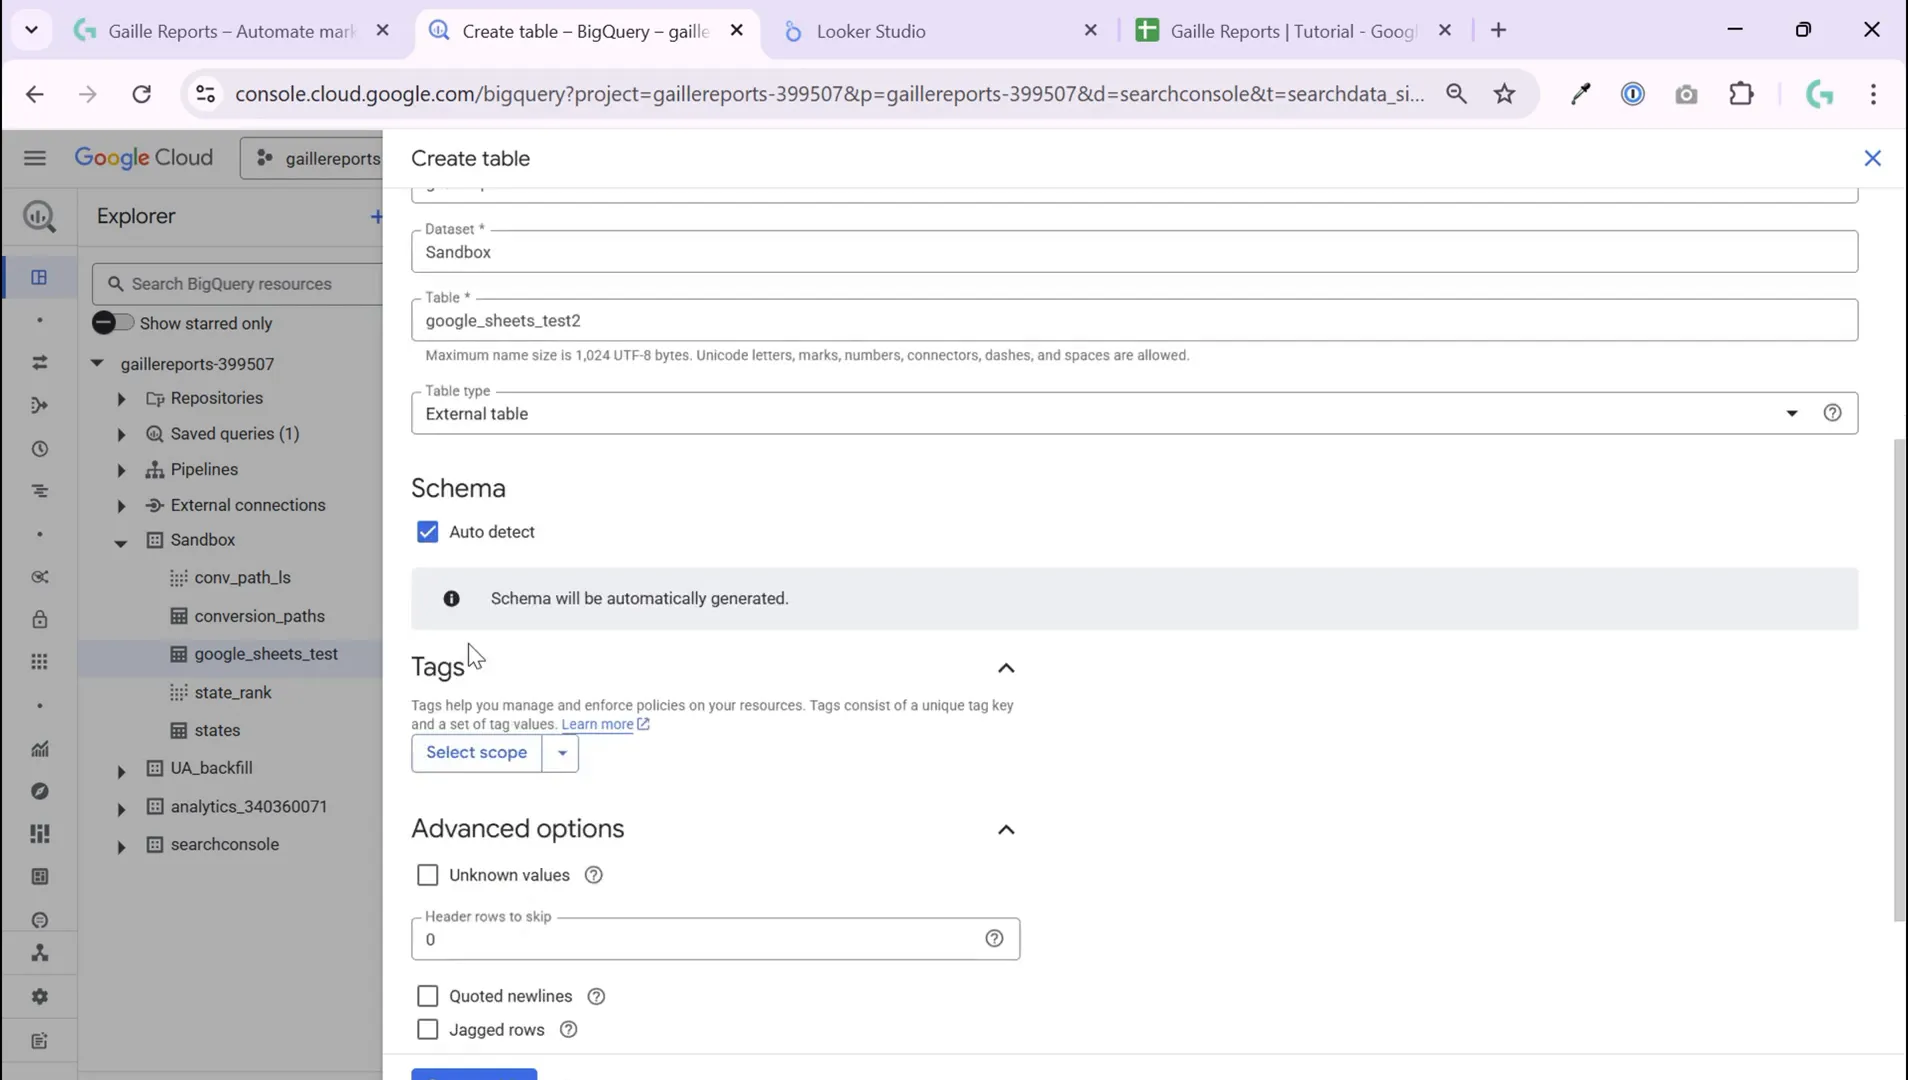
Step 3: Name Your Table and Configure Schema Settings
Now, decide on the name of the new BigQuery table you want to create. For my test, I chose Google Sheets test as the table name.
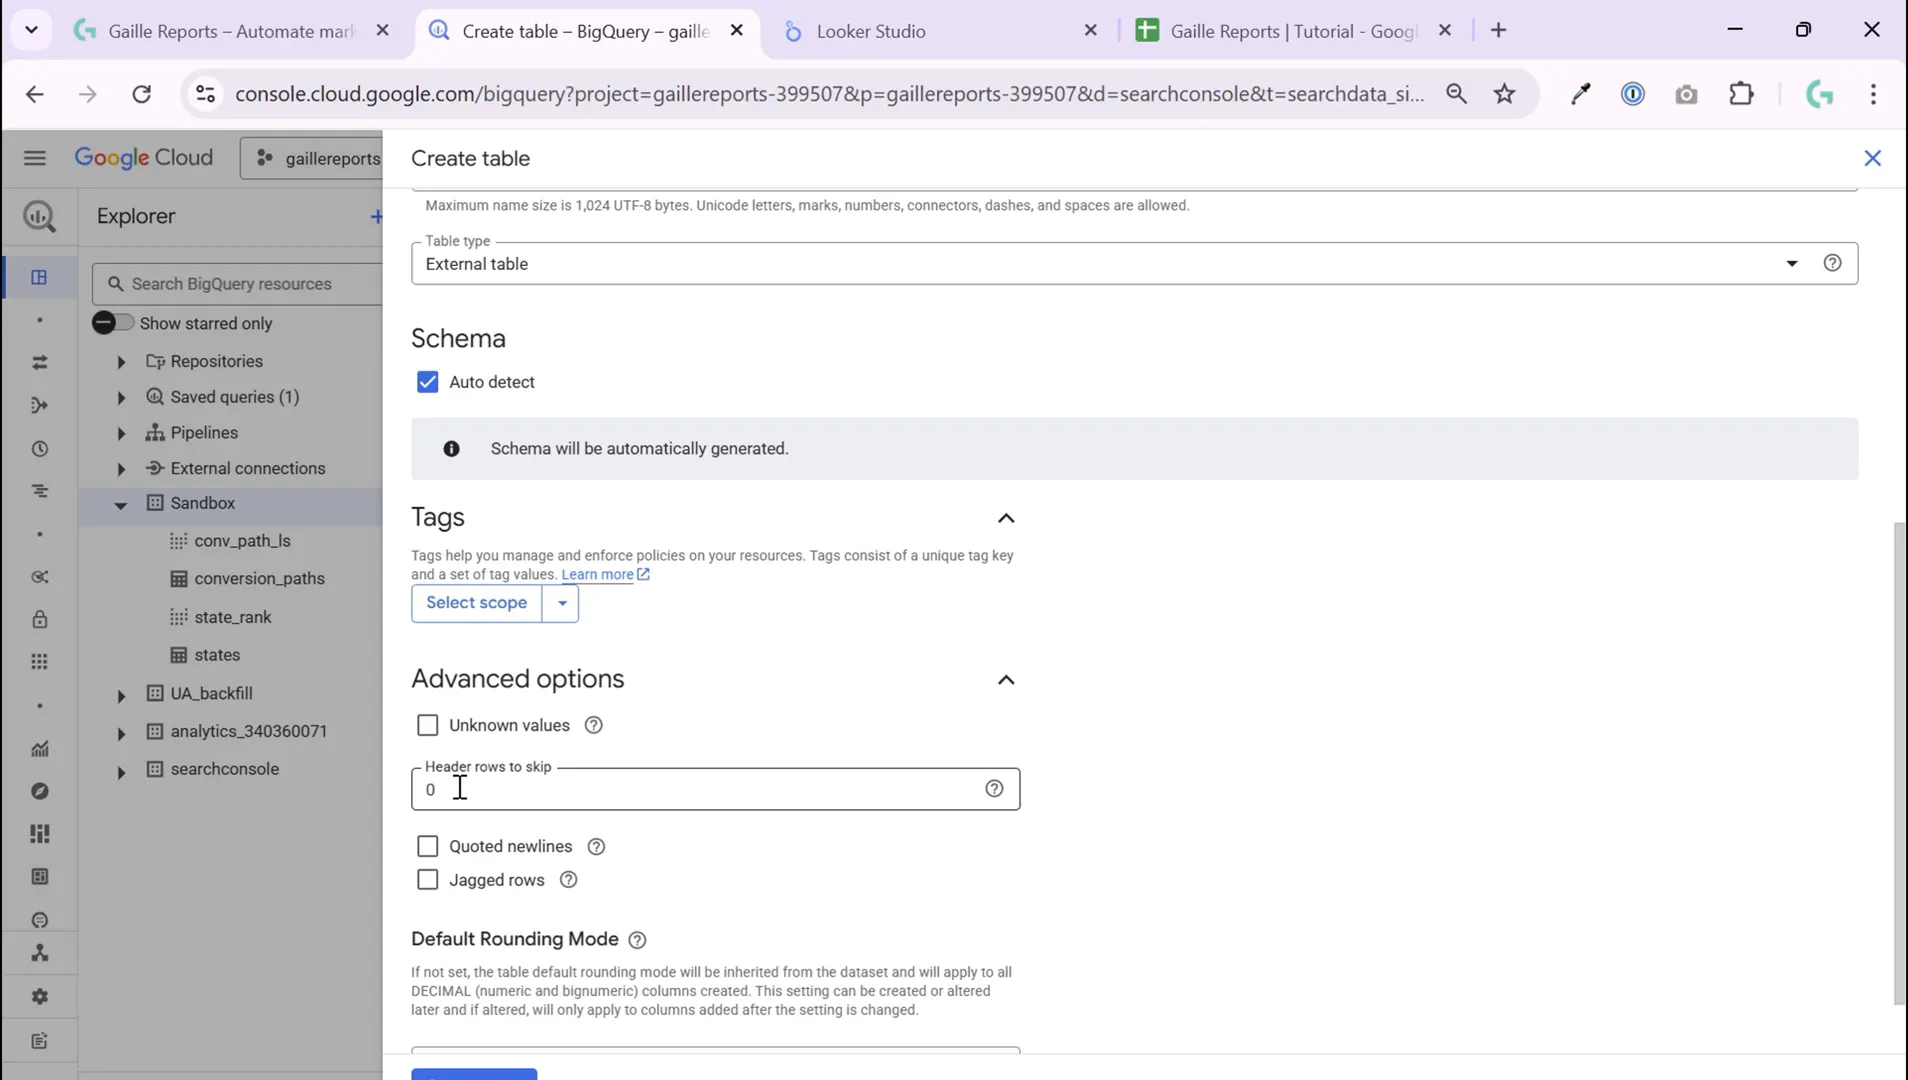
You’ll then see the option to either auto-detect the schema or manually specify it. Auto-detection works well in many cases, but if your data has complex types or you want more control, you can add fields manually. For this tutorial, I decided to try the auto-detected schema.
Step 4: Skip the Header Row in Advanced Options
One crucial step not to miss is telling BigQuery to skip the first row of your Google Sheet if it contains headers (which it usually does). To do this, expand the Advanced Options and check the box for Skip leading rows, setting it to 1.
This ensures that your column names are not treated as data, which could otherwise lead to incorrect results or errors.
Step 5: Create the Table and Inspect the Data
Click Create Table to finish the process. BigQuery will now import your Google Sheets data as a new table.
After creation, open the table to verify the data. You might notice that if you don’t specify the exact sheet or tab in your Google Sheets document, BigQuery will default to importing the first tab. This can sometimes lead to unexpected data being imported.
Step 6: Specify the Exact Sheet or Range to Import
If your Google Sheets file contains multiple tabs, and you want to import a specific one, you need to specify the sheet name or range in BigQuery.
Go back to Create Table, select Google Sheets again as the source, and this time use the Sheet Range option to specify which tab or range you want to import. For example, if your tab is named AD, you would enter AD in the sheet range field.
Repeat the previous steps: set table name (e.g., Google Sheets test two), choose auto schema detection, and again skip the first header row in advanced options.
Step 7: Query and Use Your New BigQuery Table
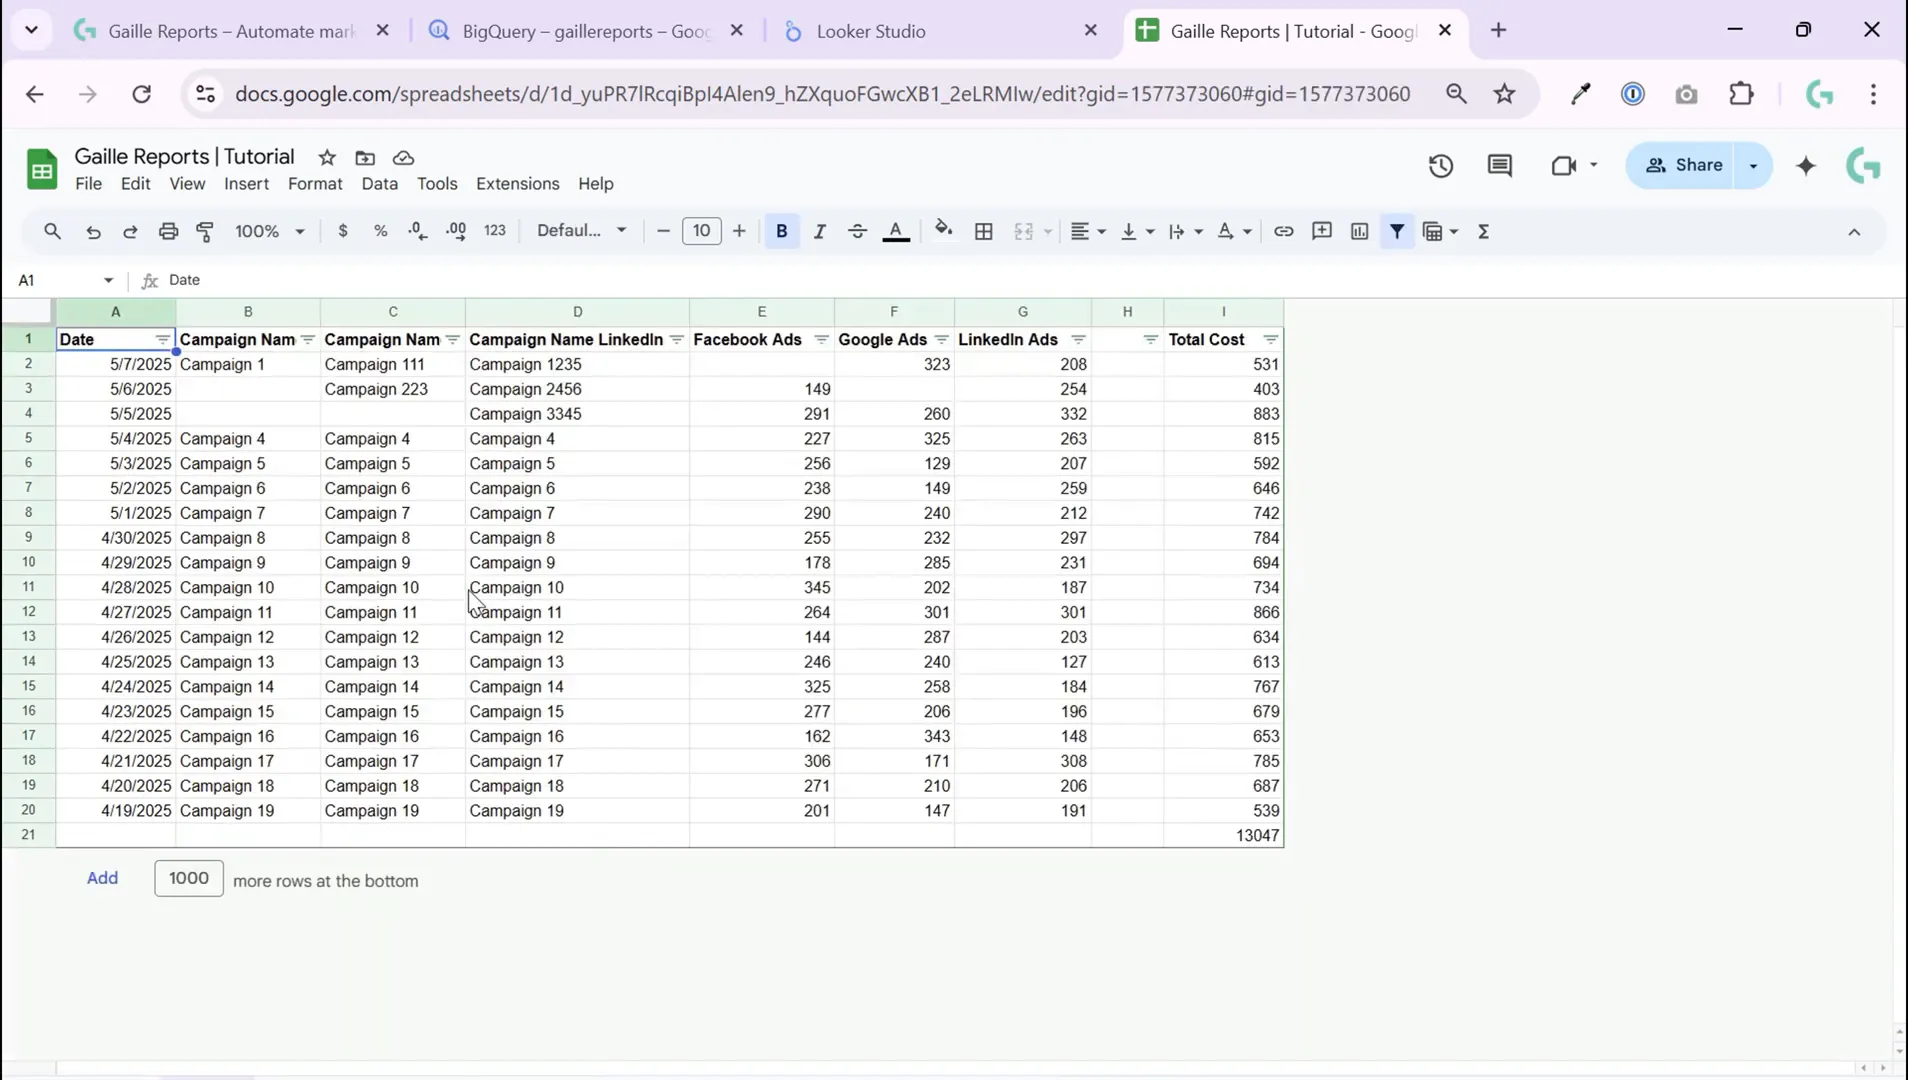
Once your table is created with the correct sheet or range, you can open it and start querying your data. You’ll see columns like Month, Channel, Customer, and Transaction ready for analysis.
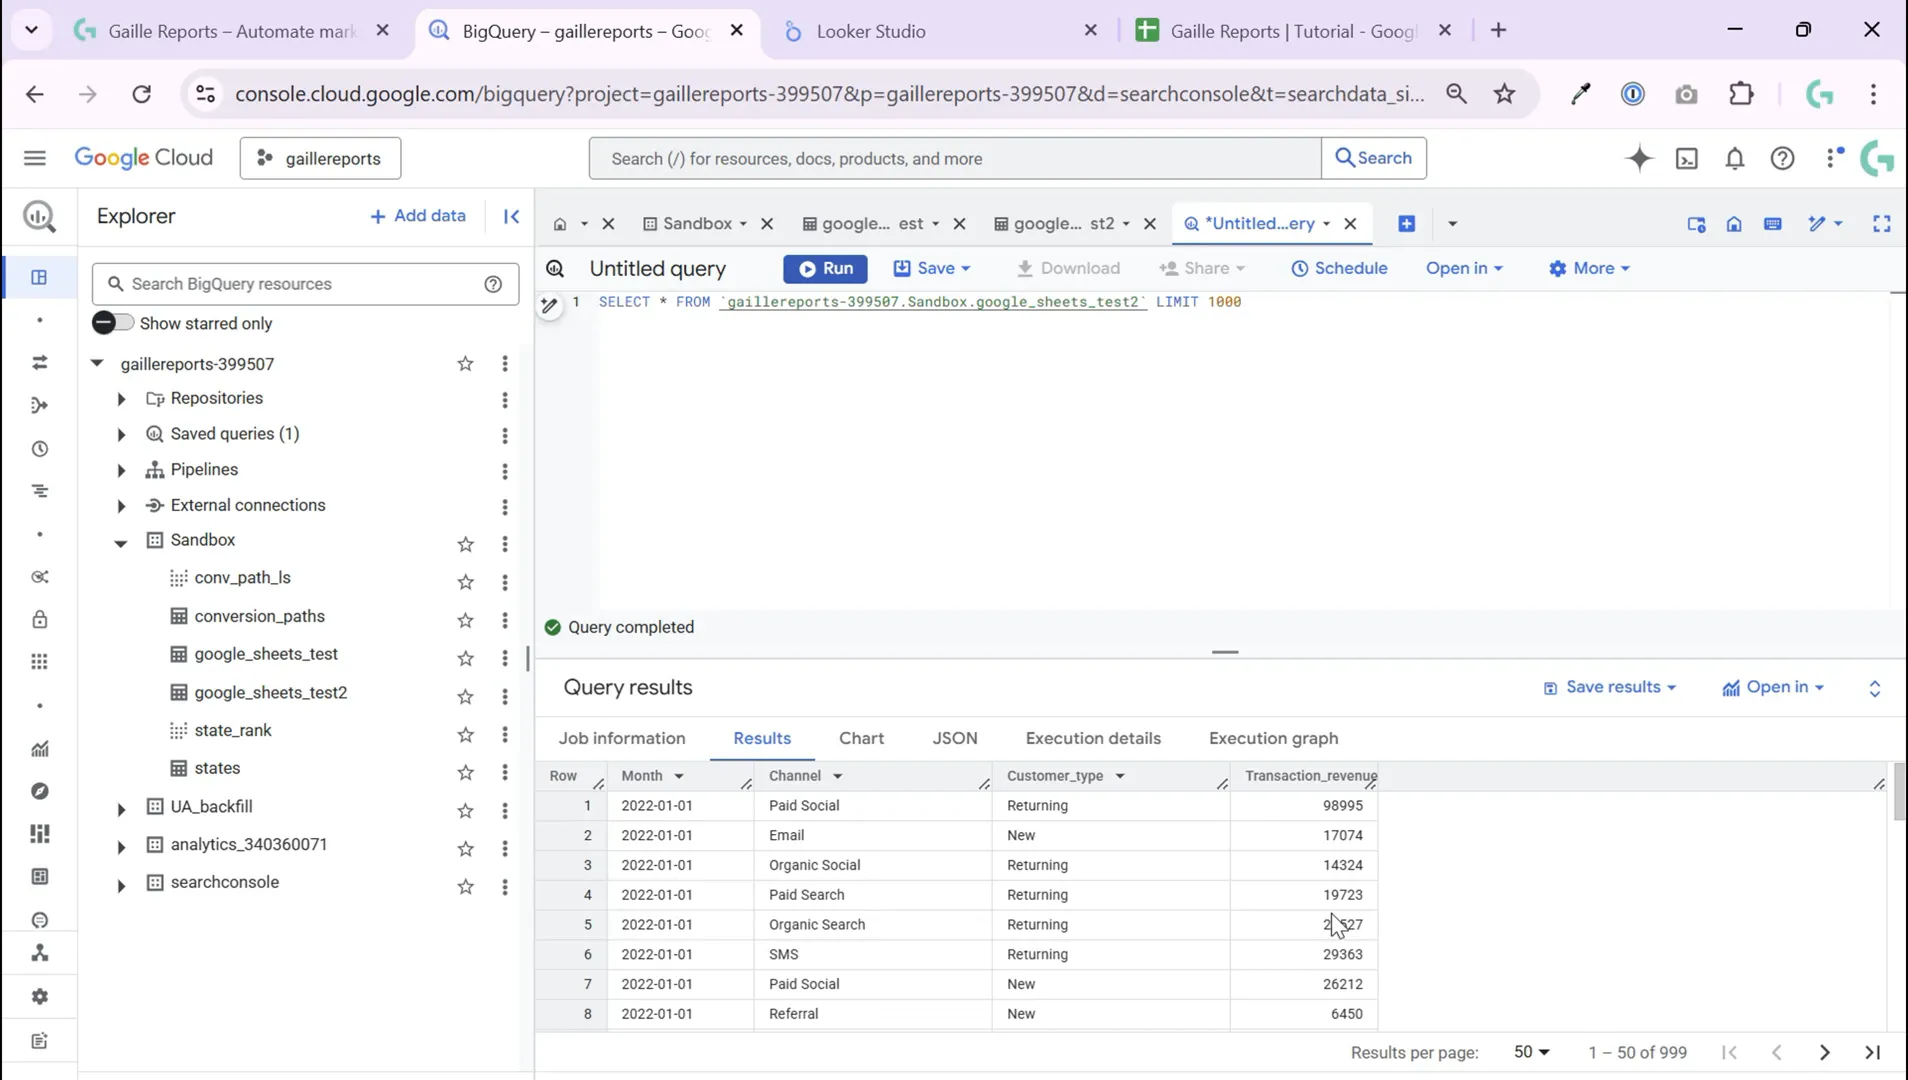
This table can now be joined with other datasets you have in BigQuery, such as Google Analytics 4 or Google Search Console data, to enrich your marketing reports and dashboards.
Why Is Specifying the Sheet Range Important?
If you don’t specify the sheet range, BigQuery will default to the first tab of your Google Sheets file, which may not be the one you want. By setting the exact tab or range, you ensure your BigQuery table contains the correct data, avoiding confusion or errors in your analysis.
Bonus Tips for Working with Google Sheets and BigQuery
- Keep your Google Sheets tidy: Make sure your data is formatted consistently with headers in the first row and no empty rows or columns.
- Refresh your BigQuery table regularly: If your Google Sheets data updates frequently, you may want to recreate or refresh your BigQuery table to keep your analysis up to date.
- Use named ranges: For more precise imports, consider defining named ranges in your Google Sheets and referencing those in BigQuery.
- Manage permissions carefully: Ensure that your BigQuery service account has access to the Google Sheets file in Google Drive.
Conclusion
Creating a BigQuery table from Google Sheets is a straightforward process that requires no coding, making it accessible for marketers, analysts, and anyone who wants to leverage BigQuery’s powerful data analysis capabilities using familiar spreadsheet data.
By following these steps—selecting your Google Sheets as a source, naming your table, choosing your schema, skipping headers, and specifying the correct sheet tab or range—you can seamlessly integrate your spreadsheet data into BigQuery.
Now, you can query, join, and visualize your data alongside other datasets, unlocking new insights for your marketing efforts or business analysis.
If you found this guide helpful, be sure to check out more tutorials and resources on my blog to become a Looker Studio and Google Sheets pro!