
Automate WordPress Hero Images in 12 Simple Steps
If you already automate blog writing, the next obvious step is the image. That is usually where the workflow gets messy again: you still need to open another tool, write a prompt, test results, and manually upload files. In this guide, I’ll show you a simple way to automate hero image generation for a WordPress content workflow using Make, ChatGPT, Google AI Studio, and piAPI.
The goal here is practical. You start with an article title that already exists in your content pipeline, generate a good image prompt from it, create an image that matches your brand style, download the file, and prepare it for upload to your site. If you want a visual walk-through, here is the tutorial:
This setup is especially useful if you want a consistent visual style across blog posts, including recurring characters or branded illustration styles. That part sounds easy until you actually try it. Keeping the same character consistent across many AI-generated images is hard. This workflow is built to make that easier.
Table of Contents
- Step 1: Start with the content automation you already have
- Step 2: Choose an image model that can keep visual consistency
- Step 3: Use Google AI Studio instead of Gemini directly
- Step 4: Generate the image prompt with ChatGPT
- Step 5: Test the prompt manually before adding it to the full automation
- Step 6: Add a reference image to keep the same style and character
- Step 7: Set the image parameters in Google AI Studio
- Step 8: Connect Make to the image model through piAPI
- Step 9: Budget for testing so you do not overthink the cost
- Step 10: Generate the image in Make and check the result
- Step 11: Download the generated image file with an HTTP module
- Step 12: Run the full scenario from keyword to image
- Step 13: Keep improving the workflow instead of chasing perfection on day one
- Summary
Step 1: Start with the content automation you already have
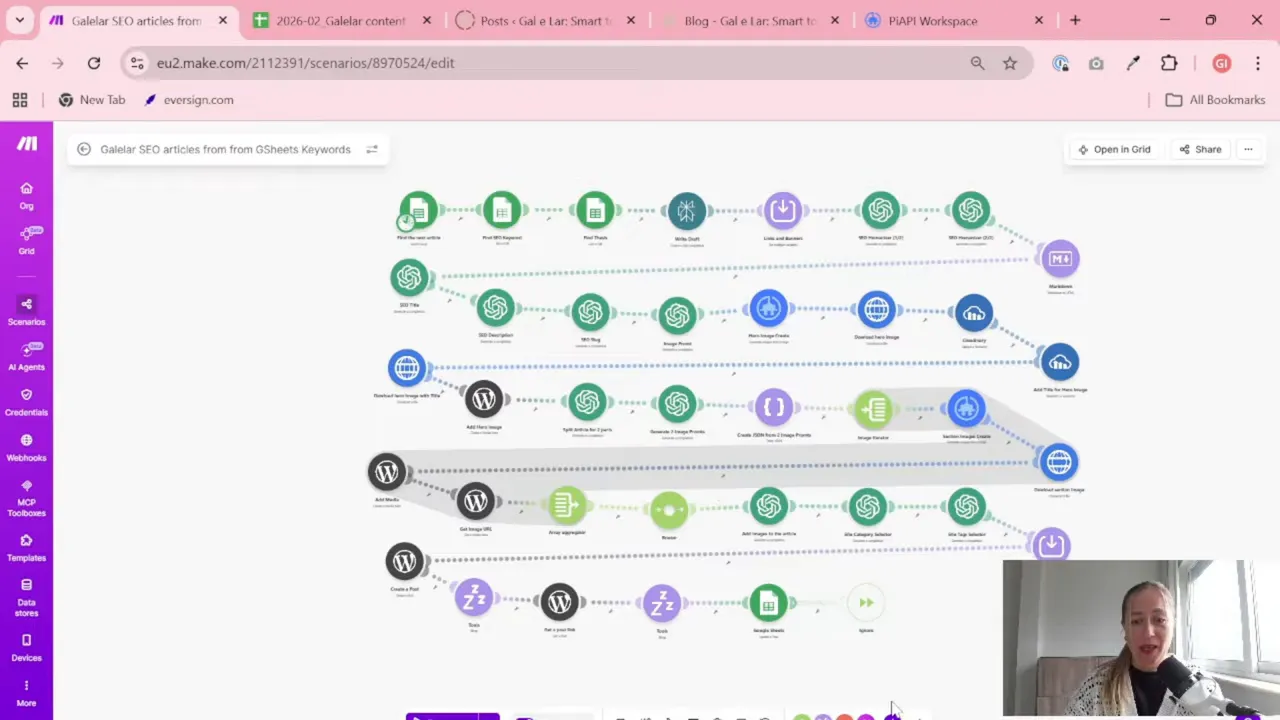
This image workflow is not meant to stand alone. It sits inside a bigger Make.com scenario that already creates blog posts automatically.
In this case, the content pipeline already does the following:
- Pulls keywords from Google Sheets
- Uses Perplexity to prepare article drafts or research
- Uses ChatGPT to write the article
- Formats the article in Markdown
- Generates SEO fields such as title, description, and slug
Once that part is done, the missing piece is the hero image. So the article already exists. The title already exists. Now you can use that title as the base for the visual prompt.
If you are still building the rest of your reporting and automation stack, the Gaille Reports blog has more tutorials around marketing data, automation, and practical no-code workflows.
Step 2: Choose an image model that can keep visual consistency
Not all image models are equally good at keeping the same character from one image to another. If your blog uses a recurring mascot, person, or illustration style, this matters a lot.
After testing different models, the workflow here uses Google’s Nano Banana model through Google AI Studio. The reason is simple: it performed best for generating similar-looking images based on a reference image.
That does not mean it will be the best model for every use case. But if your main need is “I want the same girl, cat, mascot, or brand character in many poses and scenes,” this is a strong option to test.
You can explore Google’s model environment through Google AI Studio, which gives API-based access to models in a way that can be connected to automation tools.
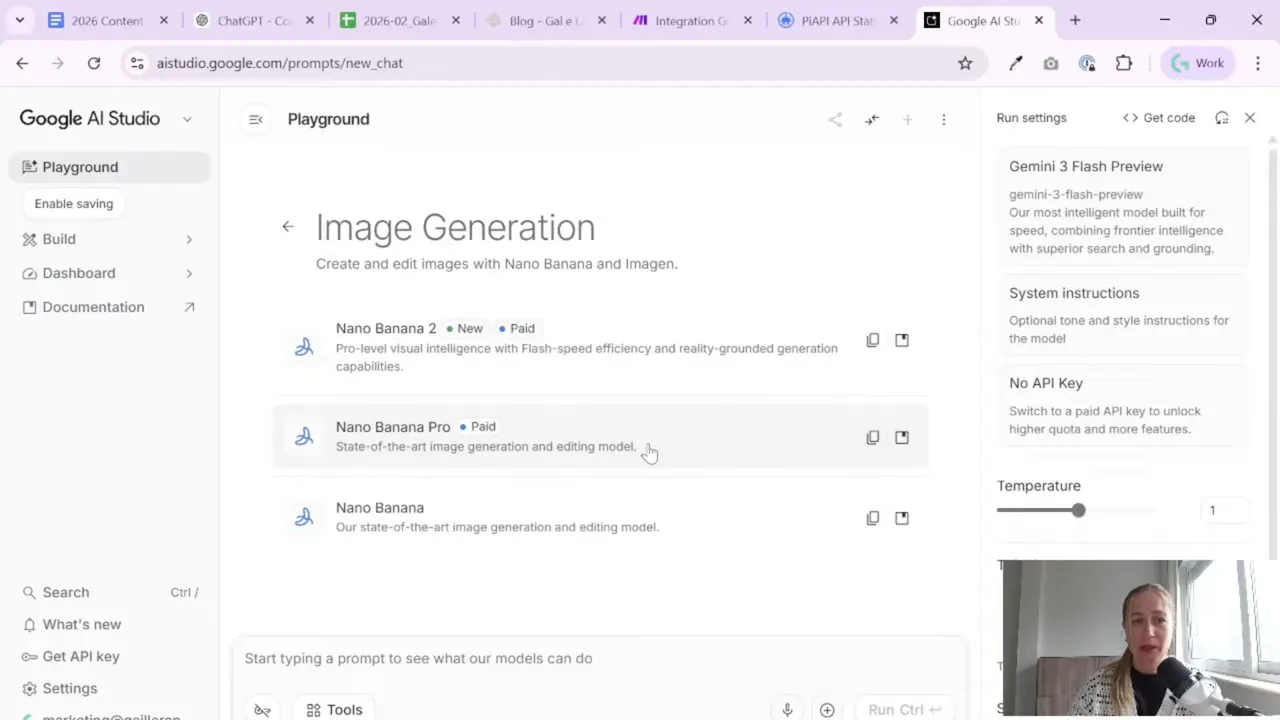
Step 3: Use Google AI Studio instead of Gemini directly
This is an important detail. You do not connect Make directly to the regular Gemini interface. Instead, you use Google AI Studio because it lets you create an API key.
That API key is what makes automation possible.
Inside Google AI Studio, you can:
- Test image generation manually
- Select the model you want to use
- Create and manage an API key
- Experiment with prompt quality before automating everything
When setting this up for the first time, go into the settings area in Google AI Studio and create an API key for your project. Name it clearly so you know what it is for later. You will need this key when connecting the workflow through piAPI.
If you have ever built dashboards or reporting automations before, this step feels familiar. The same pattern applies: test first, then connect by API, then automate.
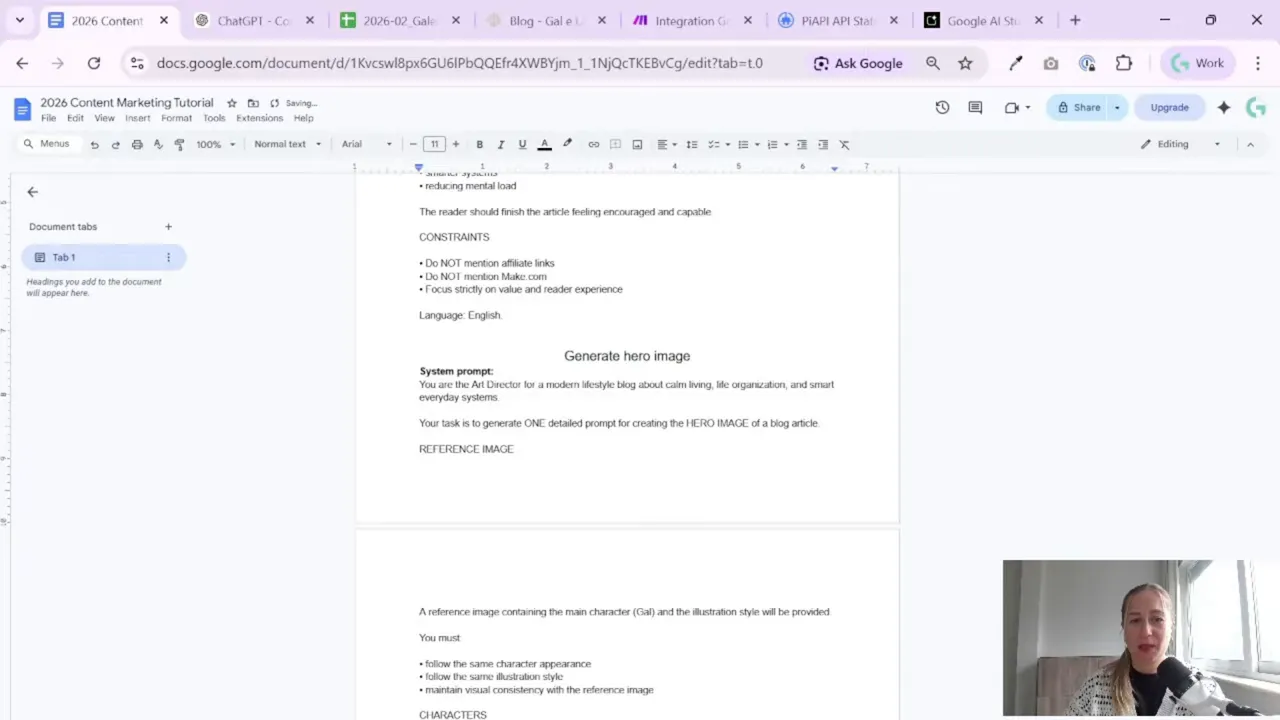
Step 4: Generate the image prompt with ChatGPT
One of the smartest parts of this workflow is that ChatGPT is not generating the image directly. Instead, it generates the prompt for the image model.
That gives you more control.
In Make, add an OpenAI module to generate a completion. The purpose of this step is to turn the article title into a detailed visual instruction for your image model.
The prompt structure has two parts:
- System prompt: tells ChatGPT to behave like an art director and create one image prompt
- User prompt: passes the article title and explains that the image should follow the same style as a reference image
That combination works well because it gives enough structure without becoming too rigid. The article title provides context. The reference image provides visual direction. And ChatGPT helps turn both into a usable prompt.
A practical tip here: do not assume the first prompt will be perfect. Usually it won’t be. Prompting for images is a little like interior decorating. You move one thing, then another thing looks strange. Then suddenly there are two cats and extra hands.
That is normal.
The Automation Tool I Use for This Workflow
## Make
For automation, one of my favorite tools is Make.com.
I use it to connect different tools and automate repetitive workflows — for example moving data between APIs, Google Sheets, and reporting systems.
The easiest way to improve prompt quality is to iterate:
- Generate a prompt
- Test the image
- Note what looks wrong
- Ask ChatGPT to improve the prompt based on those issues
- Test again
This trial-and-error phase is worth doing before you automate the final version. Once you have a prompt format that works, you can lock it into your scenario.
Step 5: Test the prompt manually before adding it to the full automation
Before running a long scenario end to end, it is much easier to test just the image-prompt step on its own.
Inside Make, you can run only the relevant module and pass a sample article title into it. That gives you the generated prompt in the output, which you can then copy and test manually in Google AI Studio.
This matters because it separates two problems:
- Is the prompt itself good?
- Is the automation setup working?
When you test manually first, you avoid debugging both at the same time.
Paste the generated prompt into Google AI Studio, add your reference image, and run image generation there. This helps you fine-tune the prompt and choose the best model settings before connecting everything through an API layer.
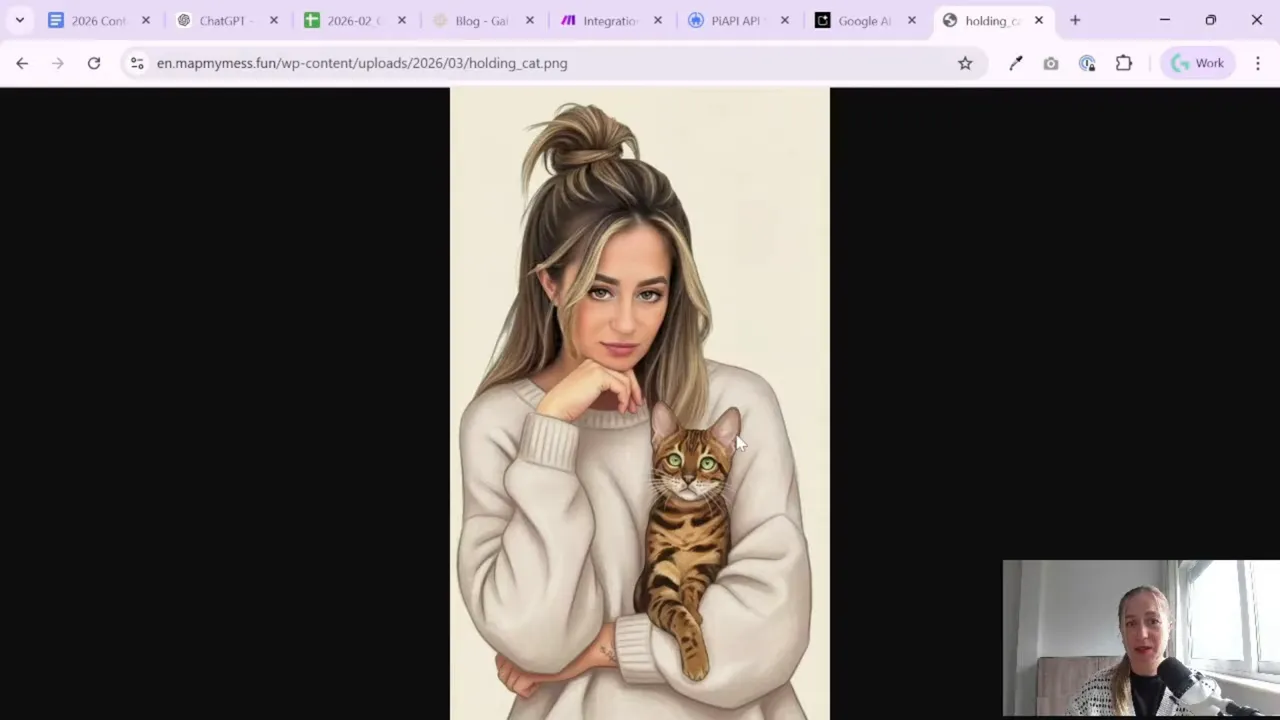
Step 6: Add a reference image to keep the same style and character
This is the key to visual consistency.
If you want your hero images to look like they belong to the same website, feed the model a reference image. That image can be one you already uploaded to WordPress or another place online where you can access the file URL.
The reference image tells the model:
- what the character should look like
- what illustration style to follow
- what overall mood or branding direction to keep
Without a reference image, you can still generate nice visuals, but character consistency will usually be weaker. If brand consistency matters, this step is not optional.
A useful shortcut is to upload your chosen reference image to your WordPress media library and copy its URL. That way the same image can be reused in the automation.
Step 7: Set the image parameters in Google AI Studio
Once your prompt is ready and your reference image is attached, you can test generation settings in Google AI Studio.
The workflow shown here uses settings like these:
- Model: Nano Banana or Nano Banana Pro
- Aspect ratio: horizontal, suitable for blog hero images
- Resolution: around 1K for testing and final output
- Thinking level / quality: lower cost for quick tests, higher quality for final images
There is a direct tradeoff here: better quality costs more. If you are experimenting, start with the cheaper option. If you are generating a final image for publication, the Pro version may produce a more accurate face and stronger consistency.
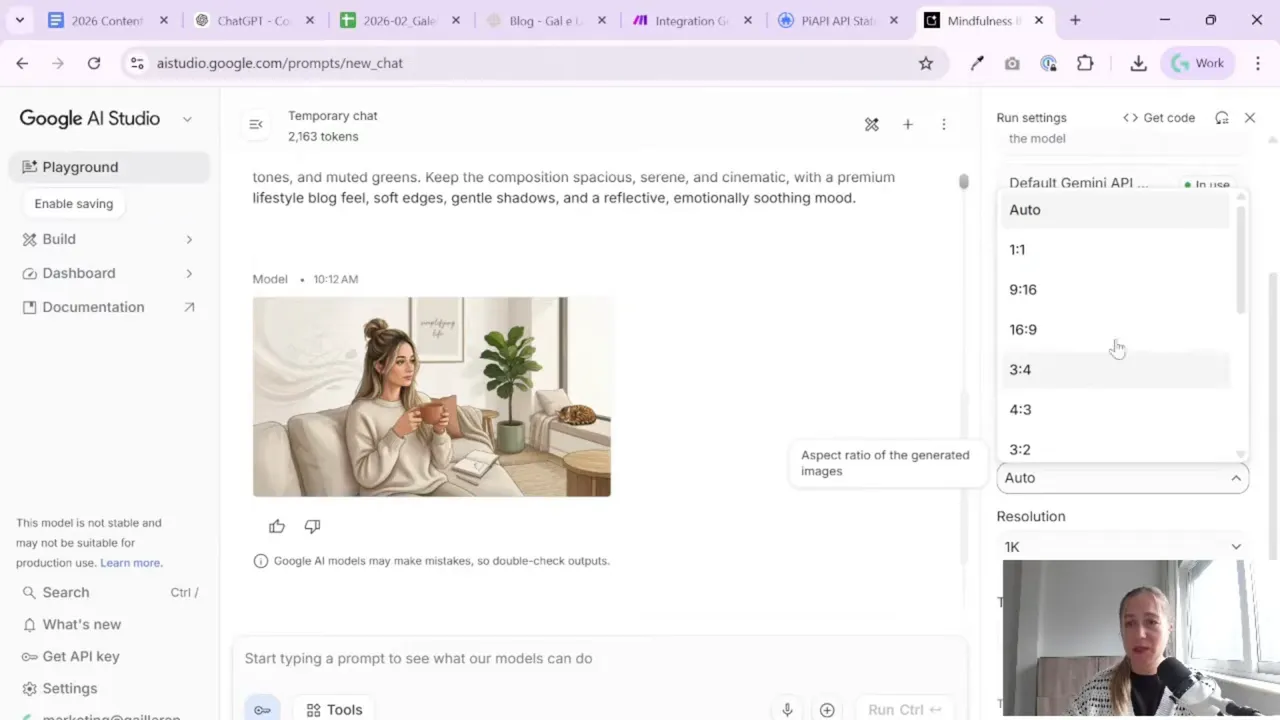
All image generation here is paid, so it is smart to test cheaply first and only switch to the higher-quality model once your prompt is stable.
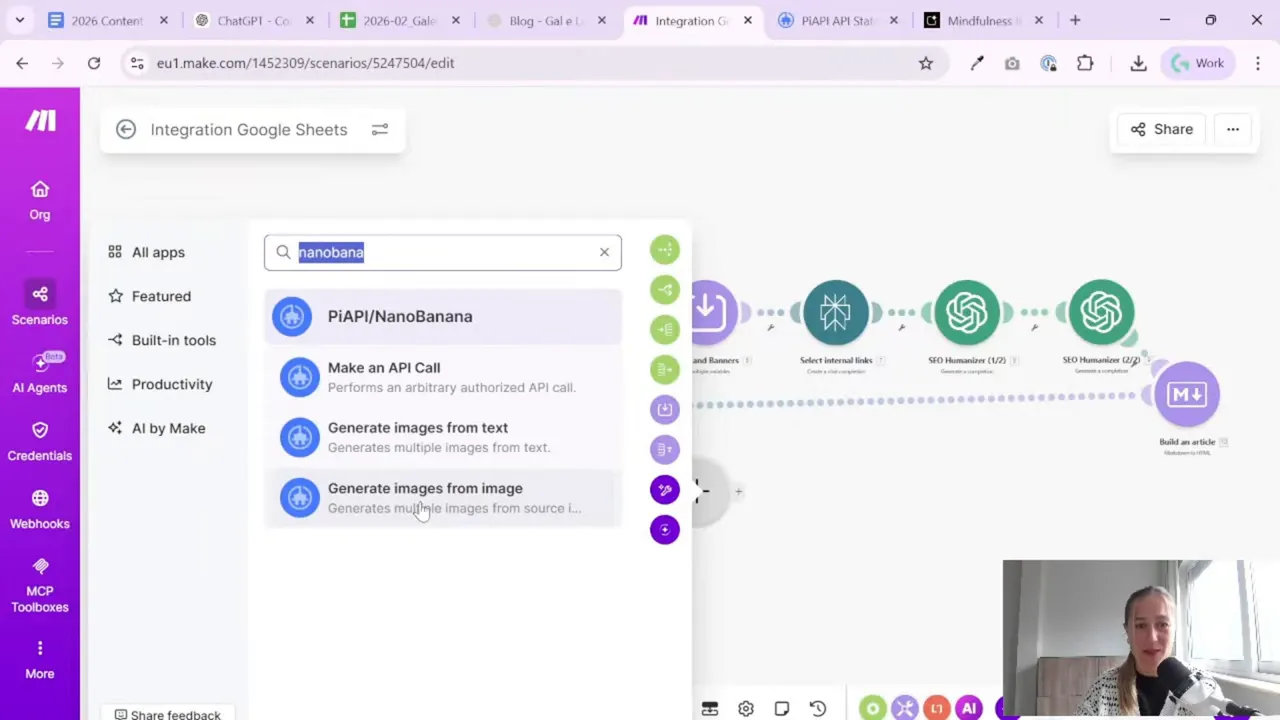
Step 8: Connect Make to the image model through piAPI
Here comes the slightly unusual part of the setup. In Make, there is no direct module for Nano Banana. So instead of connecting to the model directly, you use piAPI as a middle layer.
This sounds more complicated than it is.
Inside Make, choose the module that generates an image from an image. That is the right option because you are not creating a completely random image. You are generating a new image using a reference image.
Then create a piAPI account, add billing if needed, and generate an API key. Paste that key into Make when creating the connection.
At this stage, you will map the following fields:
- Prompt: the output from your ChatGPT image-prompt step
- Image URL: the URL of your reference image
- Model: Nano Banana or Nano Banana Pro
- Number of images: 1
- Aspect ratio: horizontal for your blog layout
- Output format: JPEG or PNG
The nice thing about piAPI is that it gives access to several image models in one place, not only the one used here. So even if you later switch models, the structure of the workflow may stay similar.
Step 9: Budget for testing so you do not overthink the cost
A small but helpful note: you do not need a big budget to start testing.
In the workflow shown here, image generation costs were roughly:
- about 3 cents per image for the standard model
- about 10 cents per image for the Pro model
That means topping up your account with $5 is usually enough for initial experiments. You can test prompts, compare models, and figure out what quality level makes sense for your blog before deciding whether to scale it further.
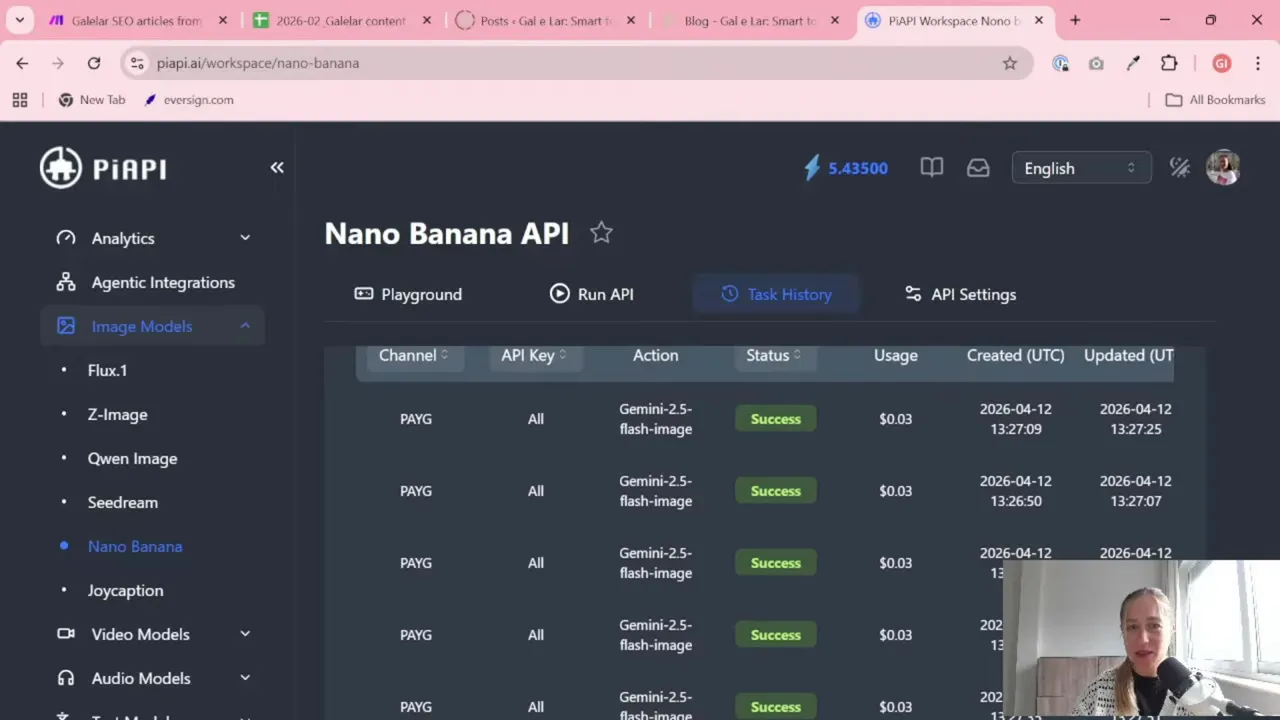
For most small blogs and business sites, this is a reasonable cost if it saves time and removes the manual design step from every article.
Step 10: Generate the image in Make and check the result
Once the module is connected, run the image generation step by itself with a sample prompt. Then wait for the task to process.
This part may take a little time, so do not worry if the task shows as pending at first. The important thing is that the automation is now doing the heavy lifting:
- it takes the article title
- turns it into a prompt
- uses a reference image
- generates the new hero image automatically
That is already a big win. Still, do not skip the quality check.
AI image generation is powerful, but it is not always polite. Sometimes it gives you extra fingers, duplicate pets, or anatomy that belongs in a surrealist museum rather than on a business blog.
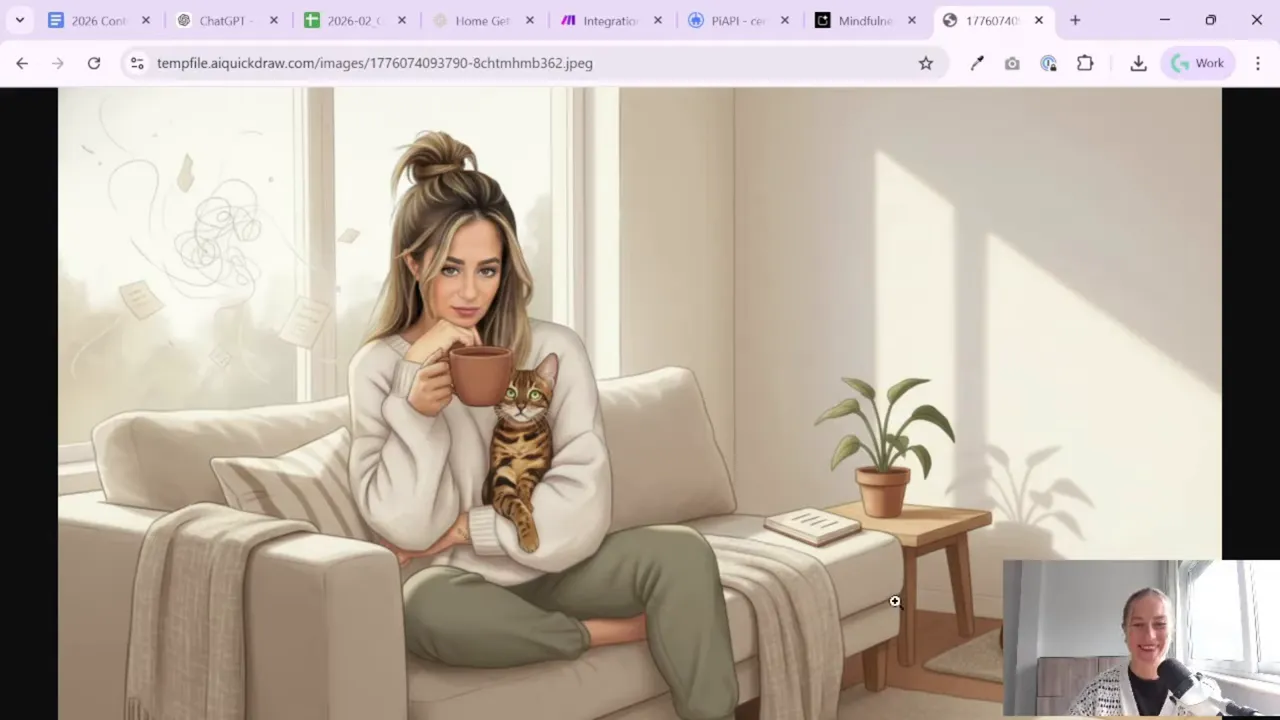
So yes, always review the generated image. Especially if you care about faces, hands, or character consistency.
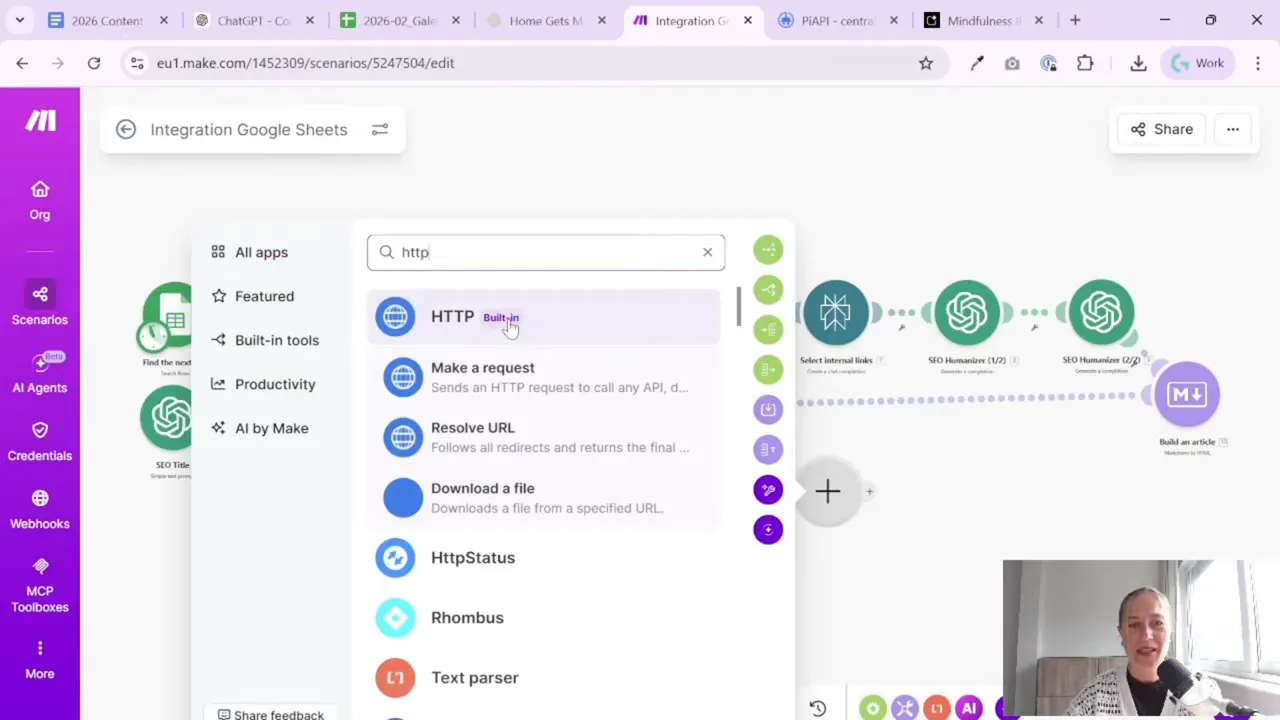
Step 11: Download the generated image file with an HTTP module
After generation, the image is usually stored at a temporary URL from the API service. That means one more step is needed before you can use it on your WordPress site: download the file.
In Make, add an HTTP module and choose the option to download a file. Then map the image URL returned by the generation step.
This converts the generated image from a remote temporary link into file data that can be passed to later modules, such as:
- a WordPress upload module
- a media library step
- another file-handling action in your workflow
Once this step is complete, the file is ready for the next stage of your publishing process.
Step 12: Run the full scenario from keyword to image
After the image part works on its own, run the whole scenario once from start to finish.
The full flow looks like this:
- Take a keyword from your list
- Build article research and thesis
- Select supporting links relevant to the topic
- Write the first part of the article
- Write the second part of the article
- Combine the text into one final article
- Create SEO fields such as title, description, and slug
- Generate an image prompt from the article title
- Create a hero image using the reference image and image model
- Download the image file for use on the website
This is where content automation starts to feel really useful. You are not just automating text. You are automating the visual layer too.
If you are building larger reporting or marketing systems around this kind of work and want help connecting tools together, the contact page here is a good place to start.
Step 13: Keep improving the workflow instead of chasing perfection on day one
A nice thing about this setup is that it does not need to be perfect to be useful.
You can begin with:
- one character
- one image style
- one image size
- one prompt template
Then improve from there.
For example, later you might add:
- automatic image review steps
- title overlays on the image
- different prompt variants by article category
- fallback models if one output looks bad
But for the first version, simple is better. Get the chain working. Confirm the image quality is acceptable. Then iterate.
Summary
If your blog workflow already creates articles automatically, adding hero image generation is the next logical upgrade. A practical setup is to use ChatGPT to create the image prompt, Google AI Studio to test the model and prompt quality, and piAPI plus Make to automate final image generation and file download.
The most important lessons are simple:
- use a reference image if you want character consistency
- test prompts manually before automating everything
- expect to iterate
- always review final images before publishing
Once it is set up, you can go from keyword to article to branded hero image with far less manual work. And honestly, that is the kind of automation that feels worth doing.
Want to go further with your automation workflows?
