
Add Internal Images WordPress: 2 Smart Automation Steps
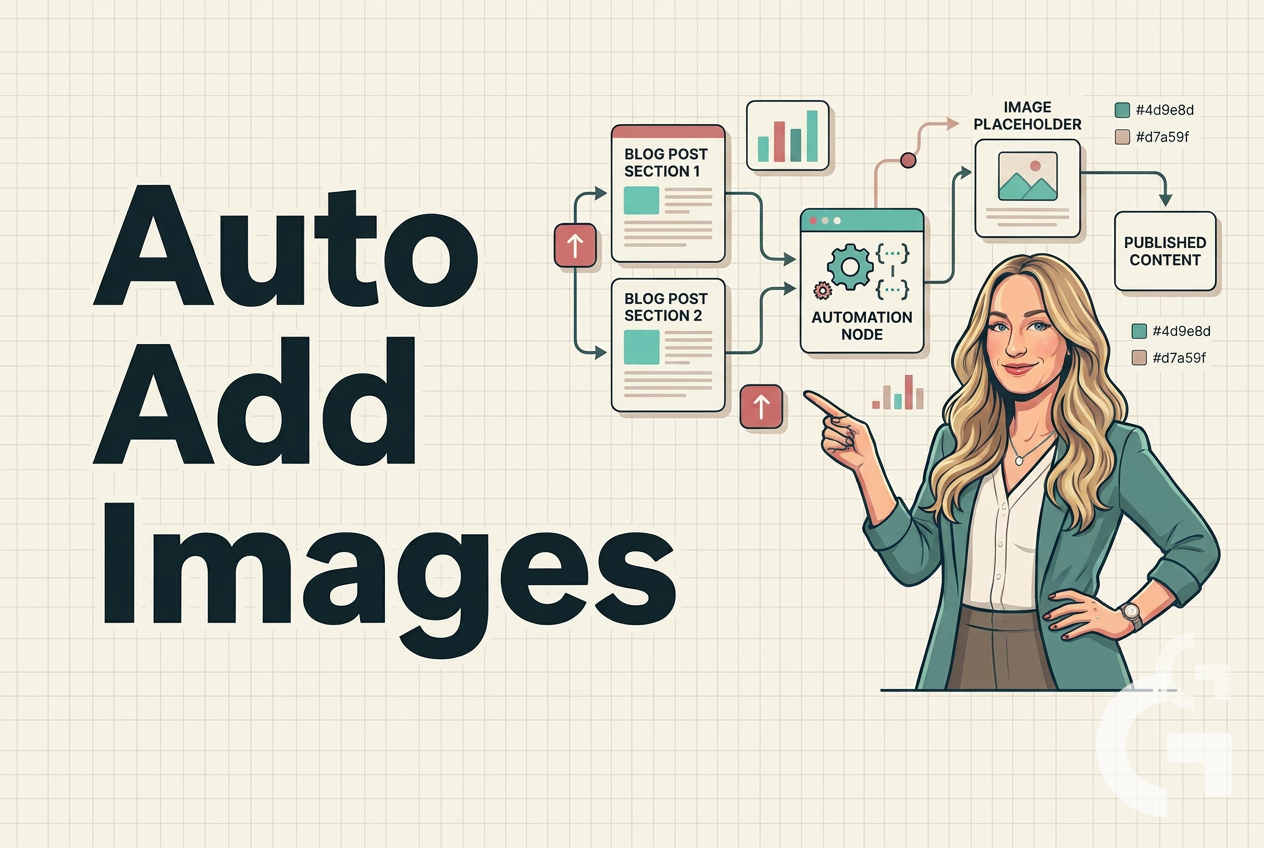
If you already automated blog post publishing in WordPress, the next obvious problem appears fast: text-only articles can feel a bit flat. A featured image helps, but it usually is not enough. Internal images make a post easier to read, more interesting, and more complete.
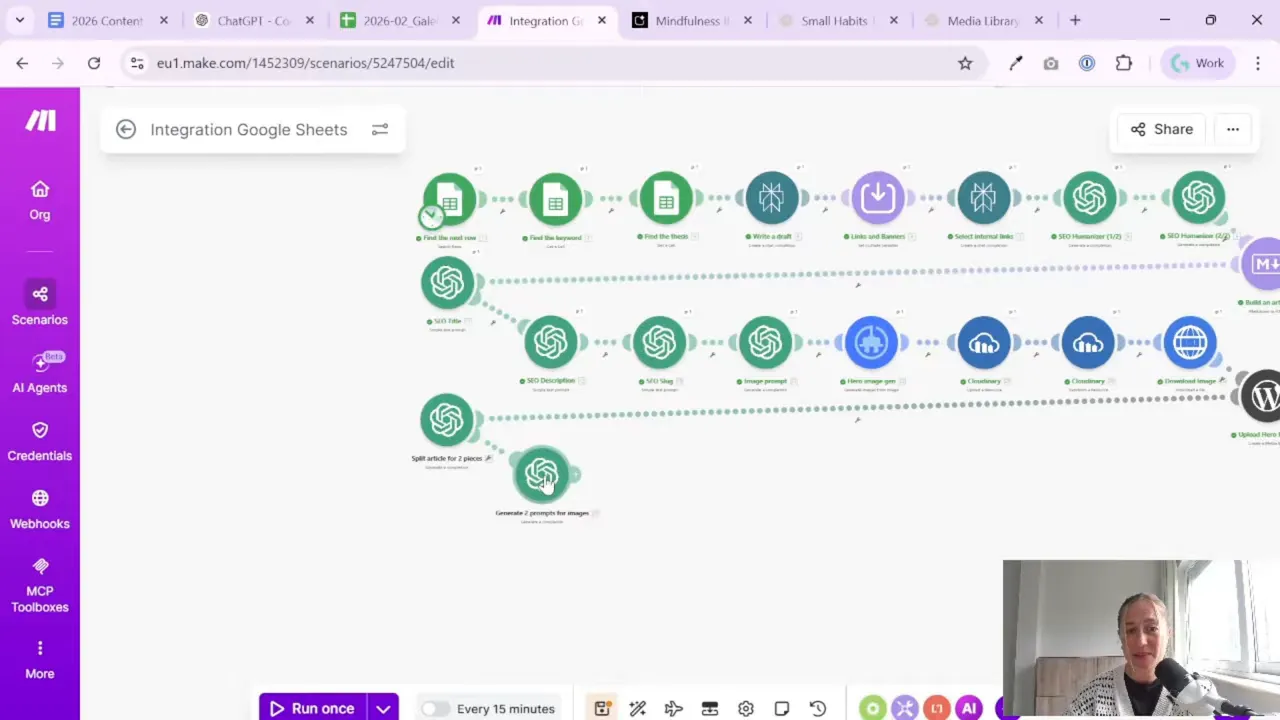
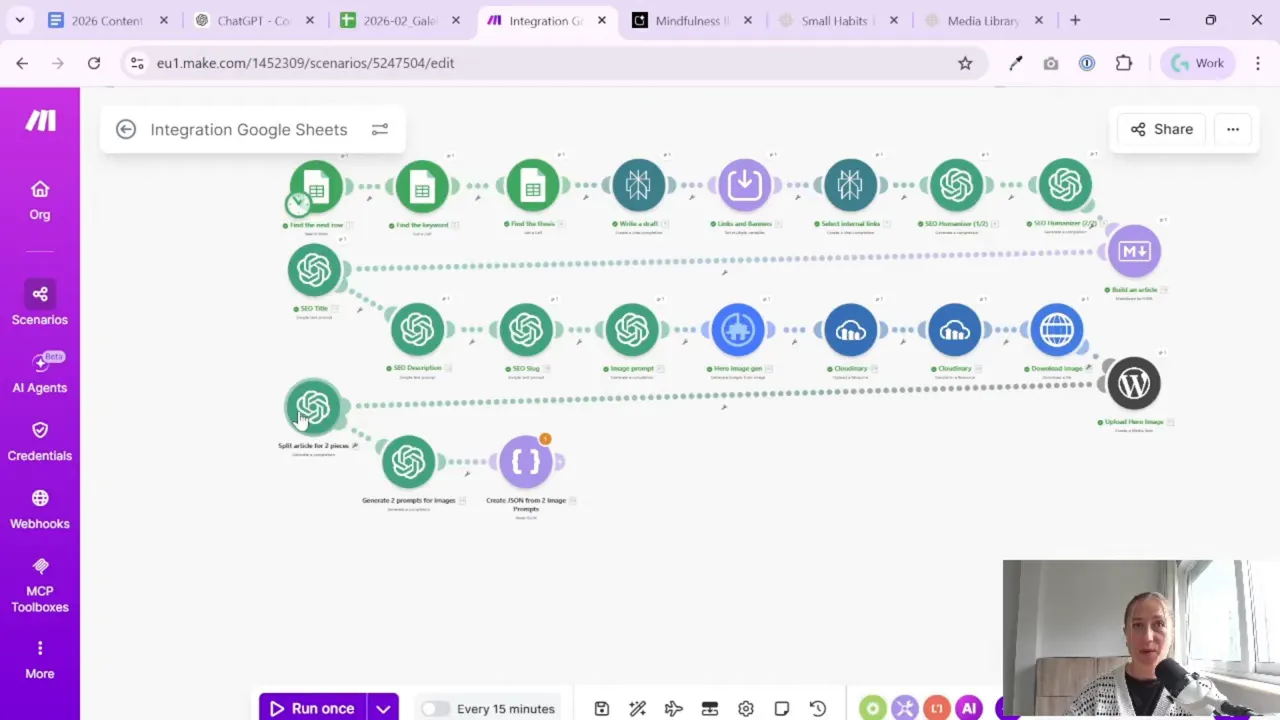
In this tutorial, I’ll walk through a simple way to prepare internal image prompts inside a Make.com scenario. The idea is straightforward: split the article into sections, ask ChatGPT to describe image opportunities, turn those descriptions into image prompts, and structure everything as JSON for the next automation step.
This setup is especially useful if you want your WordPress blog to publish automatically with less manual work. You do the setup once, and after that the system can keep doing the repetitive part for you.
Table of Contents
- Step 1: Understand the goal of this part of the automation
- Step 2: Split the article into two meaningful parts
- Step 3: Write the system prompt carefully
- Step 4: Keep the user prompt simple
- Step 5: Generate image prompts from the two article sections
- Step 6: Adapt the prompts for your niche
- Step 7: Return the prompt output as JSON
- Step 8: Parse the JSON inside Make.com
- Step 9: Prepare for iteration when you have more than one image
- Step 10: Think about cost before increasing the number of images
- Step 11: Build the full publishing pipeline one piece at a time
- Step 12: Use automation to remove the part you hate doing
- Practical tips before you build this in your own account
- Summary
Step 1: Understand the goal of this part of the automation
This stage is not about writing the article itself. It is about adding images inside the article body.
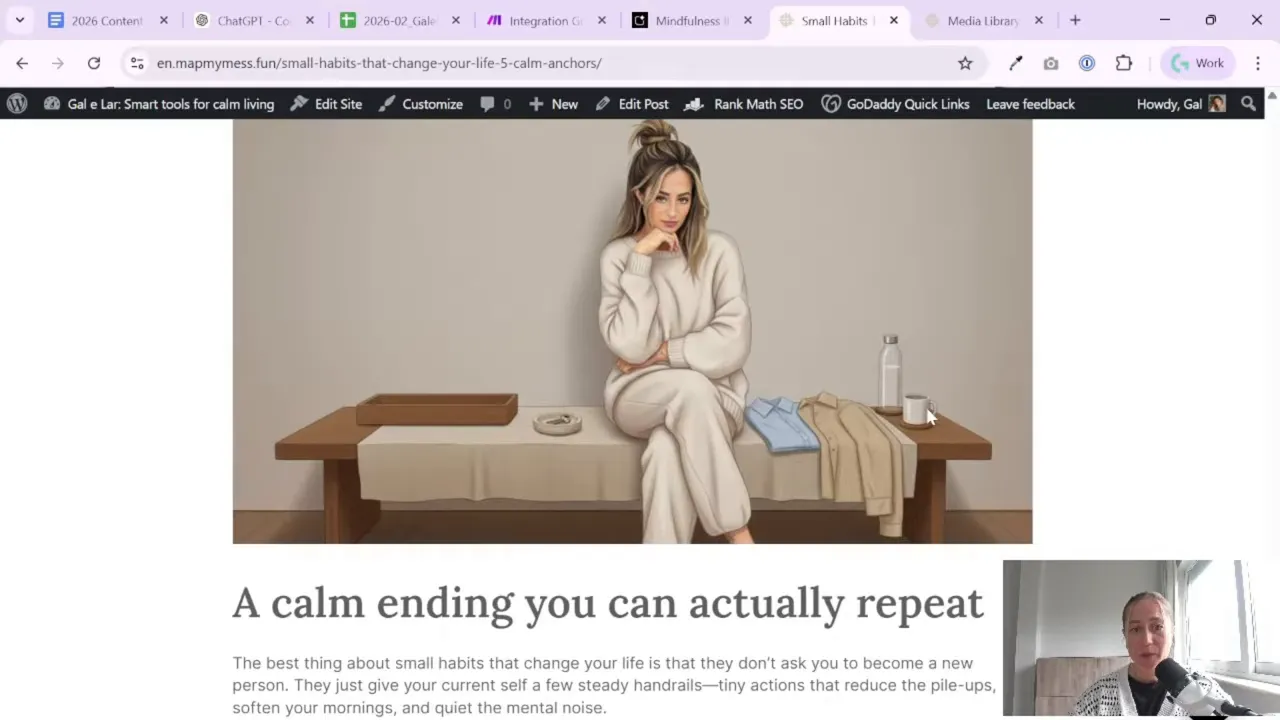
The workflow already includes the main image. Now the goal is to generate a couple of internal illustrations that match the article content. In this setup, the article is split into two parts, and one image prompt is created for each part.
Why two images? Because it is a practical middle ground.
- One image is often too little for a longer post.
- Too many images increase token usage and image generation costs.
- Two internal images are usually enough to make the article feel less boring without overcomplicating the pipeline.
If you want more images, you can absolutely expand the logic later. The same idea works for three, four, or more sections. Just keep in mind that every extra step costs something, whether that is tokens, image credits, or simply more scenario complexity.
Step 2: Split the article into two meaningful parts
The first task in Make.com is to send the full article to ChatGPT and ask it to split that article into two pieces.
This is an important detail. You are not asking the model to rewrite the article. You are asking it to analyze what already exists and break it into two logical sections that can later be illustrated.
That distinction matters because the output needs to stay stable. If the model starts rewriting the content, the rest of the automation becomes messy fast.
What the prompt should do
The prompt for this step should ask the model to:
- analyze the full article,
- keep the original article unchanged,
- split it into two parts,
- create a short title for each part,
- create a short description for each part,
- return the result in a very strict structure.
The strict structure is key. Later in the scenario, that output is parsed as JSON. So this is not the place for creativity in formatting. You want consistency, not poetry.
The article itself is pulled from the markdown version of the post and inserted into the user prompt. That way, the model works with the exact content that will be published.
Why this step matters
Most image generation tools do better when the prompt is focused. A full article can be too broad. But when you divide the post into two specific scenes or themes, the prompts become much easier to control.
This also makes the final images feel more connected to the structure of the article. Instead of getting one generic visual, you get illustrations tied to actual sections of the content.
Step 3: Write the system prompt carefully
In this setup, the system prompt does most of the heavy lifting.
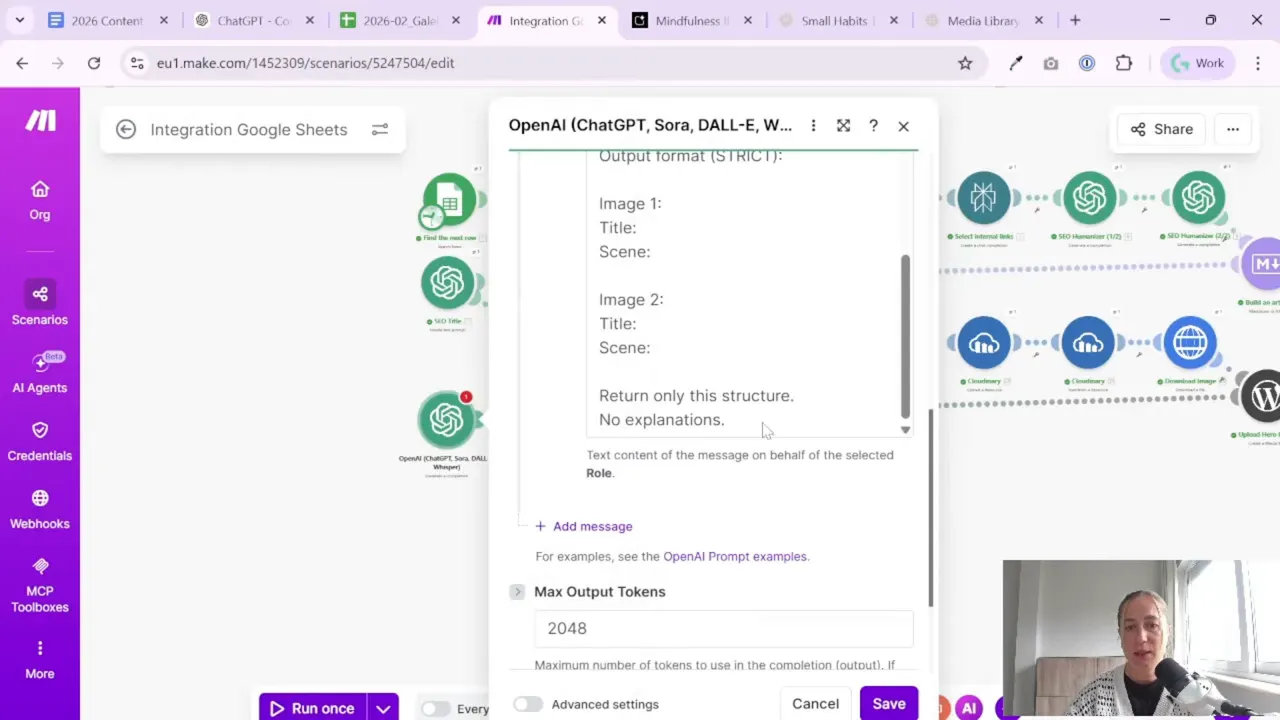
The role assigned to the model is essentially “editor.” That makes sense because the job is editorial, not creative writing. The model should review the article, divide it into two pieces, and provide structured output.
A good system prompt here should make three things very clear:
- The model is analyzing an article that already exists.
- It must not change the article content.
- The output must follow an exact format suitable for later parsing.
This is one of those boring-but-important steps that saves a lot of frustration later. If the output is loose, your scenario becomes fragile. If the output is strict, the rest of the automation is much easier to maintain.
Even if you are not a technical user, this principle is worth remembering: AI is much easier to automate when you tell it exactly what shape the answer should have.
Step 4: Keep the user prompt simple
The user prompt for this step does not need to be complicated. It mainly gives the model the article content and tells it what to do with that content.
In plain words, the request is something like this:
- Here is the article.
- Analyze it.
- Suggest two illustration opportunities.
- Return them in the exact required structure.
You also do not need to go wild with token limits here. This step is focused. The goal is not to generate long content, just a structured split of the article and descriptions for the scenes.
If you have a content pipeline already running in Make.com, this module fits naturally after article creation and before image generation.
A Tool I Personally Use for This Automation
For automation, one of my favorite tools is Make.com. I use it to connect different tools and automate repetitive workflows — for example moving data between APIs, Google Sheets, and reporting systems.
If you are still building your broader content system, the Gaille Reports blog has more tutorials around analytics, automation, and no-code workflows that can help you connect the bigger picture.
Step 5: Generate image prompts from the two article sections
Once the article has been split into two pieces, the next step is to convert those pieces into proper image prompts.
This is a separate ChatGPT module in the scenario. The first model gives you two scenes. The second model transforms those scenes into prompts ready for the image generator.
This separation is smart for two reasons:
- It keeps each module focused on one task.
- It makes troubleshooting much easier.
If the images are poor, you can adjust the prompt-writing step without touching the article-splitting step. That kind of modular setup saves a lot of time once the workflow grows.
How the second prompt is framed
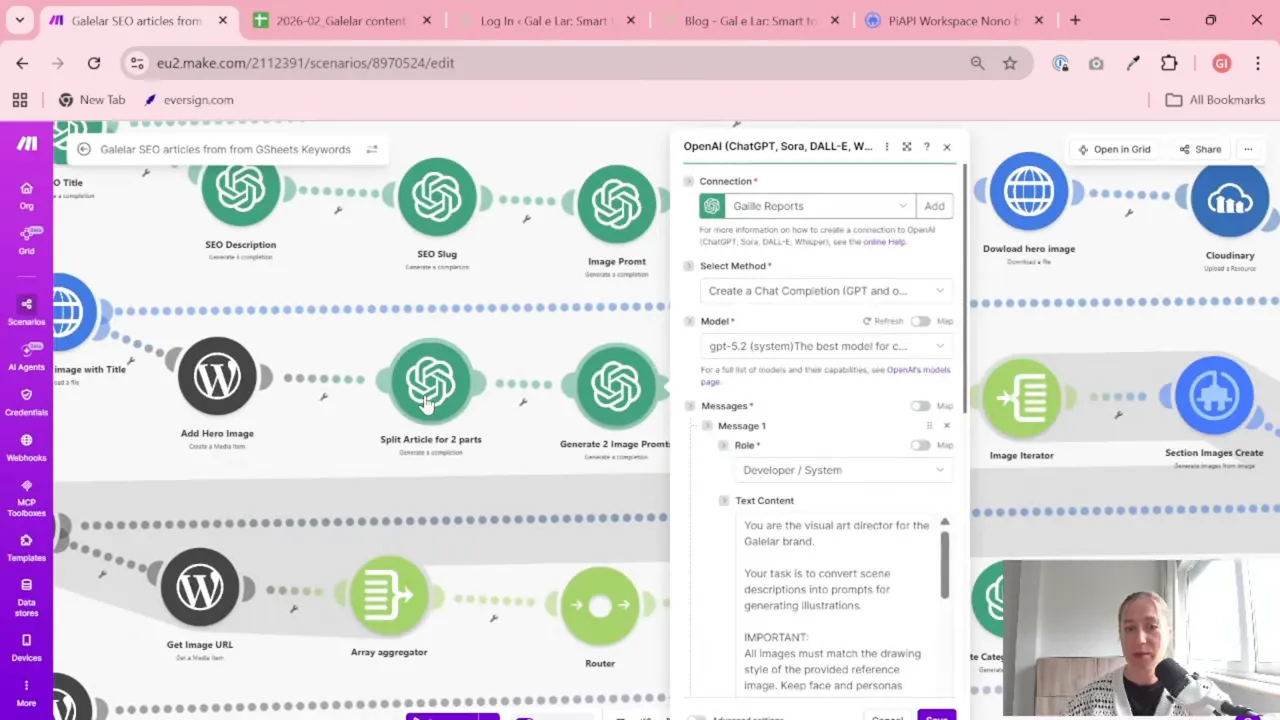
Here, the model is positioned more like a visual director. It receives the two scenes and turns them into prompts for the image generation tool.
There are also some rules included in the prompt. In this example:
- the first image should be without a character,
- the second image should include a character,
- the output should again be returned in JSON format.
This is a good example of practical prompt writing. You are not just asking for “two nice images.” You are giving the model creative boundaries. That usually leads to more useful and more consistent results.
The prompts are intended for an image generator referred to as “nano banana” in the workflow. The exact wording matters, so it makes sense to test and adapt the prompt template for your own niche.
And yes, that part is worth repeating: your prompt should match your blog topic. A base prompt can save time, but it should not be copied blindly. A marketing blog, a food blog, and a travel blog will all need different visual language.
Step 6: Adapt the prompts for your niche
This is where many people expect a plug-and-play solution. In practice, it rarely works that way.
You can absolutely start with a base prompt template. That gives you a shortcut. But you still need to update it for your own project.
For example, think about:
- What kind of mood fits your brand?
- Do you want realistic images or more conceptual illustrations?
- Should the visuals include people, or avoid them?
- Do you need a clean editorial style, something playful, or something technical?
These choices affect the quality of the final result more than people think.
If your blog already has a visual identity, use that as the reference point when refining prompts. Otherwise, your article images may look random from one post to the next, which is not ideal if you want the site to feel consistent.
This same idea shows up in reporting and dashboard work too: templates help, but they always need adjustment. If that is something you work on regularly, the Looker Studio template library is another useful example of starting from a structure and then tailoring it to your use case.
Step 7: Return the prompt output as JSON
Once the image prompts are generated, the output needs to be structured as JSON.
This is not just for neatness. It is what makes the next part of the Make.com scenario possible.
Why JSON?
- It gives you clean fields for each image prompt.
- It makes parsing easy inside Make.com.
- It prepares the data for repeating modules, iterators, or image generation steps.
Without structured output, automation gets fragile very quickly. One unexpected sentence or formatting change can break everything downstream.
So in both AI modules, the response format matters just as much as the content itself.
Step 8: Parse the JSON inside Make.com
After the model returns the image prompts in JSON format, the next Make.com step is to parse that JSON.
This is the bridge between “AI wrote something” and “the scenario can now use it as data.”
In practical terms, the parsed JSON becomes the input for the image generation stage. Each prompt can be treated as a separate item, which is exactly what you need if the scenario will generate two different internal images.
Why parsing matters
This is one of those hidden technical details that makes no-code automation work smoothly.
Once JSON is parsed, Make.com can:
- identify each prompt separately,
- pass each one into the next module,
- repeat the same image-generation logic for multiple images.
That is the real reason the earlier prompts had to be strict. You are not generating text for a human to read first. You are generating data that another step in the scenario needs to understand.
Step 9: Prepare for iteration when you have more than one image
This is where the workflow becomes especially useful.
Because there are two image prompts, you need the same part of the scenario to run twice, once for each image. That is why an iterator-like approach is needed.
If this is your first time building something like this in Make.com, it may feel less obvious than it sounds. The challenge is not writing one prompt. The challenge is designing the flow so one prompt becomes many, and the same modules can handle each item cleanly.
The parsed JSON solves that problem. It gives the scenario a structure it can loop through.
In the next stage of the automation, those prompts can be fed one by one into an image generator, and then the resulting images can later be uploaded into WordPress.
This article focuses on the prompt-preparation stage, but the pipeline is already pointing toward the full end goal: article created, images created, everything uploaded, post published.
Step 10: Think about cost before increasing the number of images
It is tempting to say, “If two images are good, six must be better.” Usually, not really.
Every additional image means:
- more tokens for analysis and prompt creation,
- more image generation cost,
- more scenario steps,
- more room for things to break.
That does not mean you should avoid more images. It just means the number should be intentional.
For many blog posts, two internal illustrations are enough to improve readability and visual flow. You can always expand later if your content format truly benefits from it.
A good rule is to start simple, get the automation stable, and only then add more complexity.
Step 11: Build the full publishing pipeline one piece at a time
One nice thing about this workflow is that it is realistic. It does not pretend you build everything in one perfect version on day one.
Instead, the pipeline grows step by step:
- Create the article.
- Create the main image.
- Split the article into sections.
- Generate internal image prompts.
- Parse the JSON.
- Use that data in the image generation step.
- Upload the images to WordPress.
- Publish the full post automatically.
That approach is much easier to manage than trying to automate everything in one giant scenario from the start.
If you are a marketer or business owner without a technical background, this is the part that should feel encouraging: you do not need to master every detail at once. You just need to build the pipeline in logical chunks.
Step 12: Use automation to remove the part you hate doing
There is a very practical mindset behind this setup, and honestly, it is one of my favorite parts.
The point is not to automate everything just because automation is trendy. The point is to automate the repetitive part you do not want to keep doing manually.
For this workflow, that means publishing and formatting content inside WordPress can be handled by the scenario. The content itself can still be your own. Automation simply removes the annoying part.
That is a healthy way to approach AI and no-code tools:
- keep control over what matters,
- delegate the repetitive steps,
- save your energy for the work that actually needs you.
If you need help building a workflow like this for your own business, there is also an option to get in touch here.
Practical tips before you build this in your own account
Before wrapping up, here are the key takeaways that make this setup work better in real life:
- Keep prompts structured. If the output will be parsed later, strict formatting is not optional.
- Split content before generating image prompts. Focused sections lead to better visuals.
- Use separate modules for separate jobs. One for article analysis, one for image prompt creation.
- Adapt prompts to your niche. A generic prompt is only a starting point.
- Start with two images. It is enough for many posts and keeps costs under control.
- Think in reusable blocks. Today it is two images; later it can be more.
If you want extra reading on structured AI workflows and machine-readable outputs, the OpenAI text generation documentation is a helpful reference. And if you are new to scenario design, Make’s help center is worth bookmarking.
Summary
If you want your WordPress blog automation to feel more complete, internal images are a great next step. The cleanest setup is to split the article into two sections, generate one image prompt for each section, return the prompts as JSON, and prepare them for iteration in Make.com.
It is a simple idea, but it solves a real content problem. Articles become more visual. Publishing becomes less manual. And the whole system gets closer to fully automated posting.
Set it up once, test your prompts carefully, and improve from there. That is usually the easiest path: not fancy, just effective.
Want to go further with automation and data workflows?

Tool I use for automation
For automation, one of my favorite tools is Make.com.
I use it to connect different tools and automate repetitive workflows — for example moving data between APIs, Google Sheets, and reporting systems.
Tool for turning videos into articles
If you create video content and want to turn it into written articles faster, you might find VideoToBlog interesting.
It can take a video and generate a blog draft that you can edit and publish on your site.
