
Schedule email delivery feature in Looker Studio
Not to forget to send the report to your client among a bunch of other tasks to do, you can use the Schedule email delivery feature in Looker Studio.
Keep reading the article to know some tricks about it or watch my YouTube video:
Settings
Clicking the tiny triangle next to the “Share” button will open a menu of options among which you can find “Schedule delivery”.
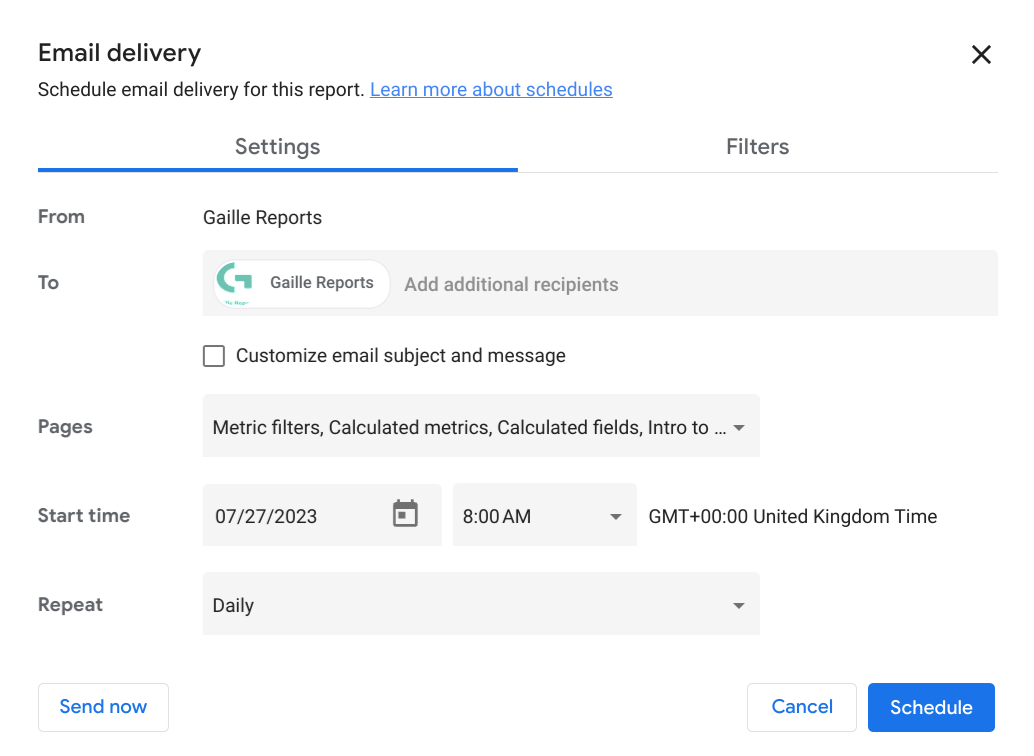
This is the kind of menu that will appear on your screen.
From is the sender of the report. To is the receiver – you can add more than one email. If you put the tick to the box “Customize email subject and message”, you will have two additional fields: Subject and Message.
Then you have a list of pages of the report. You, as an owner of the report, can choose what pages you want the receiver to see. Followingly, you can set up a date and a time as well as the frequency of delivery. It may be daily, weekly, monthly, Every working day (Mon-Fri) or with a custom frequency. The day of the week of the first delivery will be a marker for frequency settings. For example, if the date chosen is Tuesday, consequently the options of scheduling you’ll see are Weekly on Tuesday and Monthly on Tuesday.
If you choose a custom frequency, you can, for example, send the reports every couple of months on the first day. Check out the options.
Filters
While scheduling a delivery you can choose the filters to apply to your report or set up the parameters.

After finishing everything, you will have a window with a brief information about the delivery to check.
If you are curious about Looker Studio and you want to get a profound knowledge about this data visualization tool, I invite you to my Looker Studio course! Read more about it.
Hope you liked this article! Share your impressions in the comments section!
Check out more of my articles in my Medium.